NOTE: Welcome to the Knowledge Sharing Blog! If you encounter any errors during use, such as error in download link, slow loading blog, or unable to access a certain page on the blog … please notify me. via Contact page. Thanks!
Are you planning to upgrade your computer system by using an SSD hard drive to speed up Windows operating system?
Are you worried about how to keep the copyright for the Windows operating system and the software available on your computer? Are you afraid to reinstall Windows and other existing software on your computer?
Well, there are many reasons that we need to consider when deciding to replace a new hard drive for the computer or add an SSD for the computer to be the main operating system.
Therefore, I think this article will be a great article for you, after reading this article, make sure you can migrate the current operating system to the new hard drive extremely. The simplest, most effective and most time-saving.
These are all the ways of Mr. Lang Guest at the BKAV Forum to guide, I find it quite helpful, so I share it with you. Since I have not had the conditions to do so, I will update the article in more detail when I do it for you myself ?
I. What needs to be prepared?
Macrium Reflect software. You download it with the link below. The software runs well in the Mini Windows environment and directly in the Windows environment.
#first. Instructions to switch operating system from HDD to SSD with Macrium Reflect software
Note: You can download the software from the download link above and manipulate directly on the Windows operating system that you are using.
Or is you create this boot usb => then go to Mini Windows to do it, it will be more convenient, because it has more full support tools.
If you create a bootable usb from the above link, Macrium Reflect software already exists, you don’t need to download it anymore. The day I switched the operating system from HDD to SSD, I also worked in the Mini Win environment.
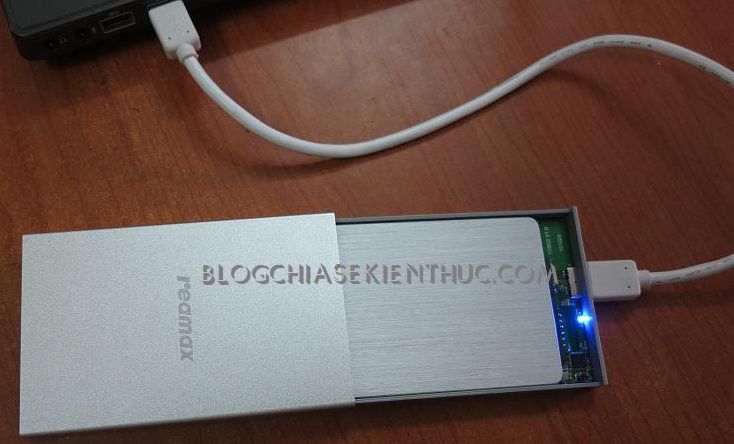
+ Step 1: You should borrow a Box and then attach it to the SSD hard drive to facilitate the migration process.
Or when you buy an SSD, you should bring it out to tell them to attach it to the computer for more convenience in use. They will remove the hard drive attached to the location of the CD drive, and the new SSD will attach to the location of the old HDD.
+ Step 2: You open the software Macrium Reflect out for us to start using. This software is portable, so you can use it without having to install it.
Note: The steps performed directly in the Windows environment or in the Mini Windows environment are completely the same.
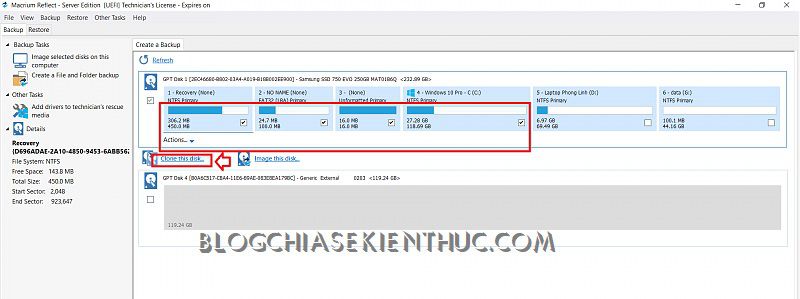
This is the main interface of the software. First switch to the Backup tab first, here we will do Clone partitions <500 MB and the partition containing the operating system by ticking the necessary partitions => then clicking Clone this disk... as shown below.
Remember to uncheck the data-containing partitions, to reduce time
Clone.
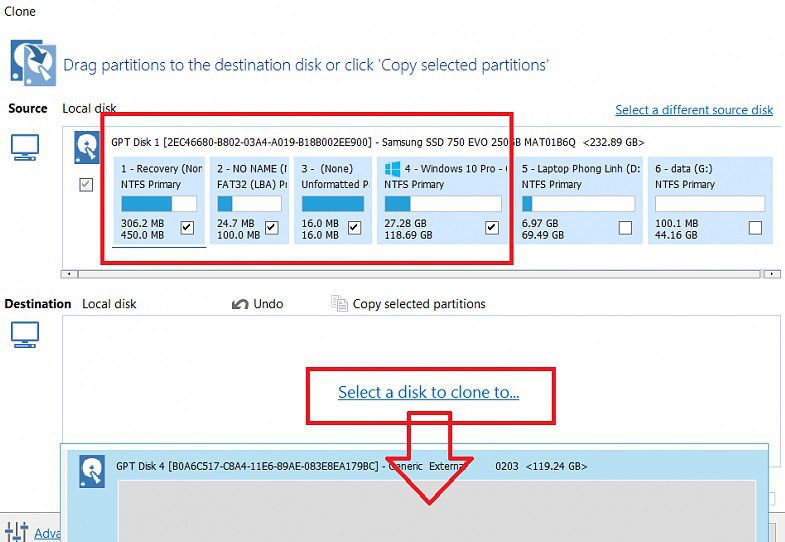
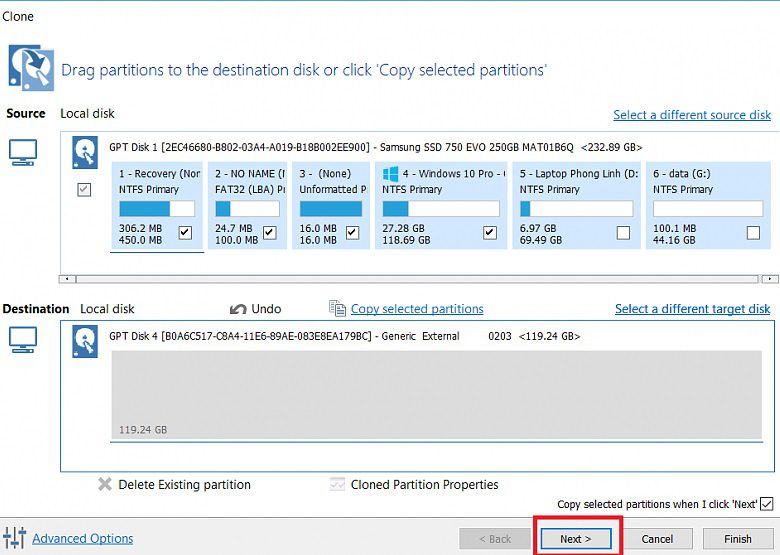
+ Step 3: A new window appears, click Select a disk to clone to... => then choose the SSD drive we need to save the data.
+ Step 4: Next press Next to continue.
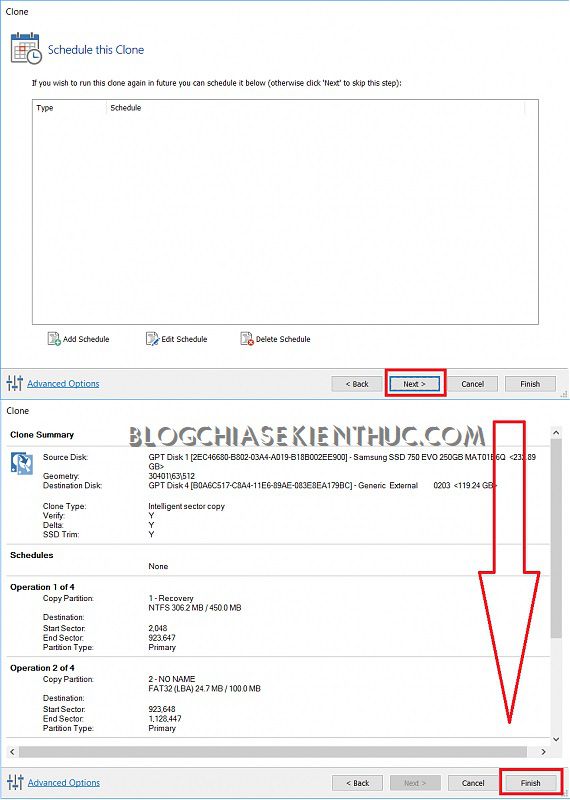
+ Step 5: Next, you just press Next => then press Finish.
+ Step 6: This step, you just need to sit and wait for the process Clone completed. This process is fast or slow, it depends on the amount of data you will move and bandwidth, the speed of the SSD hard drive, the read and write speed of the HDD …
Note: Note that during the Clone process, you should do nothing, wait for the process Clone in the end, you should manipulate using the computer.

+ Step 7: Okay, now we will do the last step that is Set the boot partition as the preferred partition EFI located on the SSD hard drive.
Because although we have already switched the operating system from HDD to SSD, by default the boot partition is still on the old HDD.
Perform:
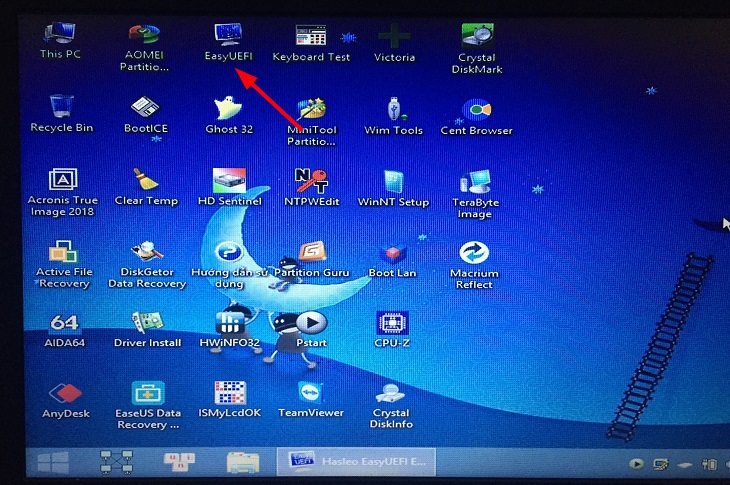
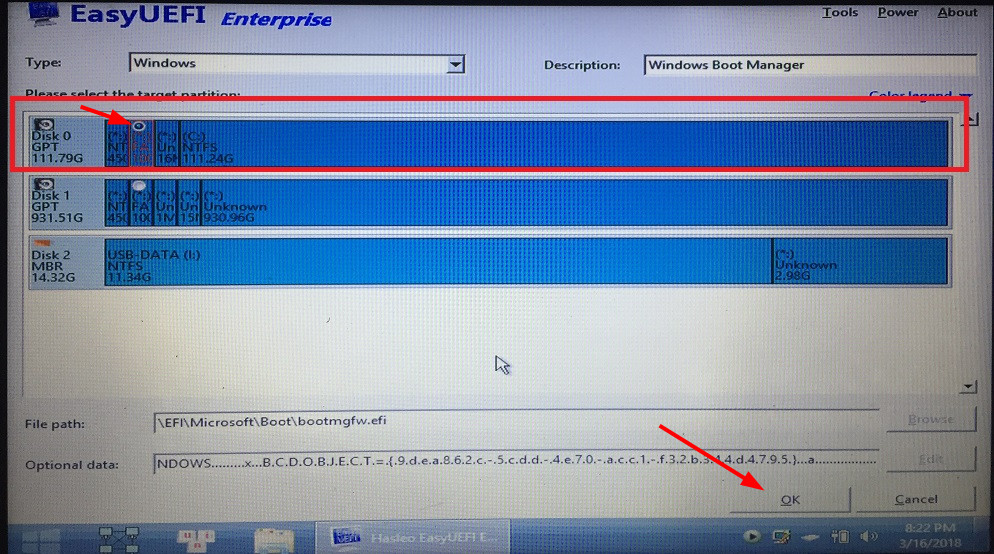
You open the software EasyUEFI in Mini Windows out.
Click on the boot boot line, like Windows its title is Windows Boot Manager => Next you click Edit to edit the path.
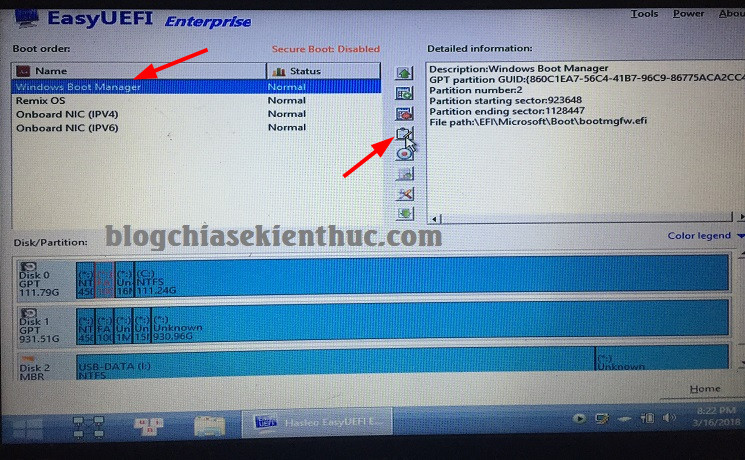
Finally you tick the formatted partition FAT32 (100 MB) => press OK to complete.
+ Step 8: Now restart your computer to enjoy the amazing speed that the SSD drive brings.
P / s: I am really satisfied with this upgrade. I replaced the 4 GB ram with an 8GB RAM stick and added a 128 GB SSD hard drive. The results used better than expected ?
+ Step 9: After switching the parallel operating system, once you feel it is stable, you can delete the old operating system partition on the HDD to act as a data drive. You can use the Parrtion Winzard software to do this simply.
#2. Watch a video on how to switch OS from HDD to SSD with Macrium Reflect
II. Video transfers the operating system from HDD to SSD with Terabyte software
III. Epilogue
Above are the 2 simplest and most effective ways to do the job successfully switch Windows operating system from HDD to SSD without having to reinstall win or ghost on the computer.
And of course, all the software you install on your computer remains the same without losing anywhere ?
If you are thinking of adding an SSD to upgrade your system, I think this is a great article for you ^ _ ^ Hope this article will be useful to you, wish you success!
Author: Lang Visitors – Laptopphonglinh.com
Note: Was this article helpful to you? Don’t forget to rate, like and share with your friends and relatives!
Source: 2 ways to convert Windows operating system to a new hard drive (HDD to SSD)
– TechtipsnReview


