There are some cases where you want to restore your data to the iPhone, the reason may be because the old iPhone has started to delay, needing to be reset to refresh. Or simply when someone fiddles with the device and enters the wrong password too many times, resulting in the device being completely locked and needing to restore the iPhone. It’s also possible that you decide to “play big” and switch to a newer, better iPhone device and want to transfer your data. So how to preserve the data in the device when restoring iPhone or changing to a new device?
If you are worried about this problem, please refer to the tips for backing up and restoring data on iPhone from the backup in iCloud of Quantrimang.com.
Backup iPhone data with iCloud
To limit data loss when we reset, restore or change to a new iPhone device, users should perform backup operations more often with two iTunes or iCloud tools. In this article, Quantrimang.com will focus on how to backup through iCloud.
iCloud backups include most of the data and settings stored on your device, specifically:
- Installed Apps
- Data with Apple Watch
- Text Messages, iMessage, MMS
- Photos, videos on the device
- Purchase history of Apple services (music, movies, TV shows, paid apps…)
- Ring
Backing up these data on iCloud is completely free, but the capacity is limited to 5GB. Therefore, you should store heavy data such as photos, videos, documents on other cloud tools such as iCloud Drive, Dropbox or OneDrive to avoid full iCloud storage.
How to backup data on iCloud
To back up iCloud, you don’t need to plug your device into your computer, just have a full WiFi connection for the process to go smoothly. iCloud automatically backs up your device data every day.
How to enable backup on iPhone as follows:
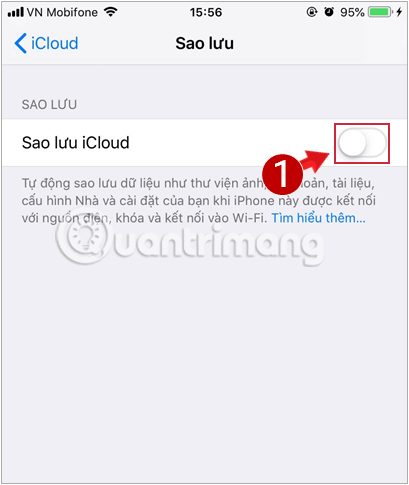
Step 1: At the interface on the device, we click on Setting (Settings), tap the Apple ID account name at the top and select icloud.


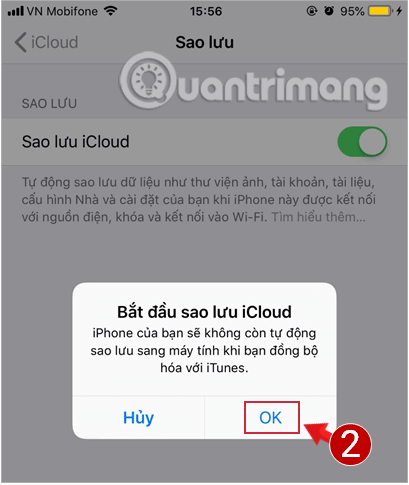
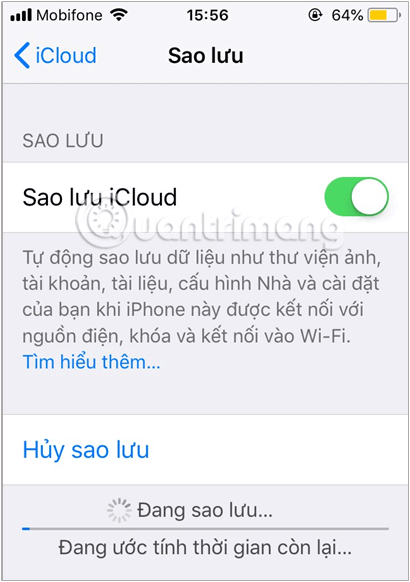
Step 2: Next, in the list of iCloud, scroll down and select the item iCloud Backup. In the next interface, we will proceed turn on iCloud Backup mode, press OK In the dialog box that appears..
Your device will now be in automatic backup mode, which is performed daily.
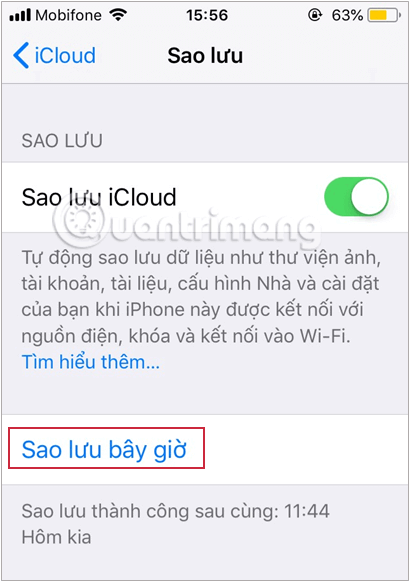
Alternatively, you can also manually back up by clicking on Backup now right below so that the device is always backed up to the present time. The backup process will take place immediately
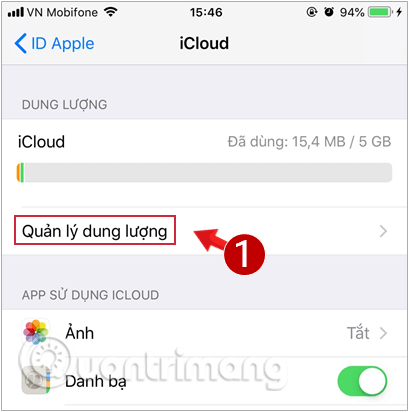
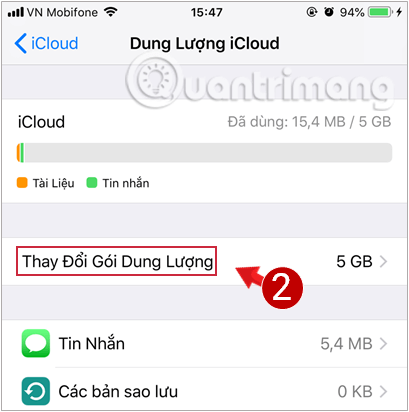
NoteiCloud needs to have a lot of free space to be able to perform the backup.
To check the current capacity of iCloud, go to Capacity management for monitoring, purchase additional memory for storage if needed.
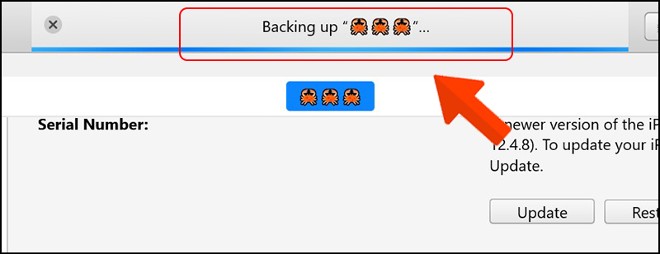
Back up iPhone with Mac
Step 1: Use a USB to Lightning cable to connect your iPhone to your Mac computer.
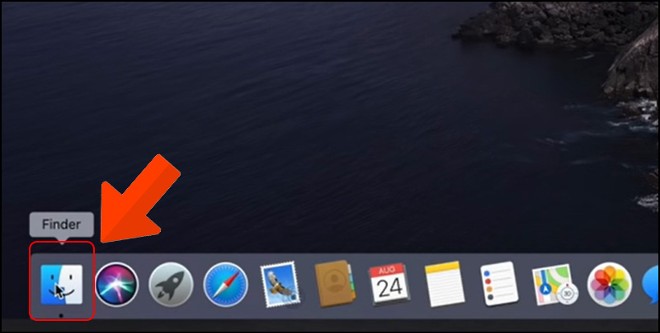
Step 2: Click Finder on a Mac computer.
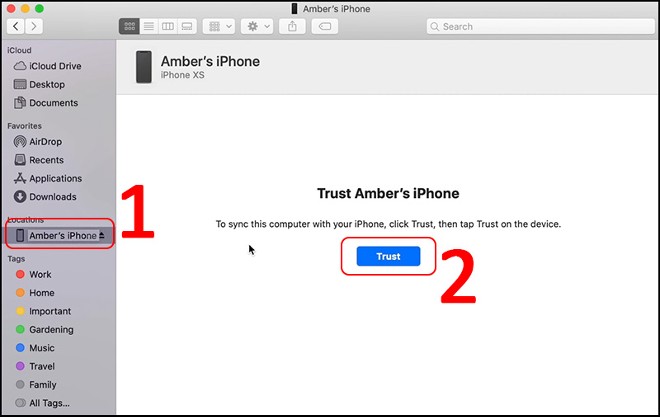
Step 3: Select the connected iPhone then tap Trust to confirm device trust.
Step 4: Select the appropriate backup mode and then press Back Up Now and wait until the backup is complete. Options that you must consider include:
- Back up your most important data on your iPhone to iCloud: Back up only important data.
- Back up all of the data on your iPhone to this Mac: Back up all your data.
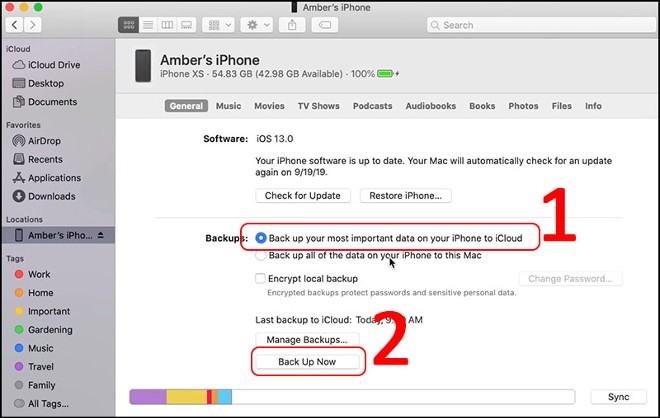
There is also a secondary option of adding encryption to the backup. You can set a password for the backup to ensure that your sensitive data is safe.
Backup iPhone with iTunes on Windows PC
Step 1: Download and install iTunes on a Windows computer.
Step 2: Connect iPhone to computer via USB cable.
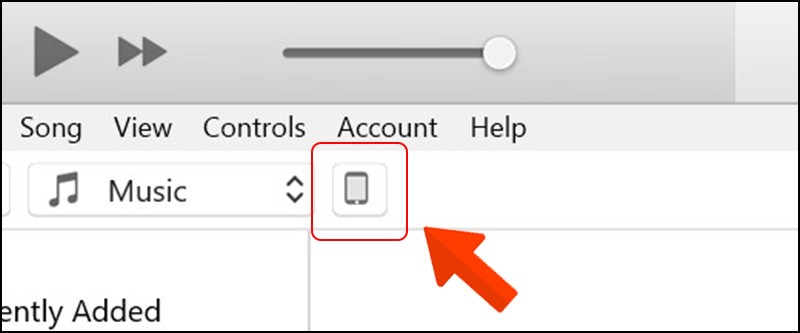
Step 3: Open iTunes and click the iPhone icon.
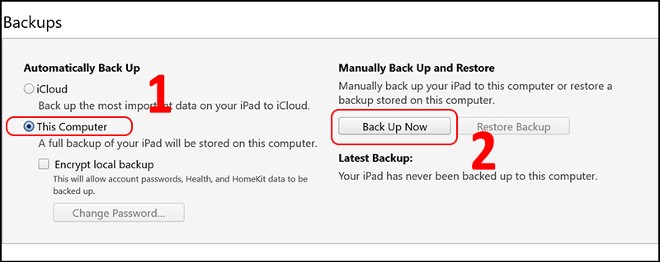
Step 4: Choose This Computer then choose Back Up Now.
Step 5: You wait for the computer to complete the data backup process.
Instructions to restore data using iCloud after restoring and resetting iPhone
If your iPhone is running slow or has a lot of annoying problems when using it, you should reset the device, erase all content on it and reinstall it.
Once deleted, start the data recovery process using iCloud. Remember to make sure you have a full backup with the steps above before erasing your iPhone. Then do the following:
- After erasing all content and settings, the device will restart and when you see the “Hello” screen, press the Home button.
-
Select language.
-
Select a country or region.
-
Select the WiFi network and log in to the network.
-
Enable or disable the location feature.
-
Set up Touch ID and a passcode for your iPhone
-
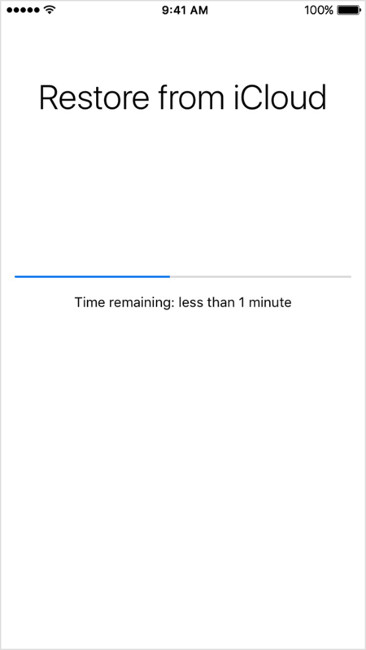
When you get to the screen Applications and data (Apps & Data) click Restore from iCloud Backup (Restore from iCloud Backup).
-
Enter your Apple iCloud ID and password.
-
Agree to the terms and conditions.
-
Select the backup you want to use. Touch Show all backups to view older backups stored in iCloud. Look at the date and size of each backup to choose the most appropriate backup. It will take a while to restore your backup from iCloud.
Above are some ways to help you recover all data on iPhone when restoring, resetting, backing up or restoring data from previous backups.
Backup data directly from iPhone to iPhone
Starting from iOS 11 onwards, Apple added a Quick Start feature that allows users to transfer data directly from the old iPhone to the new iPhone. This new backup method makes it easy for users to switch between their iPhone devices.
As soon as you open a new iPhone next to an old iPhone, on the old iPhone will appear a prompt suggesting you to transfer data to the new iPhone.
When you agree to make the transfer, a special code will appear on the new iPhone and you must use the old iPhone’s camera to scan this code to confirm the data transfer. Then you just need to wait for the data transfer to complete.
Details of how you can refer to the following article:
See also the following articles:
Wishing you success!
Source link: Backup iPhone, restore iPhone data from iCloud
– https://techtipsnreview.com/