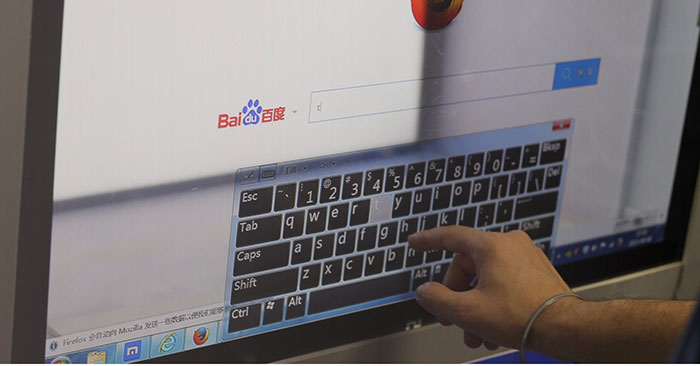
Virtual keyboard is a built-in feature that allows users to use their computer even when the physical keyboard is not working, it is also a bit more secure than a real keyboard because you are protected from keyloggers and useful when in Tablet Mode.
Therefore, if the virtual keyboard stops working, you may be in a bit of trouble. Fortunately, there are some simple tips to fix the on-screen keyboard not working problem in Windows 10.
1. Check Touch Keyboard service
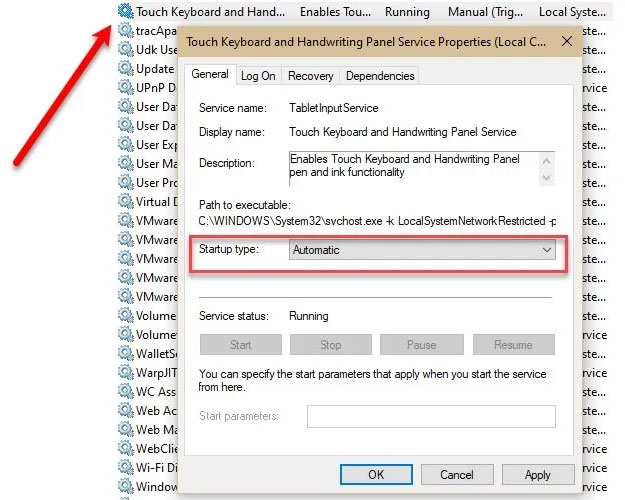
The first and foremost thing you need to do is check if the service “Touch Keyboard and Handwriting Panel” Automated or not.
To do that, launch Services from the Start menu, search for service “Services”, double click on that service, change Startup type Fort Automatic and click Apply > OK.
Now, restart the computer and check if the problem persists.
2. Enable the touch keyboard while in Tablet Mode

If you are in Tablet Mode but the touch keyboard or virtual keyboard does not appear, you need to go to settings Tablet and check if you have turned off “Show the touch keyboard when there’s no keyboard attached” not yet.
To do that, launch Settings and click System > Tablet > Change additional tablet settings. Now use the toggle to turn it on “Show the touch keyboard when there’s no keyboard attached”.
Now go into Tablet Mode and hopefully the problem will be fixed.
3. Run System File Checker (SFC)
If the problem is caused by a corrupted file then using System File Checker (SFC) can help. To do that, launch Command Prompt with admin rights from the Start menu, enter the following command and press Enter.
sfc /scannowIt will find and repair all corrupted files you may have. Hope this will also fix the virtual keyboard not working issue.
4. Create shortcut for virtual keyboard
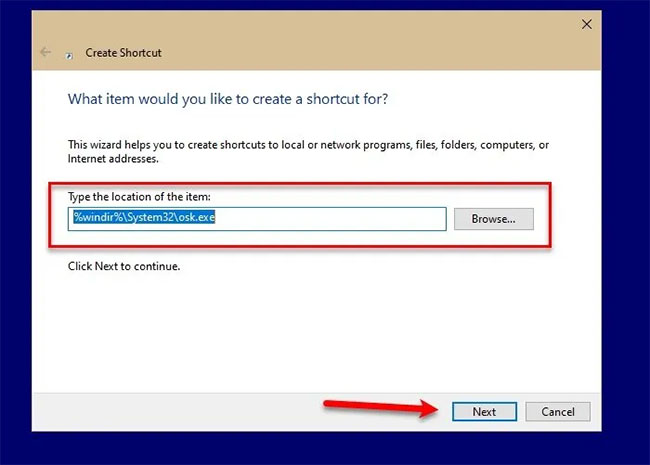
One of the ways you can launch the virtual keyboard is to right click on the Taskbar, select “Show touch keyboard button”, then click the . icon Touch Keyboard from Taskbar. But if you can’t launch the virtual keyboard using this method then you might want to create a shortcut to do the same.
To create a shortcut for the virtual keyboard on the desktop, right-click on the desktop and select New > Shortcuts. Enter the following address in the “Type the location of the item” and click Next.
%windir%System32osk.exeNow give it a name and click Finish.
This way, a shortcut will be created on your desktop and you can access the virtual keyboard from there.
5. Change Target in Chrome/Edge
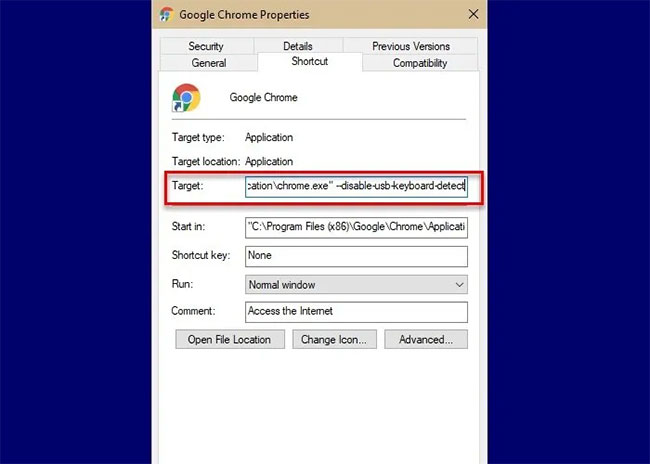
This is a rare situation, but if you are having trouble using the on-screen keyboard on Chrome then this solution is for you.
Right click on the shortcut Chrome, choose Properties, click option Target, give a space, copy and paste the following command, and then click Apply > OK.
--disable-usb-keyboard-detectAbove are some solutions to fix the problem of the virtual keyboard not working in Windows 10.
Hope you are succesful.
Source link: Fix virtual keyboard not working in Windows 10
– https://techtipsnreview.com/


