
NOTE: Welcome to the Knowledge Sharing Blog! If you encounter any errors during use, such as error in download link, slow loading blog, or unable to access a certain page on the blog … please notify me. via Contact page. Thanks!
If you are using the same computer with many people, the creation of new User Users to decentralize access to applications on Windows is extremely necessary and you must know it.
Therefore, in this article I will guide you how to create a new User on all popular Windows operating systems today, from Windows XP to the latest operating system at the moment it is Windows 10.
I. How to create more user accounts on Windows?
For Windows XP and Windows 7, creating a Local User account is quite simple and the way to do it is completely similar.
As for Windows 8.1 and Windows 10, the level of security is higher, so creating a User account (new user account) is a little different. Specifically, now we will start working immediately.
Read more:
#first. How to create a User on Windows (common way)
1.1. On Windows XP and Windows 7
Note: In this tutorial I will do it on Windows 7, and in Windows XP you do the exact same thing.
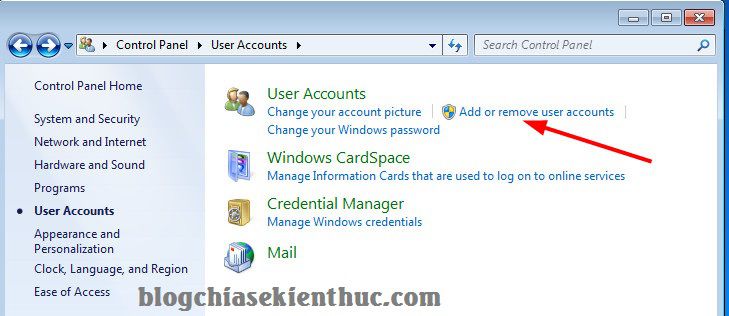
+ Step 1: First press the button Start => select Control Panel => select next User Accounts (or you can click on the option Add or remove user accounts always )

Select Add or remove user accounts to enter us into the Manager Accounts interface.
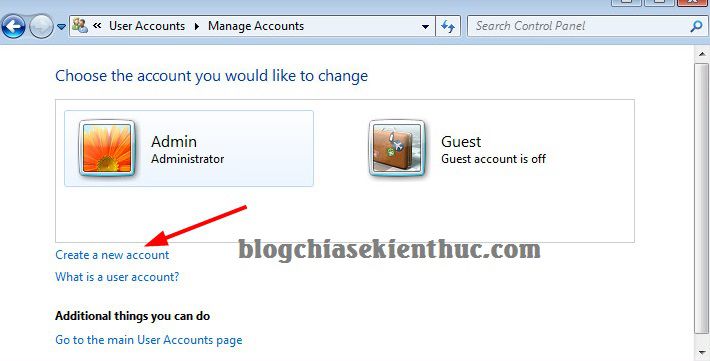
+ Step 2: Now click Create a new accounts to create a new user account.
+ Step 3: The next window will appear, you will have the following options:
? This name will appear on the Welcome…. : Here, enter a Name for the new Accounts.
- Standard User (also known as standard user): For this account, users can log in to their computer and use applications and software on the system easily. However, it is still limited in some functions, such as being unable to access certain folders, not being able to delete a file or setting up certain features of the system. You should create this account for guests to use … ..
- Administrator: This is the most advanced account on the operating system, you have complete freedom to do whatever you like without any restrictions. You can change as well as install other User accounts => The best is only you to use this account if you do not want to be installed by others, miscellaneous settings on your computer.
=> After you have selected the account, we will click Create Account to initialize.

Okey! New account has been created.
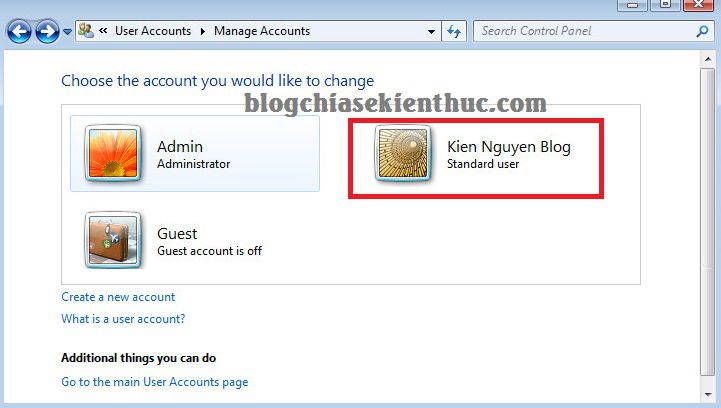
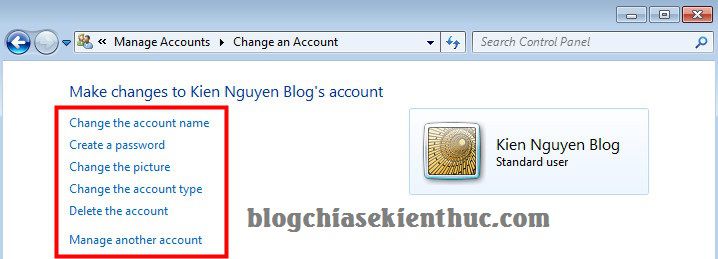
+ Step 4: To further configure this new user account, you can double-click on it to use features like:
- Change the account name: Change User Name.
- Create a password: Create a Windows login password for this new account.
- Change the picture: Change Profile Logo.
- Change the account type: Change the account type (Adminstrator or Standard User)
- Delete the account: Delete the account.
OK, now on try this account by Log off Let’s go back to the computer. You can do it quickly by pressing a key combination Windows + L and choose the account just created to use.
1.2. Create new user accounts on Windows 8.1 and Windows 10
As I said above, Windows 8.1 and Windows 10 have higher security, so if you are using the user account associated with the Microsoft account, when creating another User it will ask you enter email, password …
But okay, in this article I will guide you how to use Windows 8.1 / 10 without a Microsoft account.
Performed on Windows 8.1
+ Step 1: Access to Control Panel by pressing the key combination Windows + X => select Control Panel
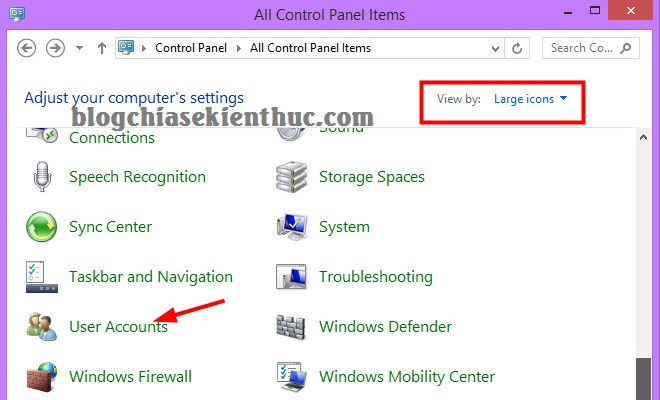
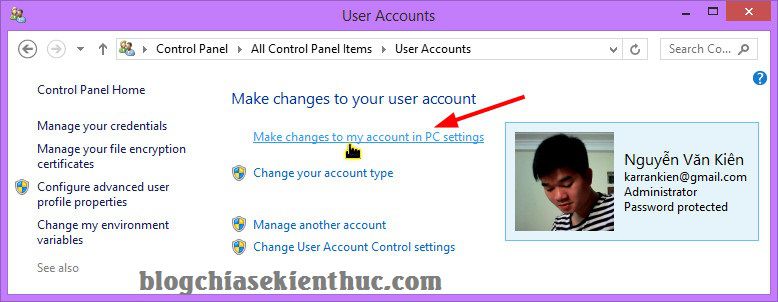
Window User Account appears, please select the line Make changes to my account in PC Settings.
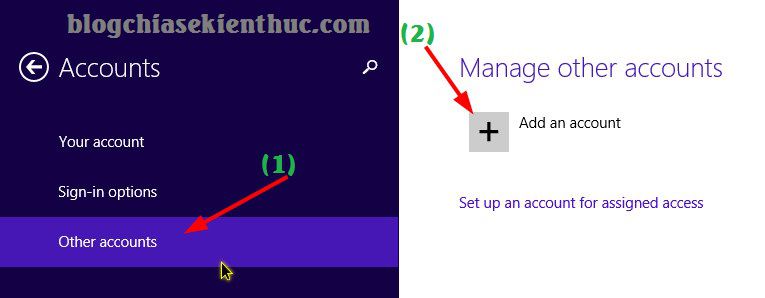
+ Step 2: At this point you will be taken to a completely new interface => choose Other account => at section Manage other account => please click Add an account to add a new account.
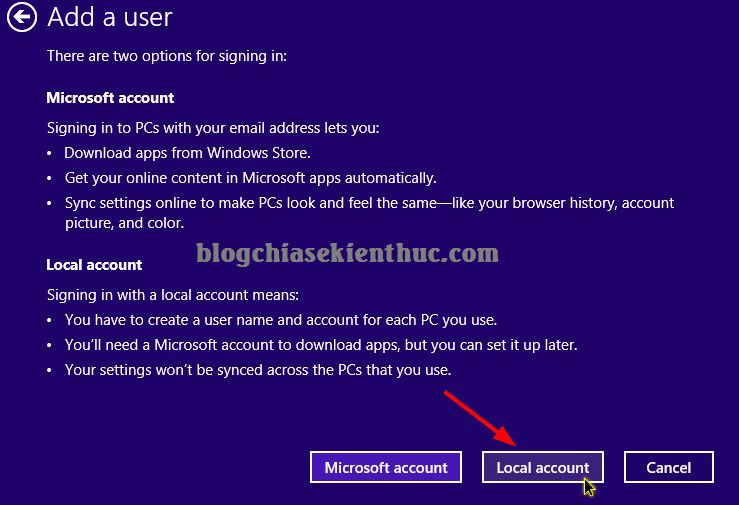
The next window will appear asking you to enter your Microsoft account email.
You can import them for better management, but if you don’t want to be associated with your Microsoft account, click on the line. Sign in without a Microsoft account (not recommended) => select Next to continue.

Choose Local account to enter the settings
+ Step 3: Here, enter a name for the new user account and set a password if you want => then press Next.
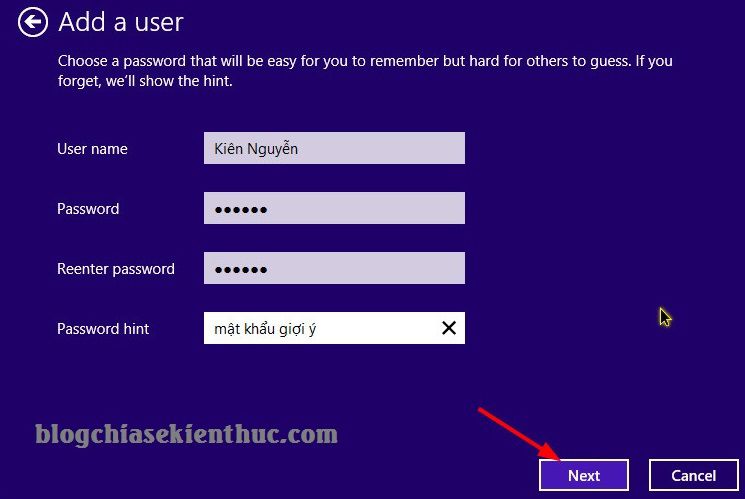
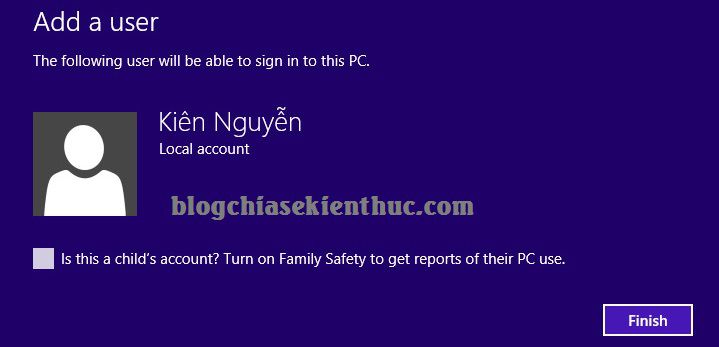
OK, press Finish to complete .
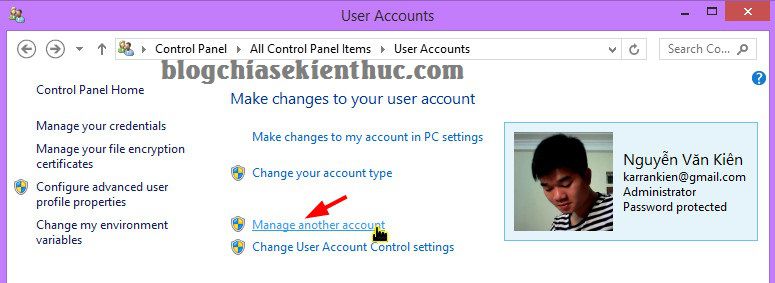
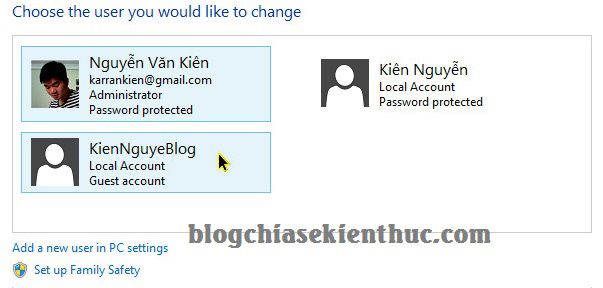
+ Step 4: Check if it is OK. You return to the interface User Account => select Manage another account.
OK! a new user account has been successfully created ?
Performed on Windows 10
You do completely similar to the instructions above, or refer to the detailed article here.
#2. Create a new User above with a single command
Note: With this way you will create a very fast user account with just one command line and you can apply to Windows 7 and above versions.
Perform:
+ Step 1: Open the window cmd under administration. (see here if you don’t already know)
- Windows 7: Click the button
Start=> entercmdgo to the search box> right-click on the filecmd.exeand choose Run as adminstrator. - On Windows 8/8/1/10: Press the key combination
Windows + X=> selectCommand Prompt (Admin)
+ Step 2: We will use the command
net user username password /add
Inside:
- username: You replace it with the account name you want to set.
- password: Set a password for the user account.
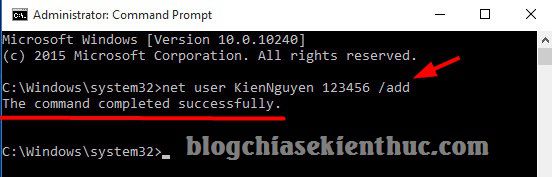
For example, I will create a user account named KienNguyen and password is 123456, then use the following command:
Net user KienNguyen 123456 /add
OKey! Please click OK to make => appear notice ” The command complete successfully”Means you’re done!
On the contrary, if you want to remove the password of that account then use the structure net user “username” “” . Specific examples are as follows:
net user “KienNguyen” “”
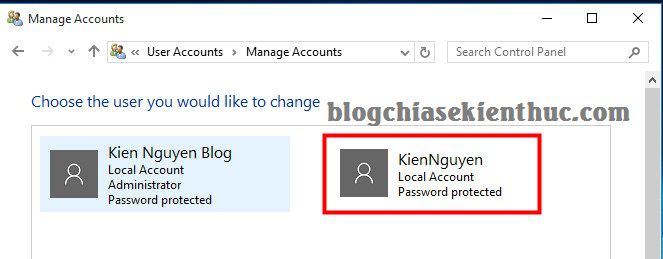
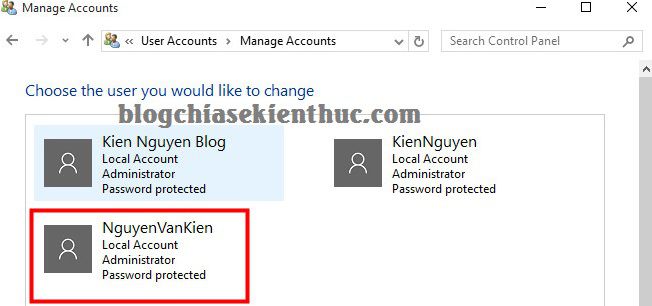
+ Step 3: Test it out. You access the section Manage Account will see an account that we just created.
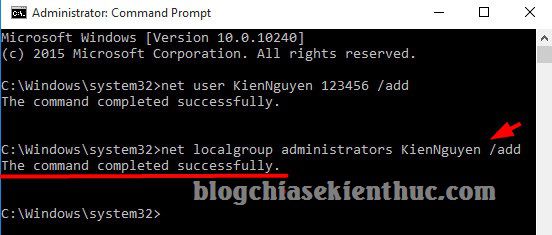
In case you want to authorize this User as Administrator, run the following command:
net localgroup administrators username /add
Where username is your username. In my case the complete statement would be
net localgroup administrators KienNguyen /add
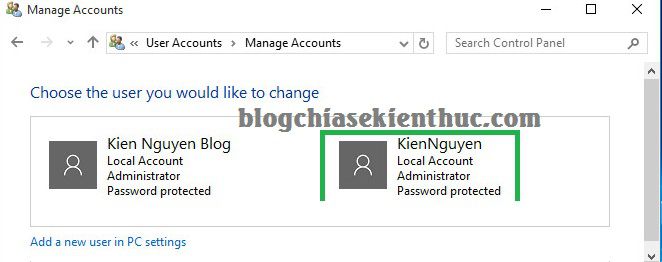
Go to check again => Switched to account Adminstrator Alright ?
Tips – read more if you like: Share a few more commands for you to apply in case of need:
+ To change the password, or set a password when that User account does not exist, use the following command structure:
net user “UserName” *
Specific example: net user KienNguyen *
+ Temporarily turn off User account: You use the same command structure net user
Specific example: net user KienNguyen / active: no
+ Re-enable the user account that has just been turned off: You use the same command structure net user
Specific example: net user KienNguyen / active: yes
+ Permanently delete the User account, you use the following command structure: net user
Specific example: net user KienNguyen / del
+ If you want to see the list and information of all existing User accounts on your computer, you can use the following command:
wmic useraccount list full
# 3. Added a way to create new user accounts on all Windows
In addition, we still have another way to create a new user on Windows, you can refer to the following tutorial:
Perform:
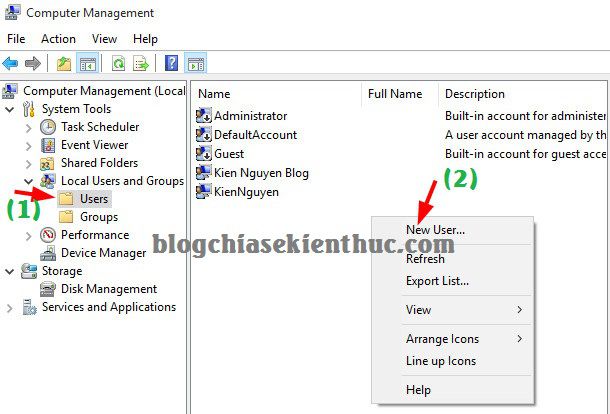
+ Step 1: Open the Run dialog box (Windows + R) and enter the command compmgmt.msc => press Enter to perform.
Or You can manually open it as follows: Right-click
This PC(Computer) => selectManage=> select nextLocal User and Groups.
+ Step 2: Next, right-click on any empty area => select New User...
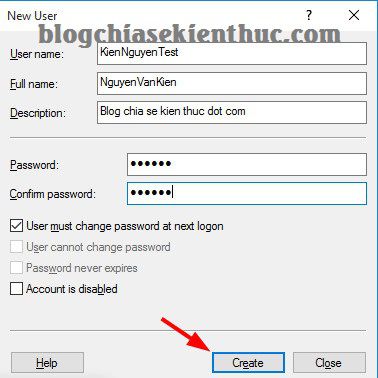
A new window appears, please fill in the necessary information here:
- User name: User name
- Full name: Enter your full name.
- Description: Description for downloading new user accounts.
- Password: Enter your Windows login password.
- Confirm password: Enter the password.
=> Then click Create to create.
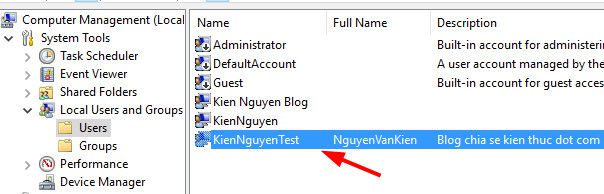
Accomplished ! so are you created a new User successfully and that. In case you want to set this account as an Admin account, do the following:
Perform: Double click on the account you just created.
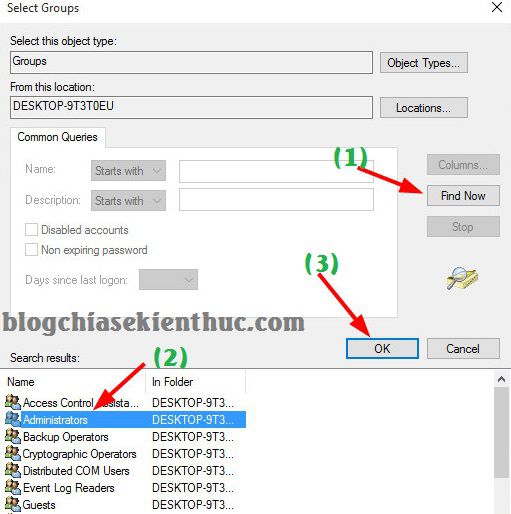
A window appears, switch to tab Member Of => click Add => select Advanced.... as shown below.
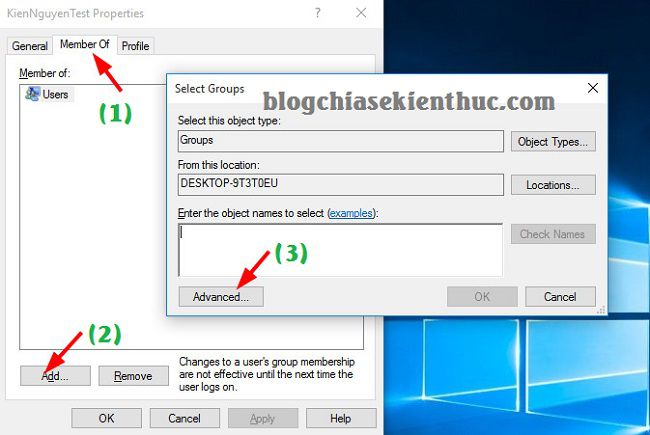
Continue to click Find Now => select account Adminstrator => press OK.
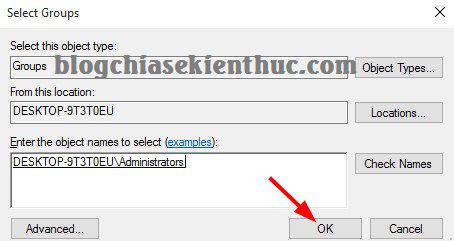
The new account you just created has been added to the Admin group => please click OK to agree.
Finally you press Apply to apply for the setting.

Check if it’s OK? The picture below is delicious already
II. Epilogue
So I have very detailed instructions for you how to create a new User on Windows XP / 7/8 / 8.1 and Windows 10 okay.
Here are 3 ways create a user account on the computer most commonly used today and you can do it any way, as long as you feel easy to do and remember.
Hope this article will be useful to you, wish you success!
Kien Nguyen – techtipsnreview
Note: Was this article helpful to you? Don’t forget to rate, like and share with your friends and relatives!
Source: Guide to create a new User on Windows XP / 7/8/10 fastest
– TechtipsnReview


