
If you’re having trouble launching your Windows 11 PC, you can try restarting the system in Safe Mode. In this mode, drivers and features on the system will be temporarily disabled to help your PC operate more stably. Here’s how.+
Access Safe Mode at system startup
For Windows 7 and earlier, users can usually access Safe Mode by pressing a specific function key (such as F8) as soon as the PC is starting up. However, Microsoft removed this feature starting with Windows 8 because thanks to new technologies, Windows PC boot time has now become so fast that users can’t even press the function key to access Safe. Mode, Windows has finished downloading.
Instead, Microsoft designed an “automatic failover” solution for cases where the PC crashes and Windows doesn’t load properly. Your PC will automatically go into troubleshooting mode if it fails to boot twice in a row. You can do this by powering on your PC, then pressing the physical power button as soon as you see the manufacturer’s logo appear. Do this twice and you will see the “Choose an Option” advanced startup screen appear on the screen. Then follow the instructions described in the section below to enter Safe Mode.
How to access Safe Mode Windows 11
There are a few different ways for you to start your computer in “Advanced Startup” mode, thereby accessing “Safe Mode” on Windows 11.
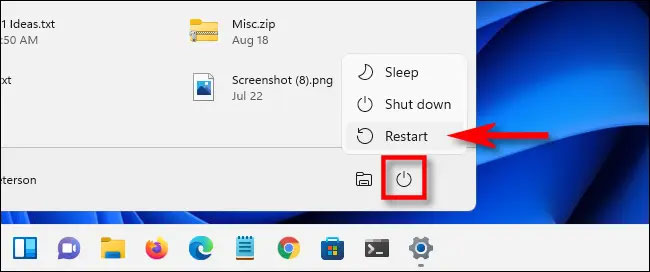
The easiest way is to open the menu Start and click the power button icon in the bottom right corner. Then hold down the Shift key on your keyboard and click “Restart“.
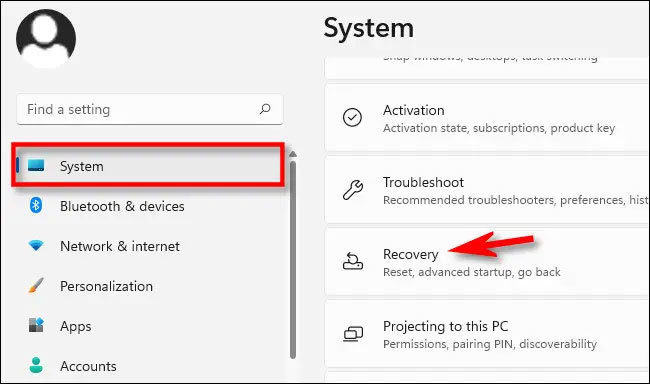
In addition, there is another “more cumbersome” way is through the Settings application. First, press the key combination Windows + i to open the Settings app. When the Settings interface opens, click on the “System, then select “Recovery“.
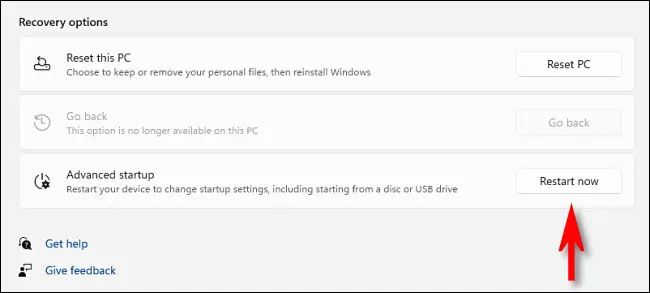
On the Recovery settings page, find the option “Advanced Startup” and click the “ button”Restart Now” next to that option.
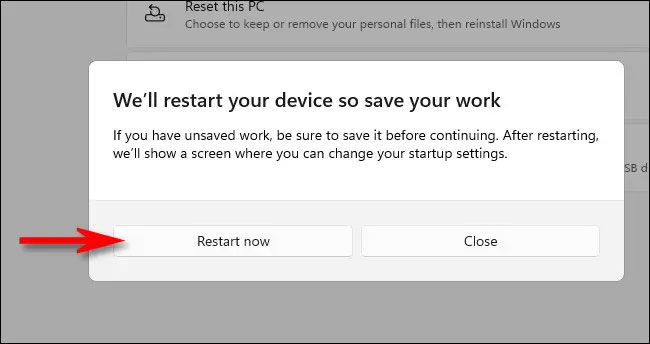
Windows will confirm with a pop-up dialog asking you to save your work before restarting. When you are ready, click “Restart Now“.
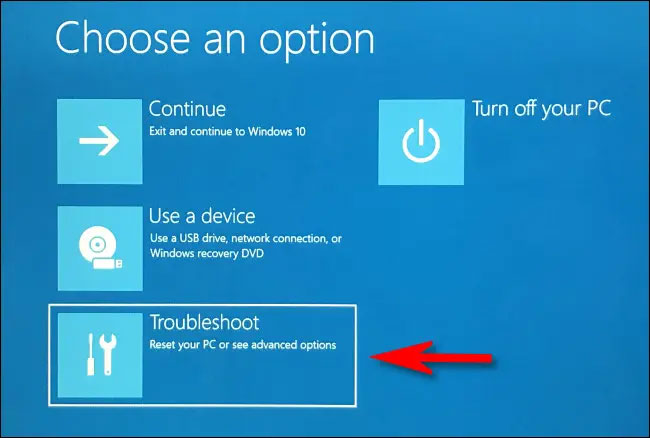
Then Windows will shut down and restart on a blue screen titled “Choose an Option, comes with a few options available. Please click “Troubleshoot“.
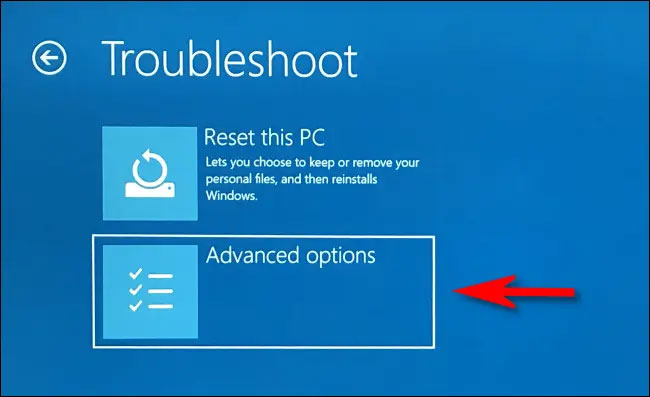
On the Troubleshoot page, click “Advanced Options“.
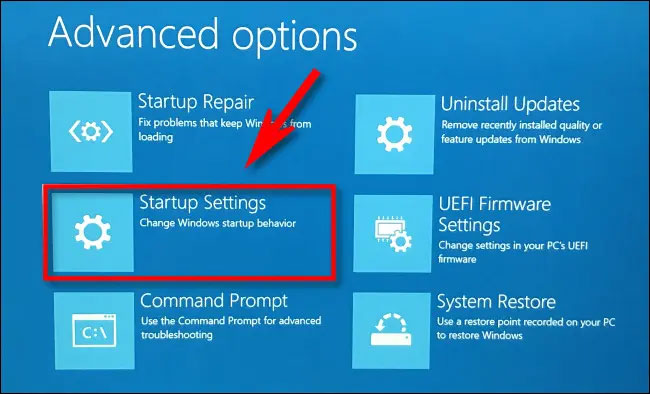
On the Advanced Options page, click “Startup Settings“.
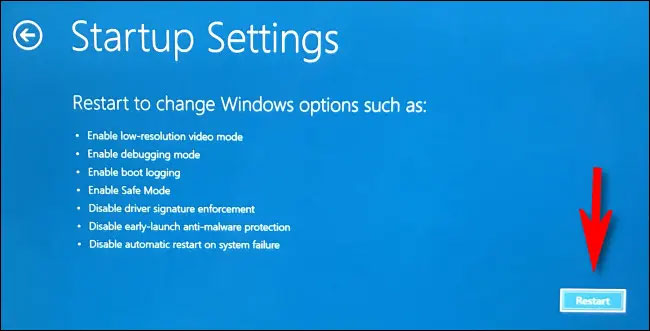
In Startup Settings, click “Restart“.
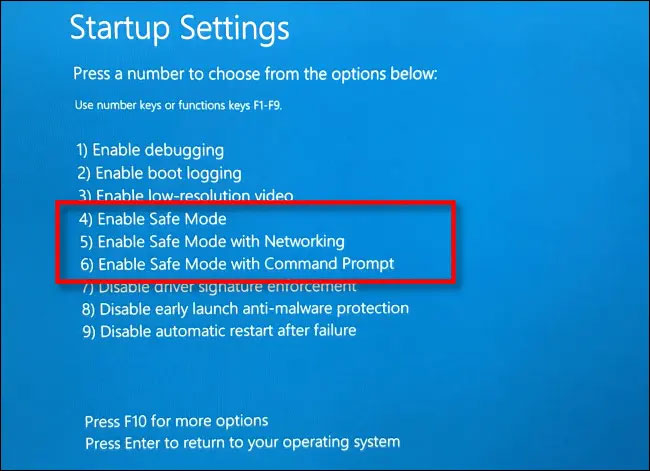
The PC will reboot into the menu “Startup Settings” with 9 numbered options. Press “4” on the keyboard to select Safe Mode, “5” for Safe Mode with Networking or “6” for Safe Mode with Command Prompt.
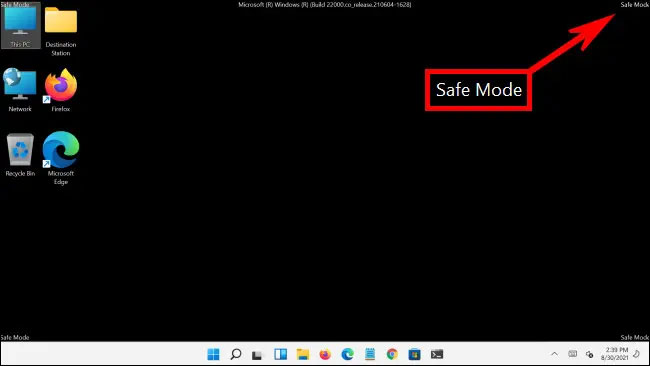
Once you’ve made your selections, Windows will reboot into the corresponding mode (Safe Mode). Your screen will be downgraded to a lower resolution and Windows will also replace the desktop background image with a black background that says “Safe Mode” in the corners.
Now you can perform any troubleshooting task you want. When done, just reboot (or shut down) your Windows 11 PC as usual. If all went well and the problem is fixed, the next time you reboot, you’ll be back in regular Windows mode. Good luck!
Source link: How to access Safe Mode on Windows 11
– https://techtipsnreview.com/


