Apple is always looking for ways to make using iPhones and iPads easier. The company will usually adjust the menu and button functions for each new iOS version to make the software interface more appropriate.
Sometimes, however, these changes can make it difficult for longtime users to reach.
In previous versions of the Apple operating system, adding some photos to an album involved simply selecting (or ticking) some of the photos in the album. Camera Roll and press the . button Add To at the end of the interface.
However, in iOS 13, Apple has moved this option to Share Sheet. The following steps explain the new process for adding photos to albums in the Photos app on iOS 13.
1. Launch the app Photos on iPhone or iPad.
2. Press Select in the upper-right corner of the screen, then tap some of the photos you want to add to the album.
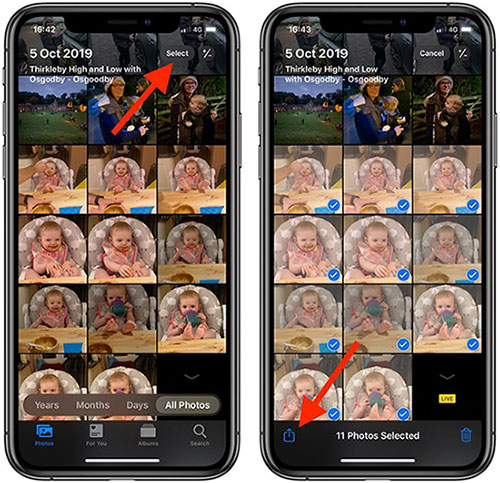
3. Touch the button Share Sheet (square with arrow indicated) in the lower left corner of the screen.
4. Swipe up Share Sheet to show actions below the share icons.
5. Click Add to Album.
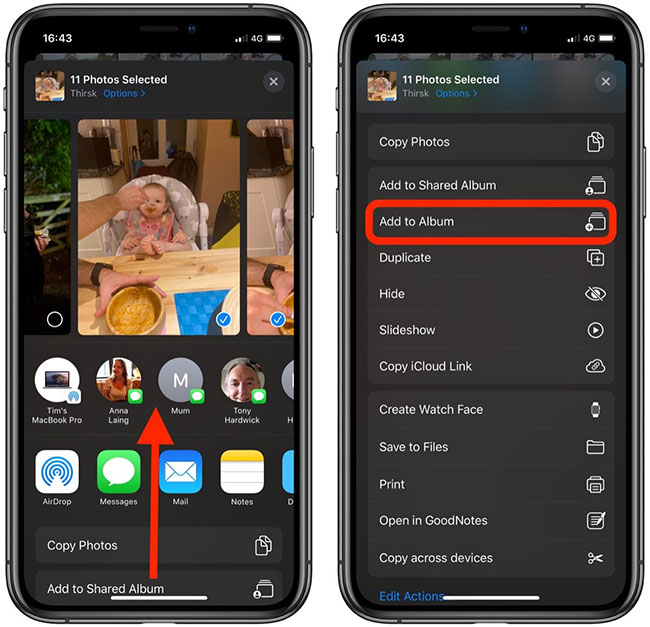
6. On the next screen, below My Albums, Tap an existing album to add your selected photo. Tap option New Album above them, give the new album a name, then press Save.

Honestly, maybe it’s time for Apple to rename “Share Sheet” to “Action Sheet”, because normally you’ll now see multiple actions, like sharing options, listed in there.
Source link: How to add photos to albums in Photos on iOS 13
– https://techtipsnreview.com/