
NOTE: Welcome to the Knowledge Sharing Blog! If you encounter any errors during use, such as error in download link, slow blog loading, or unable to access a certain page on the blog … please notify me. via Contact page. Thanks!
What is Safe Mode on Windows, I probably don’t need to repeat it again, if you don’t know, please read this article again. Also in this article I will share with you an extremely useful tip, helping you to be able to put Safe Mode into Boot Menu when booting Extremely simple, fast and does not need to use any 3rd party software at all.
With this way, you can apply to all Windows operating systems, I have tested and run very well on Windows 7, 8, 8.1 and Windows 10. And Windows XP has not tried yet, who are you using Windows XP, please test for me ?
Read more:
Okey, get to the main point in this article. To do this, please follow these steps in turn:
Add Safe Mode to the Boot Menu
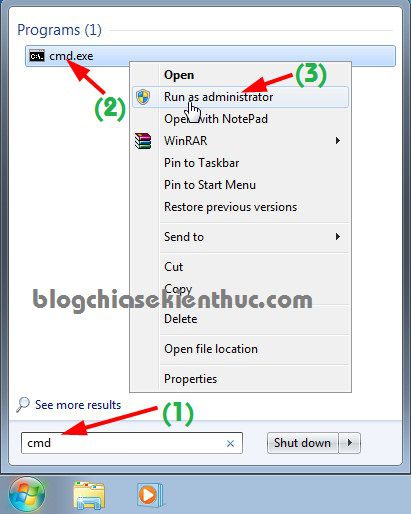
– Step 1: Open it cmd under admin.
- If it’s Windows 7: You enter cmd in the search box in the menu
Start=> right click on the filecmd.exe=> selectRun as administratorto run as administrator. - If it’s Windows 8 / 8.1 / 10: You can use key combinations
Windows + X=> then selectCommand Prompt (Admin)
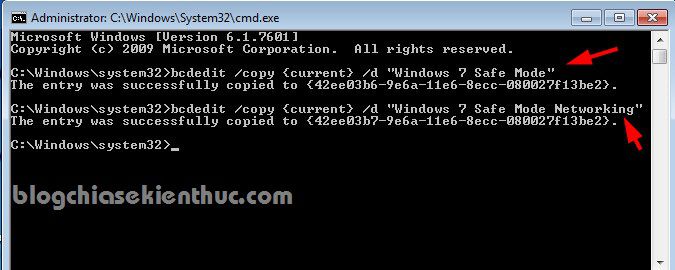
– Step 2: Use the following command to add it to the Boot Menu
bcdedit / copy {current} / d “Windows 7 Safe Mode”
In which: The part in the quotation mark you can write anything, but should not write accented Vietnamese. Then press Enter to perform.
Okey, that is okay, if you just want to add normal Safe Mode, just enter one command, and if you want to add mode Safe Mode Networking (Safe Mode but with more internet), enter the same command again.
bcdedit / copy {current} / d “Windows 7 Safe Mode Networking”
Then press Enter to add.
– Step 3: Open the Run dialog box (Windows + R) => enter the command msconfig => press Enter.

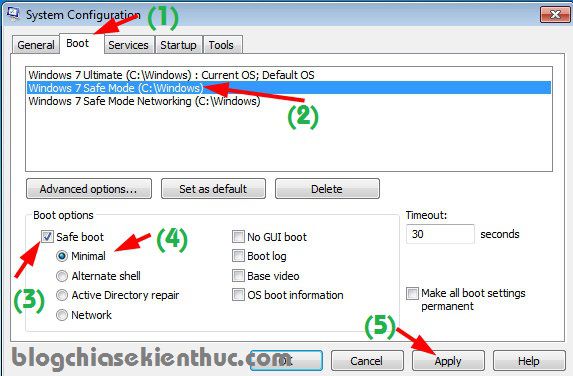
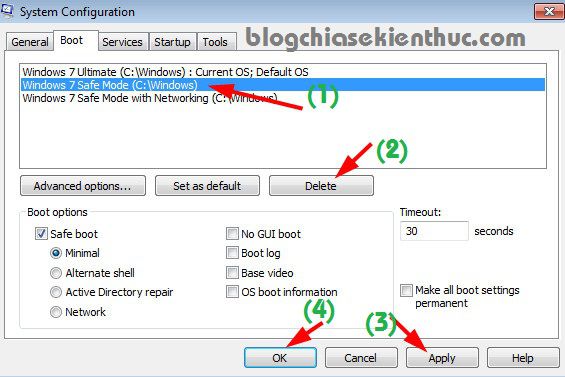
– Step 4: Window System Configuration appears, you switch to tab Boot and do the turn as shown below to assign access to it.
You select the line titled as Windows 7 Safe Mode (normal Safe Mode) => tick the line Safe boot => ticked Minimal => Press Apply to perform.
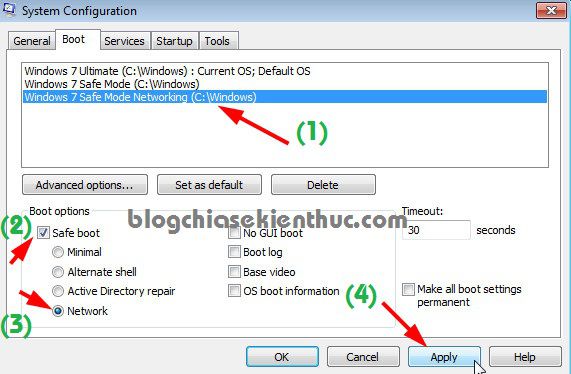
Continue, click on the line titled as Windows 7 Safe Mode Networking (Safe Mode with internet) => check the line Safe boot => tick the line Network => select Apply to do => press OK to complete the setup.
– Step 5: Now try restarting your computer to see the results. Definitely successful ?

Delete Safe Mode to launch the Boot Menu?
Okey, adding is just that simple, so if you do not need to use anymore and you want to delete, how to do? Yes ! The way to do it is equally simple.
Perform: You go back to the window System Configuration => select mode Safe Mode that you want to delete then click Delete => press Apply => OK is done.
Epilogue
So I gave you very detailed instructions on how Add Safe Mode to Boot Menu it’s warm up. This way, using the BootICE software that I introduced in the previous article is all good, you can do it in any way.
Yes ! It’s also quite interesting, right: D, hope the article will be useful to you, wish you success!
Kien Nguyen – techtipsnreview
Note: Was this article helpful to you? Don’t forget to rate, like and share with your friends and relatives!
Source: How to add Safe Mode to the Boot Menu without software
– TechtipsnReview


