
Online classes on Microsoft Teams also have the option to change information such as renaming the class, changing the class avatar so that teachers can change the information. When initially creating a class in Microsoft Teams, teachers will need to immediately enter the class name and accompanying information. For students to have immediate access to the group, teachers can change the class name, change the avatar in more detail. The following article will guide you to read instead of class information on Microsoft Teams.
Instructions to change class information on Microsoft Teams
Step 1:
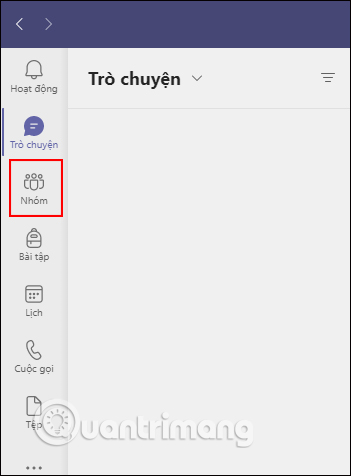
At the interface on Microsoft Teams, click group item to access created online classes.
Step 2:
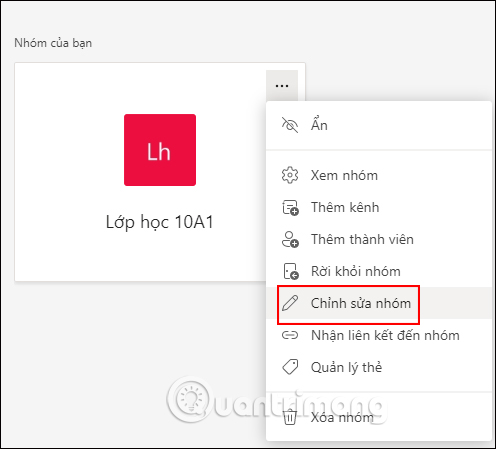
Show all classes on Microsoft Teams. In the class where the teacher wants to change the information, click 3 dots icon then select Edit group.
Step 3:
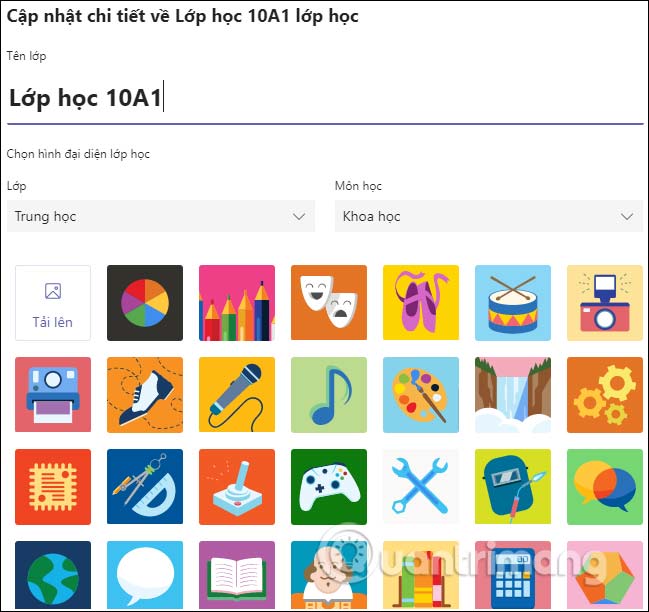
Now display the interface for us to change the information of the class, including the class name, the class’s avatar. First of all, you change the class name in the Class Name line, below is to change the information about the Class and Subject.
Next we change class avatar. You can immediately use the available images provided by Microsoft Teams or Click Upload Tải to select a profile picture from your computer.
Step 4:
Images uploaded to the computer are automatically resized to fit the class profile picture. After you have selected an image to represent your online class, click Update button below to save the new changes.

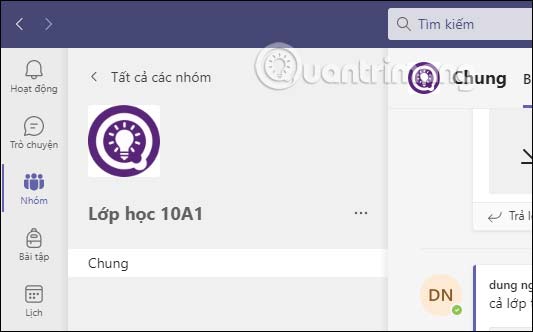
The class information results have been changed according to the new content you update.
Source link: How to change Microsoft Teams class information
– https://techtipsnreview.com/


