
Creating a dotted line in Word will help you create a line in Word that separates content more beautifully, besides a simple straight line. There are 2 simple ways for us to create a dotted line in Word, instead of pressing the dot key continuously, or creating a dotted line in Microsoft Word with the Tab key. Lines often appear a lot in documents, reference books, textbooks with the purpose of ending the content above to move on to new content. The following article will guide you how to create dotted lines in Word.
Method 1: Create Word dotted lines with keyboard shortcuts
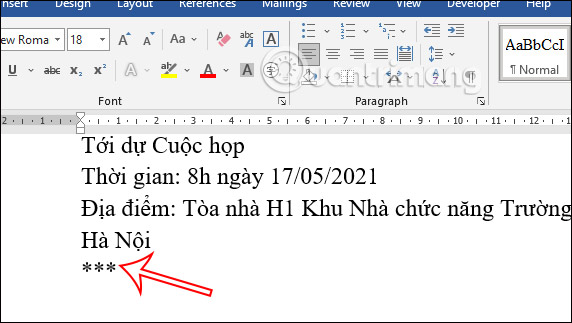
First of all, we open the Word document we want to create a dotted line. Then you press the sign key * on the keyboard. We will enter 3 times asterisk as shown below.
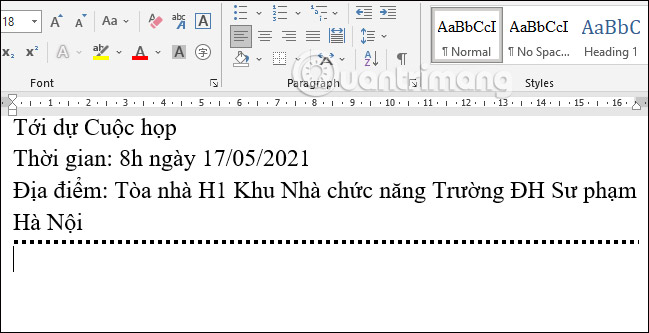
Next you press Enter key phím and immediately 3 asterisks automatically turned into dotted lines as shown.
Besides the asterisk, you can use the following characters for other dotted line styles:
- Press the dash (“-“).
- Press three equal signs (“===”).
- Press three underscores (“___”).
- Press three pound signs (“###”).
- Press three tildes (“~~~”).
Method 2: Create dotted lines with Shapes in Word
In the Shapes Word section, there are many options such as drawing lines in Word or drawing shapes in Word. And we can also use Shapes to draw dotted lines.
Step 1:
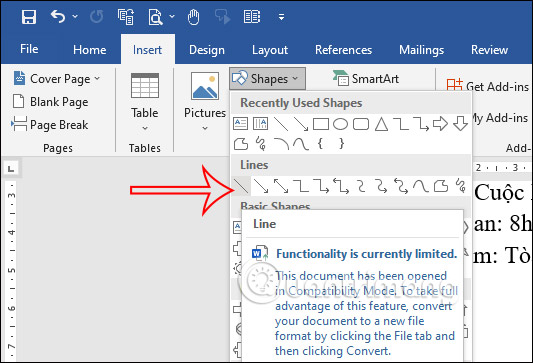
At the interface in Word, click the Insert button and then click on Section Shapes. In the display list we find section Lines phần then select first line.
Step 2:
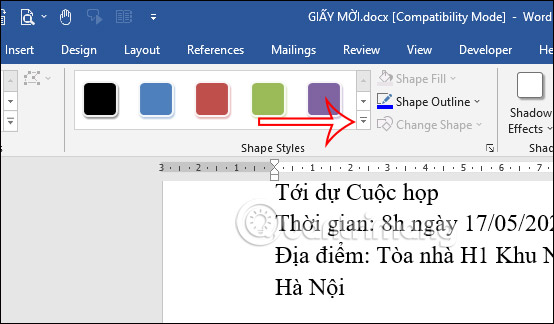
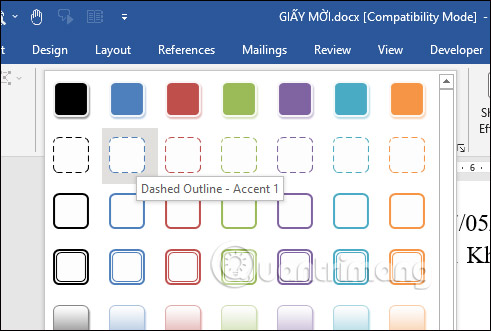
Then we draw a line in the document and then click Format tab above. Next look down Shape Styles group then click triangle icon to extend the formatting style for the newly created line.
Step 3:
You will now see some dotted line styles as shown below. You just need to click on one of the styles with different colors.
Source link: How to create dotted lines in Word
– https://techtipsnreview.com/


