
Hyper-V is a useful feature that allows you to create virtual machines without installing third-party software. However, Hyper-V has many potential security holes. Therefore, if you do not use this feature, you can disable it to avoid security risks.
In this article, TipsMake.com will guide you how to disable Hyper-V.
1. Disable Hyper-V Using Control Panel
To disable Hyper-V using the Control Panel, follow these steps:
- Press Windows + CHEAP to open Run.
- Click appwiz.cpl then press Enter to open the edit window Programs and Features.
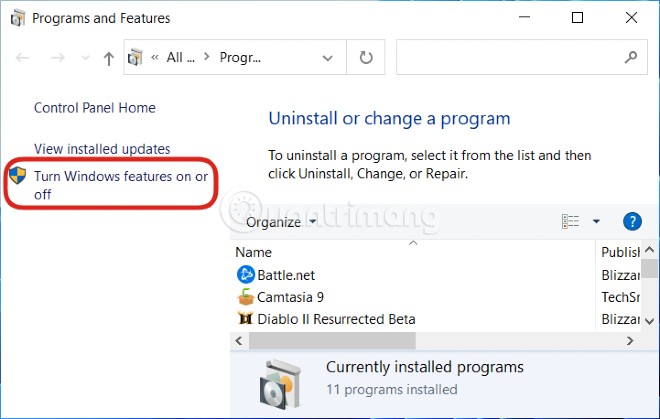
- In this window, find and click Turn Windows features on or off.
- Next, expand folder Hyper-V > Hyper-V Platform and uncheck at Hyper-V Hypervisor. Or you just need to uncheck always in the folder Hyper-DRAW.
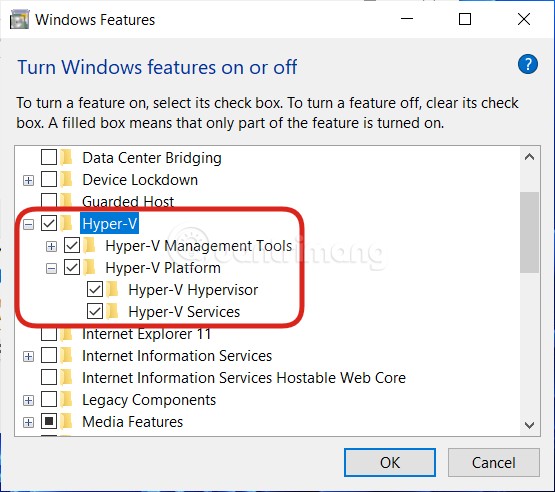
Now exit the Control Panel and restart the computer.
2. Disable Hyper-V Using PowerShell
To disable Hyper-V using PowerShell, follow these steps:
- Press Windows + CHEAP to open the menu Power User.
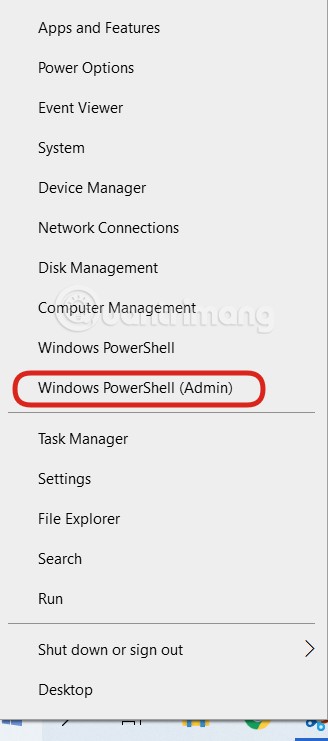
- Press A to open PowerShell under admin.
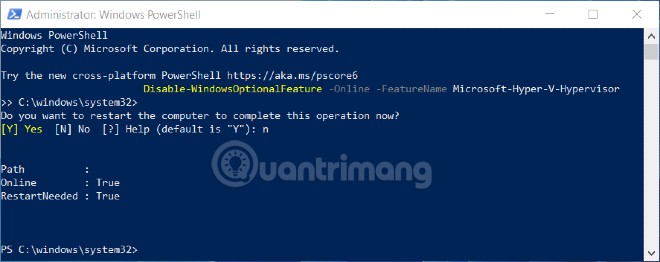
- You copy the following command line and paste it into PowerShell and then press Enter:
Disable-WindowsOptionalFeature -Online -FeatureName Microsoft-Hyper-V-Hypervisor
- If you need to re-enable Hyper-V just change Disable in the statement equals Enable.
- You wait for the command to finish running and then restart the computer.
3. Disable Hyper-V with Registry Editor
Before interfering with the Registry, you should back it up to make sure that there are no unfortunate problems.
To disable Hyper-V using Registry Editor, follow these steps:
- Press Windows + CHEAP to open Run, import notepad and press Enter to open Notepad.
- Copy and paste the following code into Notepad:
Windows Registry Editor Version 5.00

[HKEY_LOCAL_MACHINESYSTEMCurrentControlSetControlDeviceGuard]
"RequireMicrosoftSignedBootChain"=dword:00000000

[HKEY_LOCAL_MACHINESYSTEMCurrentControlSetControlDeviceGuardScenarios]

[HKEY_LOCAL_MACHINESYSTEMCurrentControlSetControlDeviceGuardScenariosHypervisorEnforcedCodeIntegrity]
"WasEnabledBy"=dword:00000000
"Enabled"=dword:00000000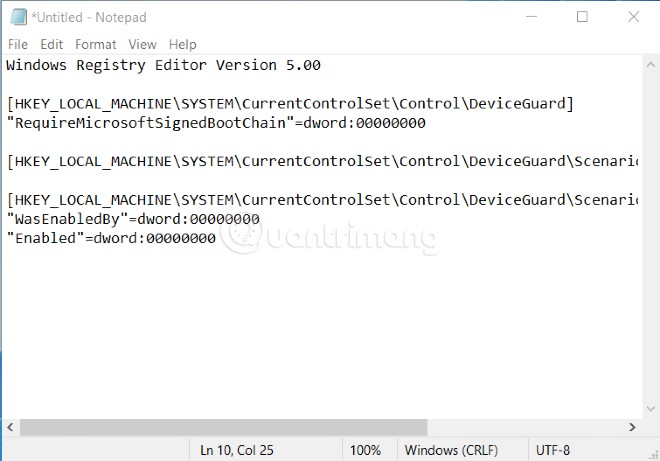
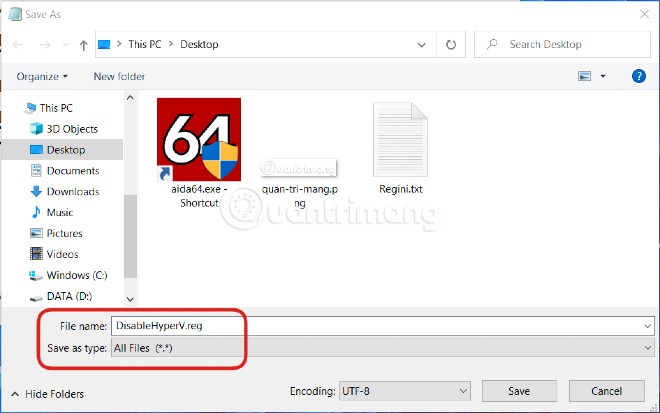
- Press File then choose Save As.
- Choose a place to save the file then name the file with the extension .reg, for example Disable_HyperV.reg.
- Choose All Files from the list Save as type.
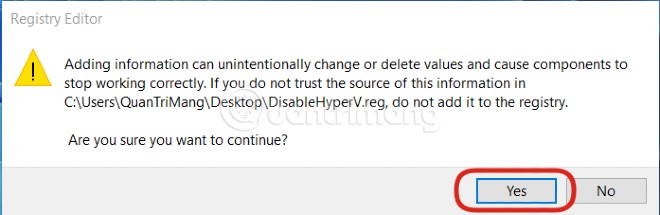
- Double-click the file you just saved to edit the Registry Editor.
- If you need to confirm, press Run > Yes (UAC) > Yes > OK.
- If you like, you can delete the .reg file after you’re done.
Above are three ways to disable Hyper-V on Windows 10. Good luck!
Source link: How to disable Hyper-V on Windows 10, disable Hyper-V
– https://techtipsnreview.com/


