
This article will show you how to disable the virtual keyboard that appears on the login screen in Windows 10.
How to disable the virtual keyboard in Windows 10?
If you’re just using the virtual keyboard in Windows 10 on the desktop or in apps and want to turn it off (or on again), press the key Windows + Ctrl + O to turn the keyboard on and off.
However, if you find that the virtual keyboard appears at the login screen when you don’t want it, you may need to take extra steps to disable it.
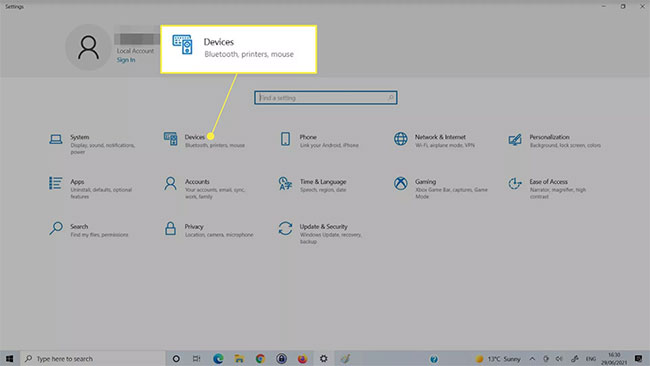
1. Open the Windows Settings app by pressing the . key Windows + I.
2. Select Devices.
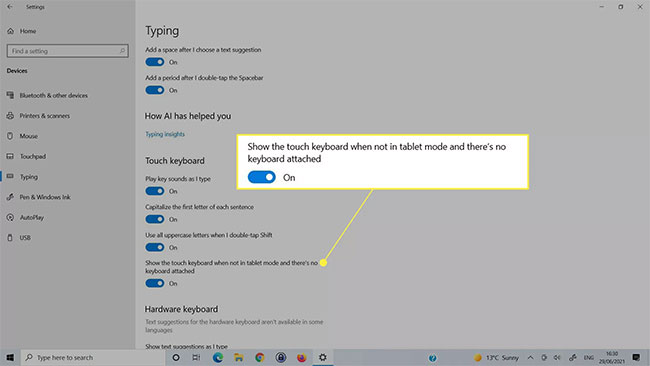
3. Select Typing from the left side.
4. Scroll down until you find the section Touch keyboard. Find a toggle button that says Show the touch keyboard when not in tablet mode and there’s no keyboard attached. Turn it into Off.
Disable the virtual keyboard in Ease of Access Center
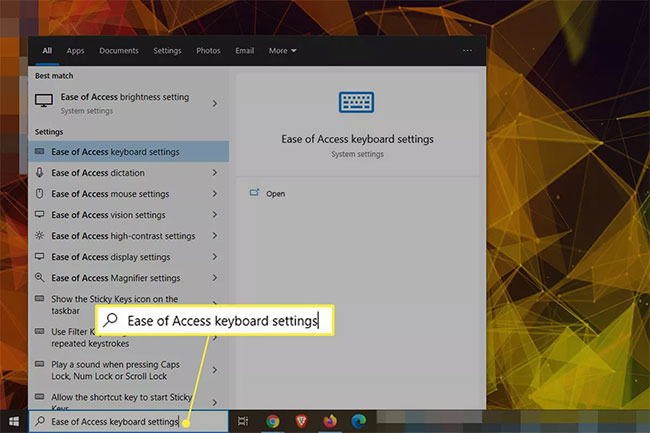
If the above method does not disable the virtual keyboard, you can also disable it in the Ease of Access Keyboard Windows 10 menu.
1. Use the Windows search box to find Ease of Access Keyboard Settings and select the corresponding result.
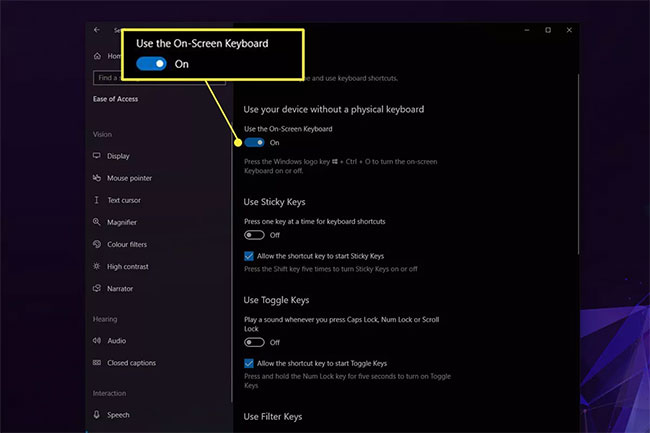
2. Find the toggle switch titled Use the On-Screen Keyboard and off, then back on. You may see the touch screen keyboard pop up and then disappear again.
Disable virtual keyboard service
Disabling the virtual keyboard service may cause it to no longer appear. Only use this method if you don’t want to use the keyboard anymore. If you disable it now, you’ll need to re-enable the service later when you want to use it.
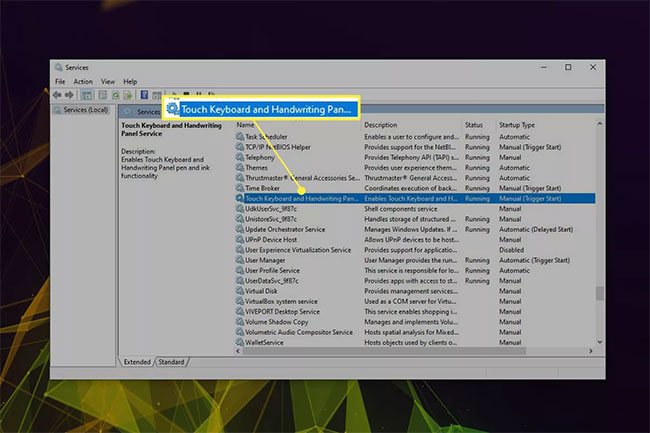
1. Use the Windows search feature to search Services and select the corresponding result.
2. Scroll down the list of services until you find it Touch Keyboard and Handwriting Panel Service Properties. Double-click it to open the service’s properties.
3. Press the button Stop if the service is running, then use the drop-down menu next to it Startup type to choose Disabled.
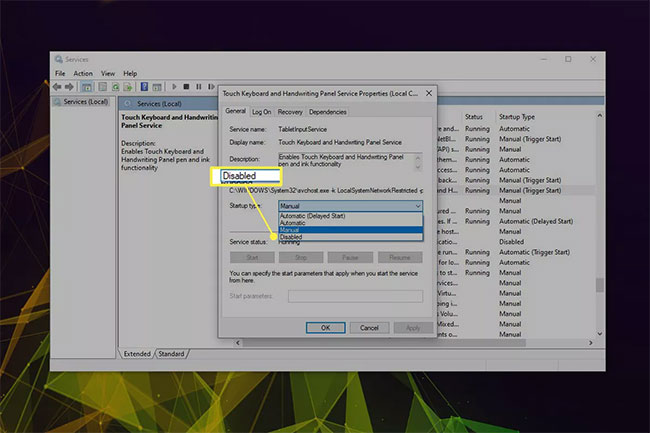
4. Select Apply > OK.
Remove recently installed applications or drivers
Sometimes the virtual keyboard may randomly appear at the login screen due to a recently installed application or driver. If you have any idea what could be wrong, try disabling, restoring, or removing that setting to see if this fixes the problem. You can also try reverting to a restore point.
Source link: How to disable the virtual keyboard on Windows 10
– https://techtipsnreview.com/


