
Sleep mode or sleep mode is a low power state available in Windows operating systems, including Windows 10. This low energy sleep mode is useful especially for laptop and tablet users. , as it helps to prolong battery life.
What is Sleep mode in Windows 10?
Unlike Hibernation, when a device is put in sleep mode it consumes a very small amount of power, but you can resume your work very quickly (almost immediately) by pressing any button. any key on the keyboard, mouse movement, touchpad or pressing the power button.
Since the Sleep state consumes a small amount of energy, on a device using battery power, if the battery level drops below the limit, Windows will automatically put the device into Hibernation mode (if enabled) to avoid loss. the data.
With the default settings, your PC can go into Sleep after 15 minutes (with battery power) or 30 minutes (when plugged in) of inactivity.
However, the problem here is that the Sleep mode is set to default, so it will automatically put the device into sleep after a period of inactivity. Therefore, there will be many cases where you are downloading data, the machine will automatically go to sleep state and forced to resume to download again.
For example, your Windows 10 PC might go to Sleep while the file is being downloaded through a web browser, forcing you to start the whole process reloading from scratch, if the server is from where you were downloading the file. Down does not provide continued support.
The following article will help you customize the sleep time, or you can disable Windows 10 sleep mode if necessary.
How to enable or disable Sleep in Windows 10
Method 1: Turn on / off Sleep in Windows Settings
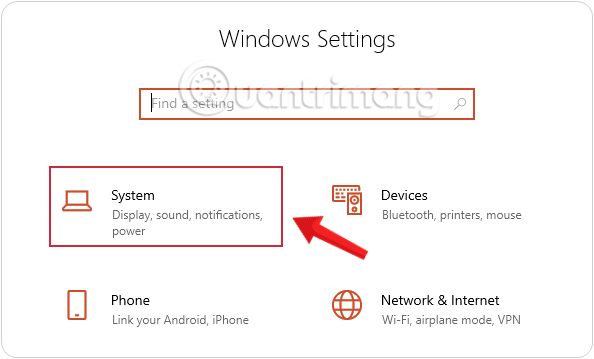
Step 1: First of all, we will open the window interface Windows Settings by pressing select Start menu then click on serrated icon.
Or you can use key combinations Windows+I.

Step 2: In the interface Windows Settings, keep clicking System to set the settings on the system.
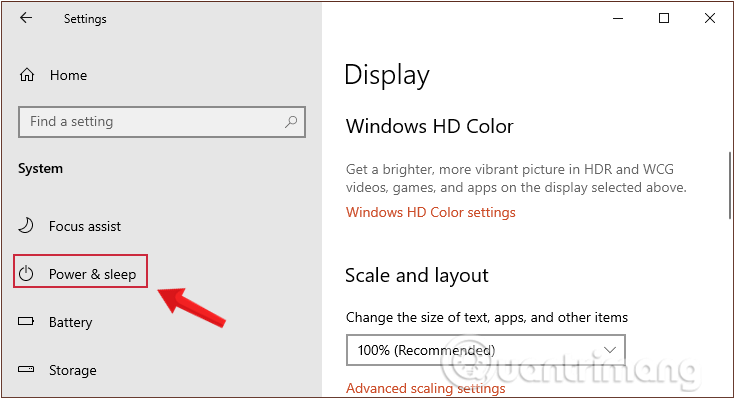
Step 3: Switch to the new interface, in the list on the left you click to select settings Power & Sleep.
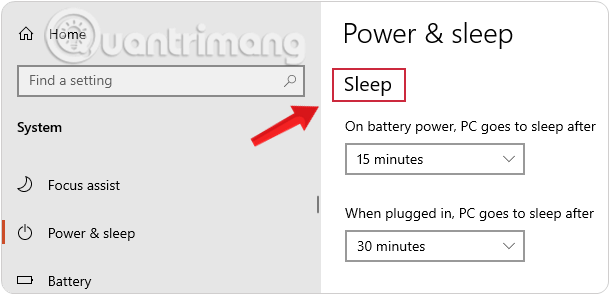
Step 4: Switch to the right view Section Sleep There will be options to set this up, including:
- On battery power, PC goes to sleep after: When using the battery, the computer will automatically go into sleep mode after a period of 15 minutes.
- When plugged in, PC goes to sleep after: When the power is plugged in, the computer will automatically go into Sleep mode after about 30 minutes.
In case you want Turn off Sleep just switch to Never mode is to be.
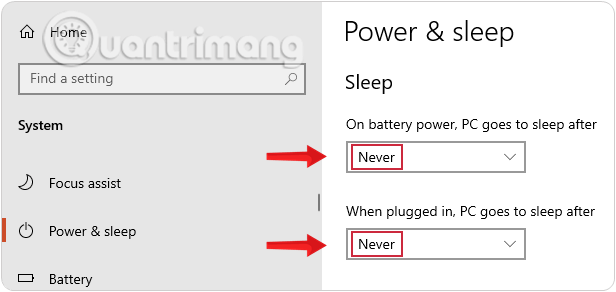
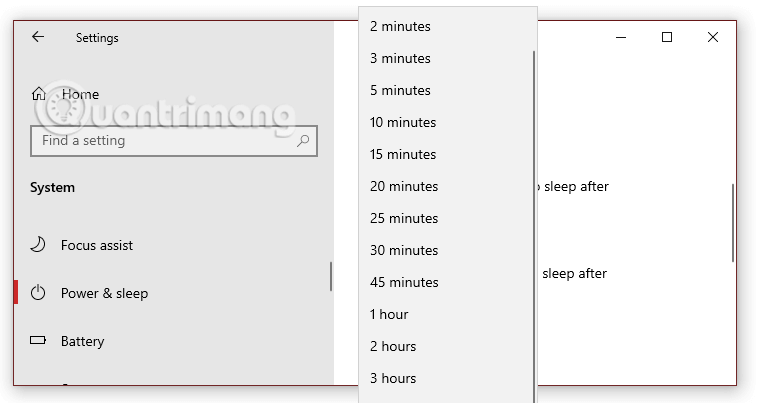
Or if you want change the time it takes to put the device into Sleep stateWe just need to choose the amount of time the list provides.
Note: If you’re using a PC, you’ll only see the option with Plugged in. And if you use a laptop, the new computer shows both full modes as instructed by Quantum.com. You should choose shorter times when using the battery and longer times when using the power source.
Method 2: Customize Sleep mode in Power Options
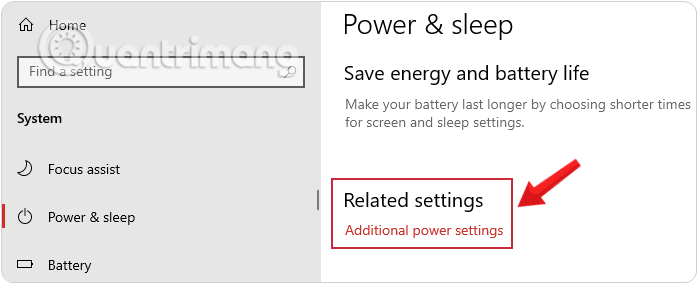
Step 1: Still in the view on the right part Power & SleepYou drag down the item Related Setting choose Additional Power Settings as shown below.
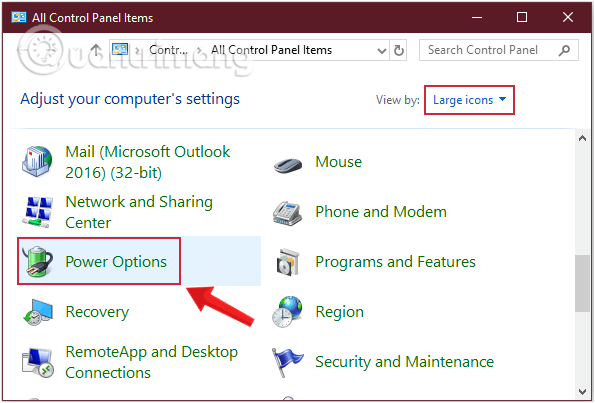
Or alternatively you can open it Power Options very easy words Control Panel.
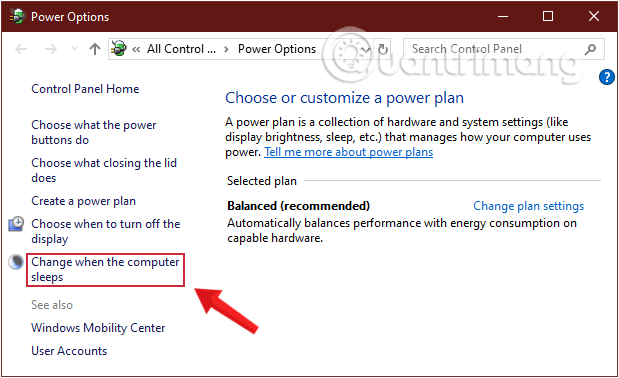
Step 2: In the interface Power Options is opened, click on settings Change when the computer sleeps in the list on the left side of the interface.
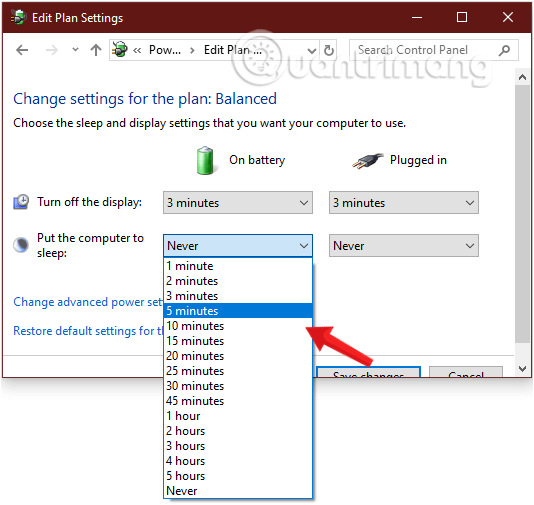
Step 3: At interface Edit plan settings, in item Put the computer to sleep has been set in default mode Never at 2 columns On battery (With battery) and Plugged in (When plugged in).
To adjust the amount of time that your Windows computer goes into sleep mode, click the arrow icon, then choose time in the provided list.
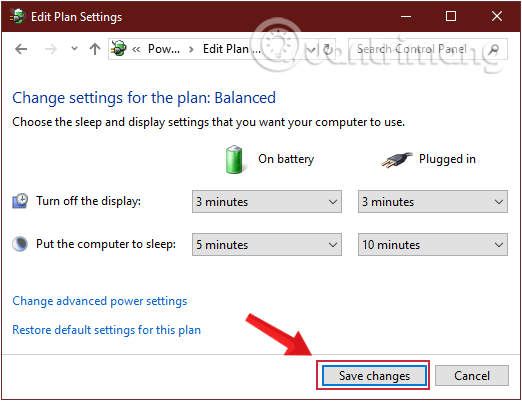
Step 4: The last action is to press the button Save changes to save any new changes to Windows 10 Sleep mode.
Method 3: Use a shortcut
Use the Power User menu shortcut
The shortcut that puts the computer into the most trusted Sleep state in Windows 10 is not a real shortcut, instead, it’s a series of quick keys. However, since this shortcut works without any setup and works in every application, this is the best method in most cases.
Press Win+X to open the menu Power User. Press U then use the key S to put the machine into state Sleep or H to put the device in hibernation.
Sleep mode shortcut Alt + F4
As you may already know, press Alt+F4 will close the current window, just like clicking X in the upper right corner. However, if you do not have the window currently selected, you can use it Alt+F4 as a shortcut for Sleep mode in Windows 10.
Please press Win+D to display the desktop. From there, press Alt+F4 and you will open the dialog box Shut Down Windows.
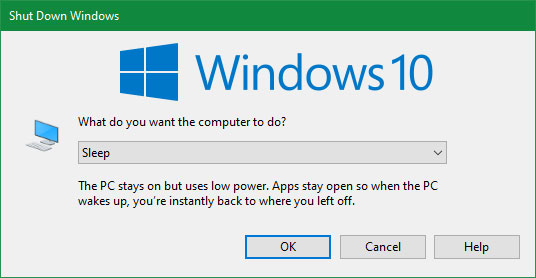
Depending on the system, you will likely see Shut down or Sleep in the drop-down box by default. If you are satisfied with this, just press Enter to confirm the selection. On the other hand, use the arrow keys to switch to other options, then press Enter when you are ready.
Create your own shortcut
While there is a built-in Sleep shortcut for Windows 10, you can create your own shortcut pretty easily.
Create a new shortcut
To do this, start by right-clicking on an empty spot on the screen and selecting New> Shortcut.
To create the Sleep shortcut, enter:
rundll32.exe powrprof.dll,SetSuspendState 0,1,0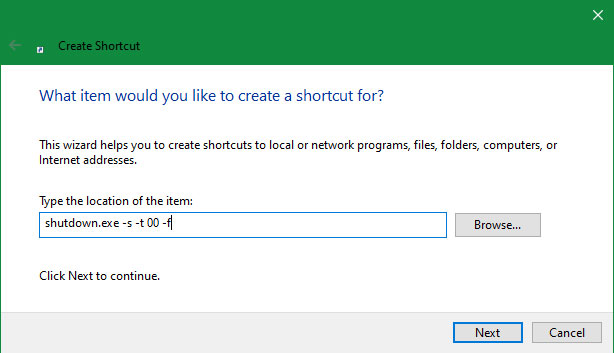
Unfortunately, there’s a little warning with the Sleep shortcuts. If you have hibernated on your computer, this command will cause the computer to sleep instead of hibernate.
After you enter the command, press next, name the shortcut and press Finish.
Assign a shortcut to the command
Now that you have a shortcut to the option you want, you just need to assign it a key combination. To do this, right-click on the new desktop shortcut and select Properties. Select a tab Shortcut at the top and in Shortcut key, enter the key combination you like.
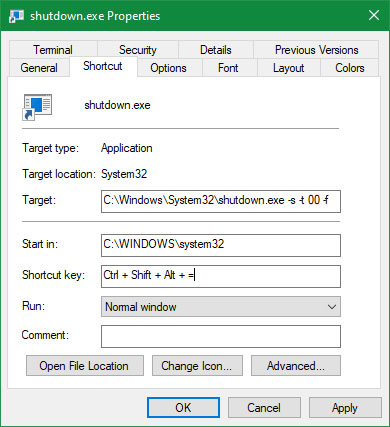
You should choose a key combination that other programs have not used. Also, make sure that the keyboard shortcut you set up isn’t easy to touch accidentally, as you won’t want your system to suddenly shut down while working.
When done, press OK and the shortcut will be activated. If you change your mind later, just delete the shortcut file.
Adjusting the Windows 10 Sleep mode helps the computer save energy using the battery, while the computer is still working, but we are not sitting in front of the screen. Besides, users can also disable Windows 10 Sleep mode if desired.
Wish you all success!
See more:
Source link: How to enable or disable Sleep in Windows 10
– https://techtipsnreview.com/


