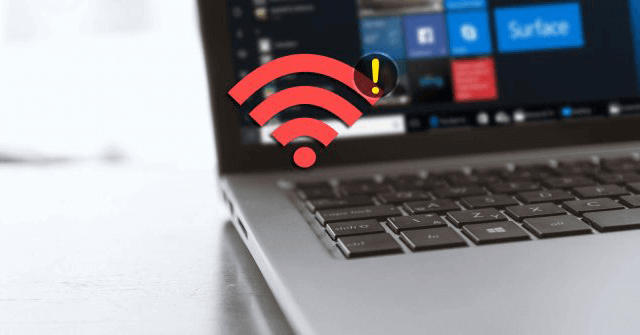
Laptop not connecting to WiFi can be caused by many reasons, and therefore there are many ways to fix the problem. If the laptop cannot access the WiFi you can try the following ways to fix this situation.
1. Reboot the laptop or restart the WiFi router
The first solution that make tech easier is to restart your laptop or WiFi router (router). You should always think of this method first when you encounter errors on your computer, because it solves many small errors. The reason is because sometimes the computer works for a long time causing file errors, or software conflicts while using it.
The WiFi router is similar, maybe because you use it for a long time leading to minor glitches. Disconnect the power for a few minutes and then plug it back in to see if that fixes it.
If that doesn’t help then follow up for the next solution.
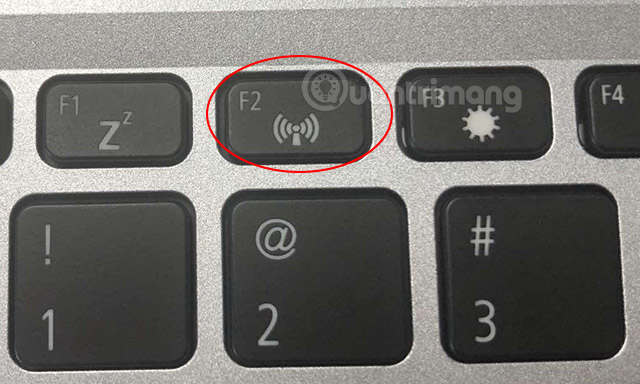
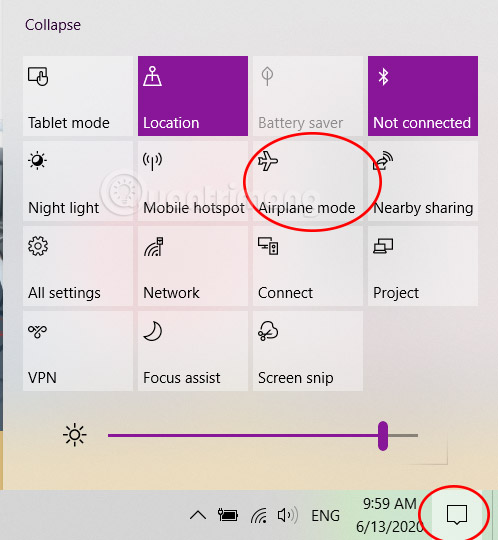
2. Check if WiFi is turned off, is airplane mode on?
On laptops often have a quick WiFi toggle button, usually included with the Fn keys, you may accidentally press the wrong button, making the laptop unable to access the WiFi. Please press the WiFi on / off button on the keyboard and see if the laptop has caught the WiFi?
On Windows 10, you can enable airplane mode to quickly disconnect all connections when needed or when using it on a plane. Try to check if airplane mode on your laptop is turned on, by clicking on the notification center, and checking the airplane mode icon.
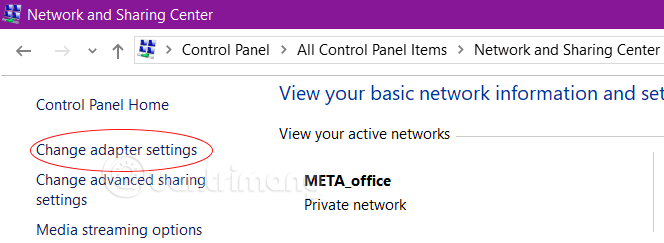
3. Check the network settings in Control Panel
You enter Control Panel > Network and Sharing Center > Change adapter settings > find WiFi networks.
If you find it grayed out, sink in, right-click on it and select Enable to re-enable the WiFi network.
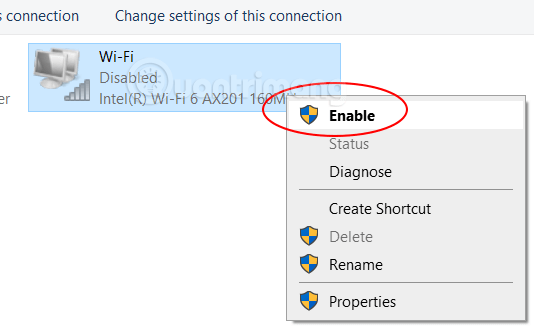
Also, if the WiFi network is red x, you can try right-clicking on it, select Disable, wait a moment, then right-click again and select Enable again, sometimes this can help.
4. Delete the WiFi network and reconnect
This method usually applies when your WiFi connection is exclamation of yellow or limited.
Step 1: Click on the WiFi icon in the lower right corner of the Taskbar to open the list of WiFi networks.
Step 2: From the list above, specify the WiFi you want to remove and right click on. In the menu that appears, click to select Forget to forget / delete this network.
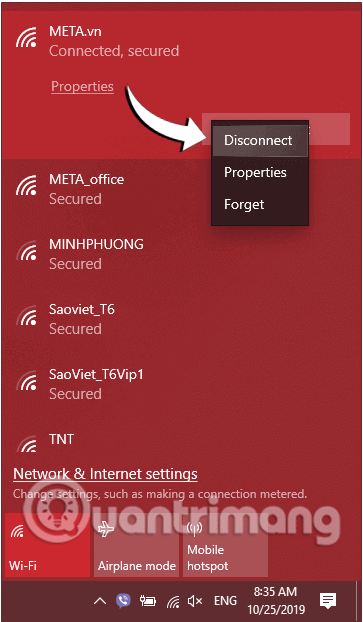
Step 3: That WiFi will be immediately removed from your computer. Now click on the WiFi icon and reconnect.
Check if there are errors or not!
5. Reinstall Wireless Network Adapter Driver
Reinstalling the network driver will clear the registry and reset all existing wireless configurations, which can help the laptop access the Internet over WiFi again. Here’s how to reinstall your Wireless Network Adapter Driver
To do this, you will need to use Windows Device Manager to uninstall the wireless adapter before installing the driver.
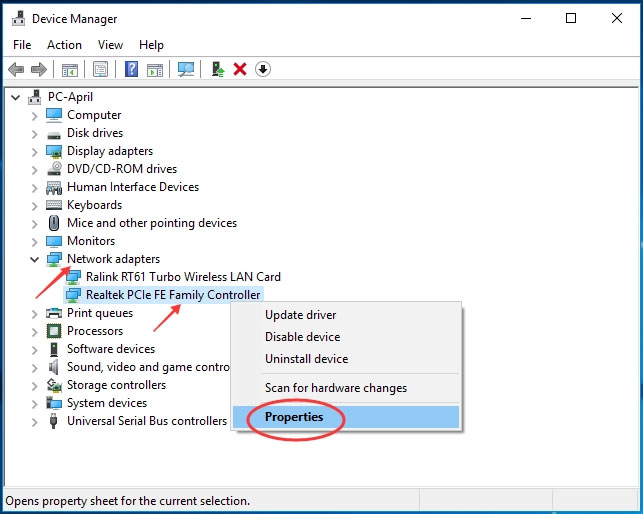
1. Click Start, then enter Device Manager into the search box.
2. Double-click Device Manager to choose it.
3. Double-click Network Adapters
4. If you have multiple adapters, a drop-down menu will appear listing all of them. Right click WiFi Adapter and choose Uninstall.
5. Monitor Confirm Device Uninstall will appear. Press OK. Wait for the uninstall to complete. Make sure that the name of the wireless adapter is no longer displayed in the list Network Adapters again.
6. On the window Device Manager, click Action. You can find the tab Action at the top between the tabs File and View. Choose Scan For Hardware Changes from the drop-down menu.
7. Computer will reinstall WiFi adapter and you should be able to see its name again.
8. Close all windows and restart the computer.
9. Try connecting to WiFi again. If the problem persists, read on.
6. Refresh the IP address
Some cases that cause the failure to connect to WiFi on a laptop is due to your device’s IP address conflict. In this case, you should refresh the IP, change to a different IP range to fix the error. Here’s how to do it:
Step 1: Open Command Prompt, first enter cmd Seach Start Menu or on the Taskbar, then right-click and select Command Prompt Run as administrator.
If you have Windows 10 with the latest versions then the button Run as administrator will appear as soon as you search Command Prompt.
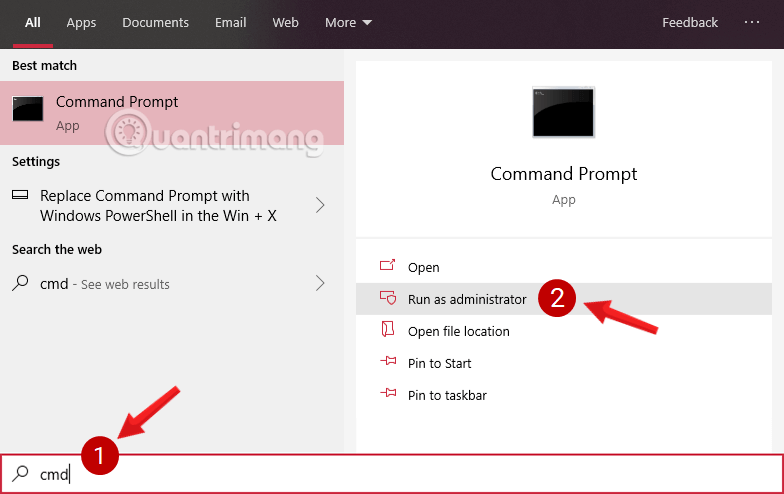
Click to select Yes if the message User Account Control appears on the screen.
Step 2: On the window Command Prompt, Enter the following command and press Enter to remove the old IP that is failing:
ipconfig /release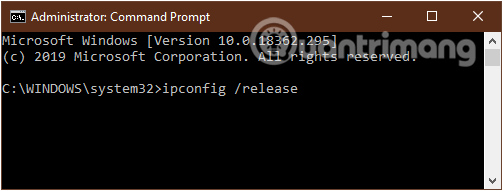
Step 3: Type the following command to the computer to receive a new IP range:
ipconfig /renewStep 4: Restart your computer for the system to take note of the changes.
7. Assign a static IP address
It is still a problem due to IP conflict, which has the same address as another device on the LAN, this will cause either the machine to lose the network or both of them are lost. So try assigning a static IP address to your network as well.
Make tech easier than ever to change a static IP for your computer, you can refer to it here: How to assign a static IP address in Windows 7, 8, 10, XP or Vista
8. Turn off battery saver mode
Battery saving mode on the computer has also been found to be one of the reasons why the computer fails to connect to WiFi on the laptop. So, you try to turn off this mode to see if it fixes it.
Step 1: Open a command prompt Tremor by pressing the key combination Windows+R.
Step 2: Here you enter the following command and then click OK.
ncpa.cpl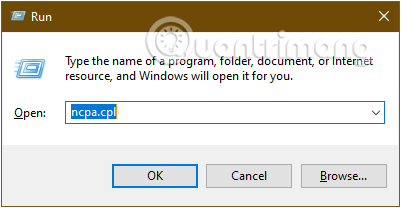
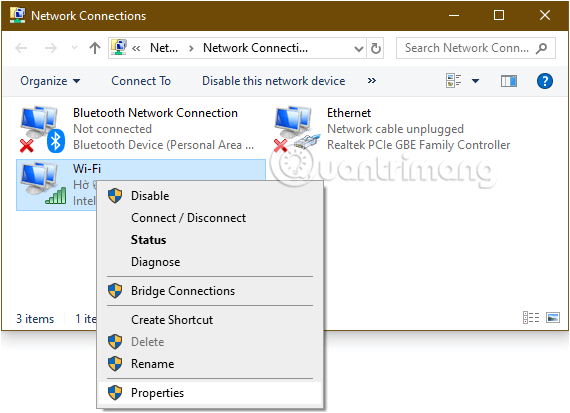
Step 3: A window appears on the screen Network Connection. Here you right click on the WiFi in use, select the option Properties.
Step 4: At the line Client for Microsoft Networks, you press select Configure …
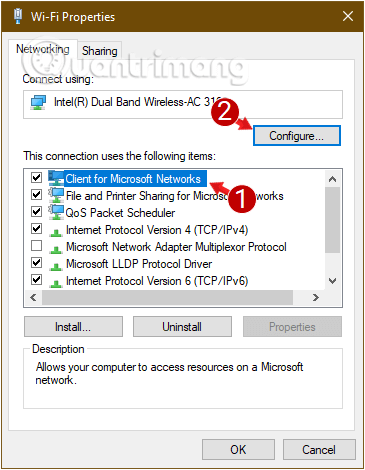
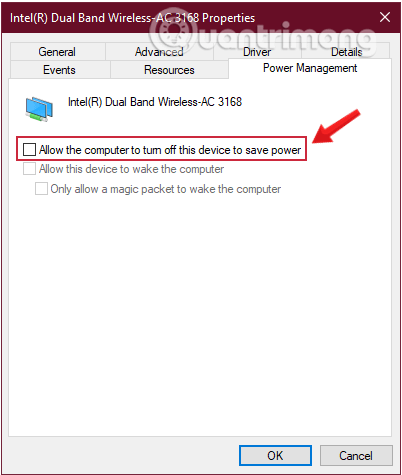
Switch to tab Power Management and make sure to uncheck the item Allow the computer to turn off this device to save power.
Step 5: Click to select OK and close Wi-Fi Properties.
If the WiFi still disconnects, go to the solution below.
9. Scan the entire computer for viruses
This is considered the most common reason for not being able to connect to a WiFi network on a laptop. The main reason is that you visit websites that contain malicious code and use unsafe crack software, but do not have an anti-virus program to protect your computer.
You can fix this by using a trusted antivirus program to scan your entire system.
Refer to the list of the best anti-virus software at: The best antivirus software for Windows today
10. Adjust WiFi location
In the living room, the WiFi signal is stretched but moving to another room, signal loss is a fairly common phenomenon. For many reasons, cordless phones and other devices using the 2.4GHz band can cause interference.
In addition, the glass mirrors in the room were also a cause. Therefore, check the objects next to the computer, check the antenna outside of the router, and also check for firmware updates for the router.
11. Reinstall Windows on the computer
If the above methods cannot fix the error, you may have to reinstall Windows from scratch to fix this problem. Rest assured this solution will not lose any data on your computer. However, to be sure, you should still copy the contents of the folders and move to an external hard drive.
This process will reset the entire PC settings, it’s like a factory reset except keeping your files.
You refer to how to do here offline: Reset Windows 10 to its original state
It may also be due to some browsers crashing, so try all the browsers on your computer. Defective WiFi card is also a cause of the computer losing the network. At that time, you bring your laptop out to the store for repair and replacement.
Above are some ways to fix laptop not connecting to WiFi. If there is a more effective way, please share with make techin.com by commenting below the article.
Good luck!
Source link: How to fix laptop not connecting to WiFi
– https://techtipsnreview.com/


