Media test failure check cable not rare. Here are how to fix pxe-e61 media test failure check cable The easiest.
PXE-E61 errors are usually related to the Preboot eXecution Environment (PXE) supported by some motherboards. PXE is a special boot mode that allows the computer to search for and load a bootable operating system over the network instead of from the local hard drive.
PXE-E61 usually occurs when a user accidentally boots up a network device that doesn’t actually exist, arises due to misconfiguration in the BIOS but can also be caused by a hard drive failure.
These are common errors related to PXE-E61
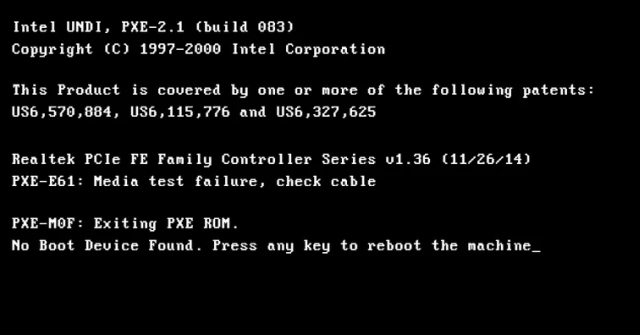
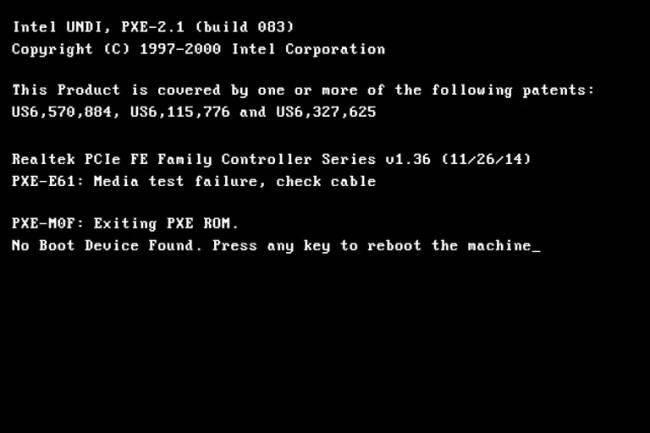
PXE-E61: Media test failure, cable check
PXE-M0F: Exiting Intel PXE ROM.
PXE-M0F: Exiting Intel Boot Agent.
No Boot Device Found. Press any key to reboot the machine.
Errors PXE-E61 usually appears in white text on a black background before the computer starts and always contains one of the above contents.
How to fix error PXE-E61
1. Change the boot order in the BIOS to boot from the hard drive instead of the network. This action will force the BIOS to find the operating system installed on the local hard drive. This is how most computers are set up.
2. Access BIOS and make sure it can detect the hard drive. You can see the error PXE-E61 if the computer boots a hard drive fails or fails to connect.
Find the menu Boot, make sure to see the Boot Drive Order screen showing the hard drive and no “No Boot Drive” message. If the BIOS does not see the hard drive, turn off the computer, open the PC tree, check that the hard drive cable is connected correctly.
3. If you’re trying to boot from a USB device such as an external drive, make sure it’s actually bootable. Otherwise, the BIOS will find another alternative device and will use the network, which leads to the PXE-E61 error.
You can use a program like Rufus to create a PC bootable USB device. Also, double check that the boot order is configured to boot from USB, the device is connected and the USB port is working.
4. Go to BIOS, turn off PXE if you don’t want to use it. That option is called Boot to Network or Ethernet and is always in the Boot menu.
5. Update network card driver to fix Media test failure, check cable. An old, missing, or damaged driver can prevent the computer from accessing the network, causing PXE to malfunction.

Note: Since it’s nearly impossible to start your computer to update drivers, try opening Windows in Safe Mode or changing the boot order to use the internal hard drive first. After that, update the network card driver, try to boot by network one more time.
6. Clear CMOS to reset BIOS. If the PXE-E61 error is caused by the wrong BIOS setting, reset the BIOS to the default option and the problem will be fixed.
How to clear CMOS using Factory Defaults
The easiest way to clear CMOS is to go to the BIOS setup utility and select Reset BIOS Settings to publisher default levels.
The exact location of this option in the menu located in the motherboard’s BIOS can vary, but look for phrases like reset to default, factory default, clear BIOS, load setup defaults… Every manufacturer has a way to set it. its own name.
Option BIOS Settings usually located at the bottom of the screen or the last position in the BIOS selection list, depending on how it is designed. If you have trouble finding it, get close to the . button Save or Save & Exit because they often appear nearby.
Finally, choose to save this setting and then restart the computer.
Clear CMOS by resetting CMOS battery
Another way to clear CMOS is to reset CMOS battery. Start by making sure the computer is unplugged. If you’re using a laptop or tablet, remove its battery.
- Next, open the computer tree if you are using a desktop PC, or find and open the small CMPS battery panel if you are using a tablet or laptop.
- Finally, remove the CMOS battery for a few minutes, then put it back in. Close the case or battery panel. Then plug in the charger or re-insert the main battery of the computer.
By disconnecting and reconnecting the CMOS battery, you remove the power that saves your computer’s BIOS settings, resetting them to their default state.
Laptops & tablets: The CMOS battery is enclosed inside a special box and connects to the motherboard via a 2-pin white connector.
Desktop: CMOS batteries are not difficult to find on most computer models because they are like normal batteries in toys or watches.
7. If you want to use PXE to start a network device, check that the network card is firmly inserted. Without a stable connection, the PXE will not be able to communicate over the network, causing the PXE-E61 error. At this point, replace the network cable with a new one.
As you can see, how to fix error PXE-E61 not too difficult. You have a lot of options to fix the problem. So, don’t worry too much when you unfortunately receive a notification pxe-e61 media test failure check cable. Stay calm and follow one of the methods above!
Source: How to fix “PXE-E61: Media Test Failure, Check Cable” error
– TechtipsnReview


