
Is your Windows device showing an error “Shell Infrastructure Host has stopped working” are not? In most cases, this problem occurs when running the application on a Windows guest account. But why are you getting this error and how to solve it? Join Quantrimang.com to find the answer through the following article!
1. Log in to Windows with admin rights

For most users, this error usually appears when using a guest account. So a quick fix is to try and log into the system as admin.
If you are already signed in to the guest account, here’s how you can switch to the admin account:
Step 1: Press Ctrl + Alt + Delete to open the window Security Options.
Step 2: Choose Switch User and then follow the on-screen instructions to log in to the Administrator account.
If you’re using someone else’s PC, you can ask them to give you admin access.
2. Create a new guest account
You don’t want to log into the system as admin? If so, you can create a new guest account. And if you decide to delete the problematic guest account, make sure to copy or back up important files first.
If not, here’s how you can create a new guest account on Windows:
Step 1: Navigate to Start menu > PC Settings > Accounts.
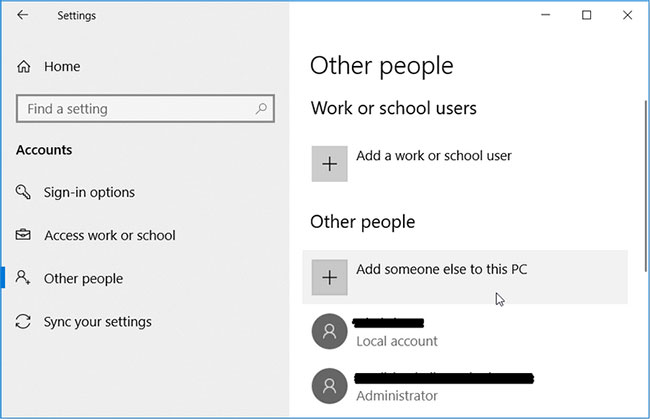
Step 2: Click Other people on the left.
Step 3: Next, click Add someone else to this PC on the right.
In the next window, click I don’t have this person’s sign-in information. Next, follow these steps to complete the account setup:
Step 1: Click Get a new email address and enter details.
Step 2: Create a password, enter your date of birth and select your country of residence.
Step 3: Click next when you’re done and follow the on-screen instructions to complete the process.
3. Reinstall or repair Microsoft Visual C++ programs
PCs depend on the Microsoft Visual C++ runtime library package to function properly. When these packages are missing or damaged, you may encounter various system related problems. In this scenario, repairing or reinstalling the Microsoft Visual C++ programs may resolve this issue.
Let’s see how you can repair Microsoft Visual C++ programs:
Step 1: Press Win + CHEAP to open the dialog box Run.
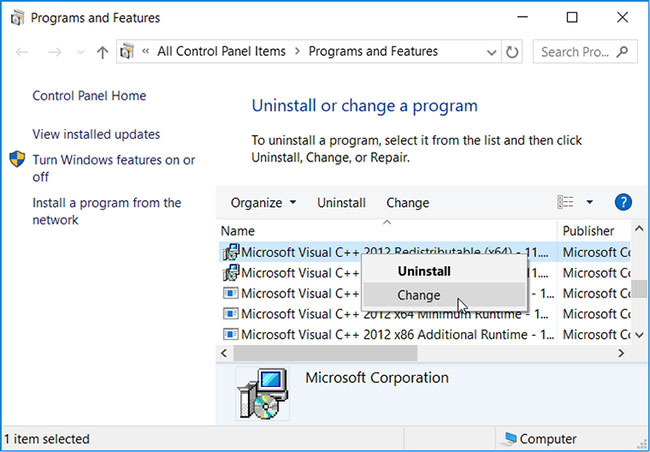
Step 2: Import appwiz.cpl and press Enter to open the window Programs and Features.
Step 3: Right-click each program Microsoft Visual C++ then choose Change.
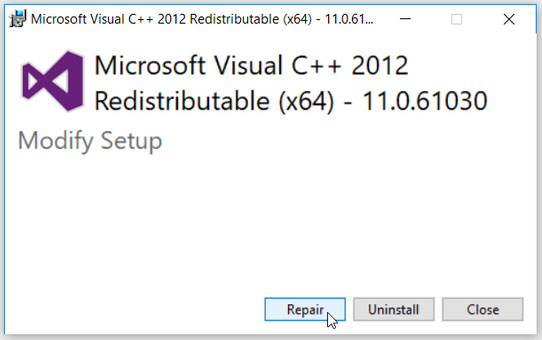
In the next window, click the . button Repair. From there, follow the onscreen instructions and restart your PC when you’re done.
If the problem persists, reinstall the Microsoft Visual C++ program by following these steps:
Step 1: Open the window Programs and Features follow the previous steps.
Step 2: Right click on each Microsoft Visual C++ program and click the . button Uninstall.
Step 3: When you’re done, reinstall the Microsoft Visual C++ programs.
Follow the on-screen instructions to complete the process.
4. Configure boot settings for PC
Shell Infrastructure errors may appear depending on how you have configured your PC’s startup settings. In this case, consider how the Normal Startup and Selective Startup settings can help.
First, configure the Normal Startup settings. This will load all the device drivers and services whenever you restart your PC.
Now, this is how you can configure the Normal Startup settings:
Step 1: Press Win + CHEAP to open the dialog box Run.
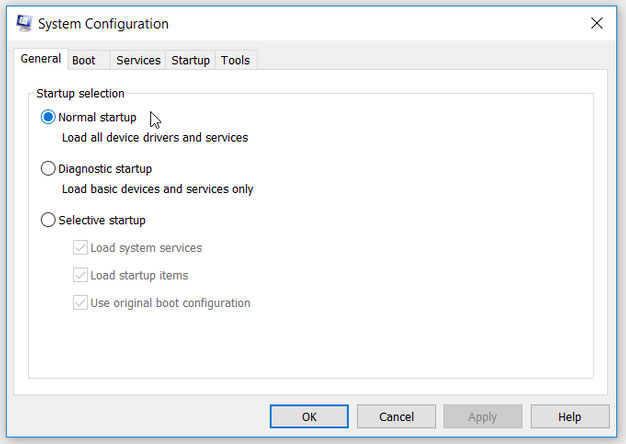
Step 2: Import msconfig and press Enter to open the System Configuration window.
Step 3: Navigate to tab General and choose option Normal Startup.
Step 4: Press Apply > OK.
If not, you can configure the Selective Startup settings. This will allow you to choose the services you want the system to load whenever your PC boots.
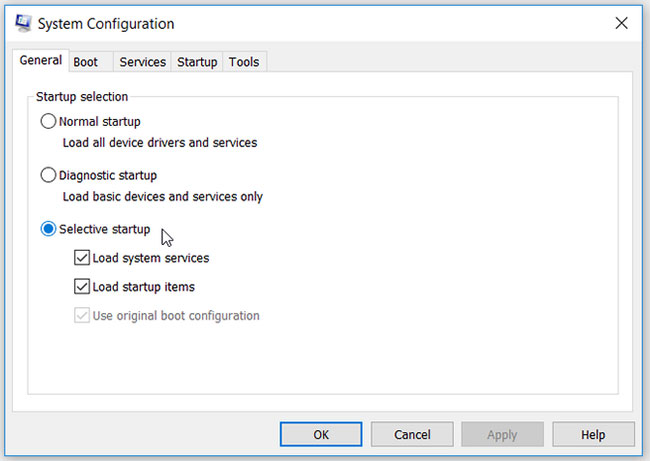
Here’s how you can configure Selective Startup settings:
Step 1: Open the window System Configuration follow the previous steps.
Step 2: Navigate to tab General and choose option Selective Startup.
Step 3: Next, check the boxes Load system services and Load startup items below this option.
Step 4: Click Apply > OK to save these changes. Restart your PC when you’re done.
If the problem persists, here’s what you can do:
Step 1: Open the window System Configuration follow the previous steps.
Step 2: Select option Selective Startup and then check all the boxes below this option.
Step 3: Click Apply > OK.
5. Run the Windows troubleshooters
Windows’ built-in troubleshooter can also help you with this. If this error is caused by a system maintenance issue, the troubleshooter System Maintenance can help. But if the problem is caused by hardware related issues, then you can use the troubleshooter Hardware and Devices.
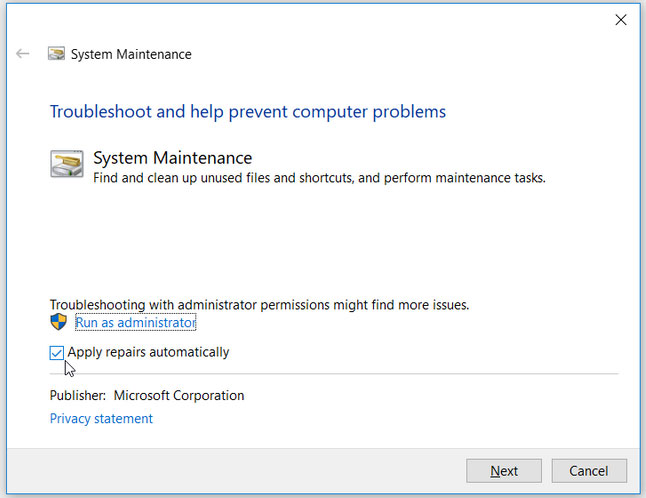
To get started, let’s see how you can run the System Maintenance troubleshooter:
Step 1: Press Win + CHEAP to open the dialog box Run.
Step 2: Import msdt.exe -id MaintenanceDiagnostic and press Enter to open the troubleshooter System Maintenance.
Step 3: Click on the option Advanced and then check the box Apply repairs automatically.
Step 4: Click next and follow the on-screen instructions to complete the process.
If the problem persists, run the Hardware and Devices troubleshooter by following these steps:
Step 1: Navigate to Start menu > PC Settings > Update & Security, then select option Troubleshoot.
Step 2: Click on the troubleshooter Hardware and Devices on the right and press the . button Run the troubleshooter.
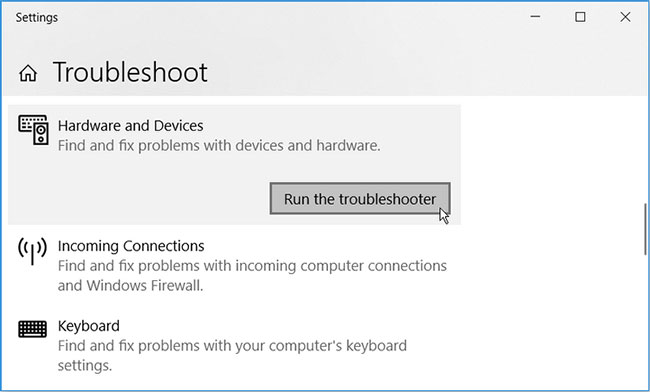
Follow the on-screen instructions, then restart the PC.
In case this problem is caused by corrupt system files, then the System File Scanner (SFC) tool can help. This tool allows you to find and repair all the corrupted files on your PC with a few quick steps.
Good luck fixing the error!
Source link: How to fix “Shell Infrastructure Host Has Stopped Working” error in Windows
– https://techtipsnreview.com/


