
Similar to previous versions of Windows, Windows 11 provides users with a diverse set of font packages (fonts) pre-installed on the system, ensuring to fully serve basic needs. However, in many cases, the nature of your work may make you want to install more fonts. Or vice versa, sometimes you may also want to get rid of problematic or rarely used fonts. Find out how to do it right here.
How to install fonts on Windows 11
To install a new font in Windows 11, you will need a compatible font file. You can download fonts for free from the web, copy them from another system, or buy fonts online…it depends on your needs. Just note that Windows 11 supports TrueType (.ttf), OpenType (.otf), TrueType Collection (.ttc) or PostScript Type 1 (.pfb + .pfm) formats.
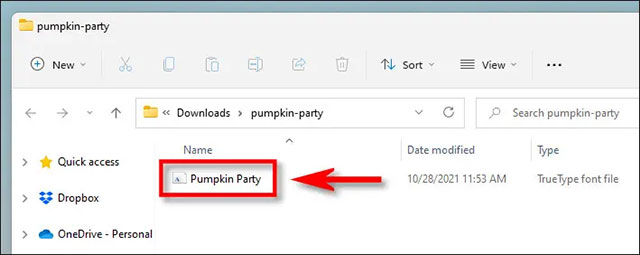
Next, open File Explorer and find the font file you want to install. Double-click the font file to open it.
Windows will open the file in a special font preview window. Click “Install” to install the font. This will automatically move the font file to the Windows system fonts folder (C:WindowsFonts by default by default).
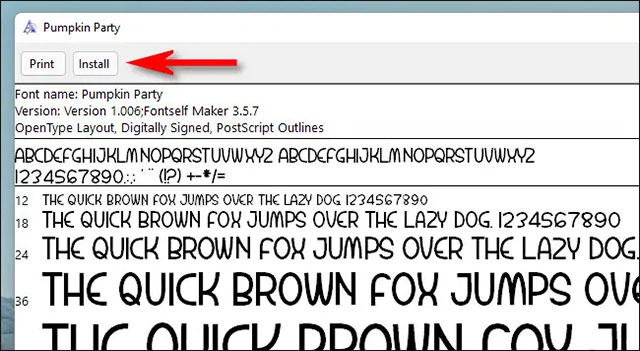
Accomplished! Your new font is now installed and available as an option in Microsoft Word and other input-enabled applications. Repeat this process for the other fonts you want to install.
How to uninstall fonts on Windows 11
Uninstalling fonts in Windows 11 is as simple as installing it.
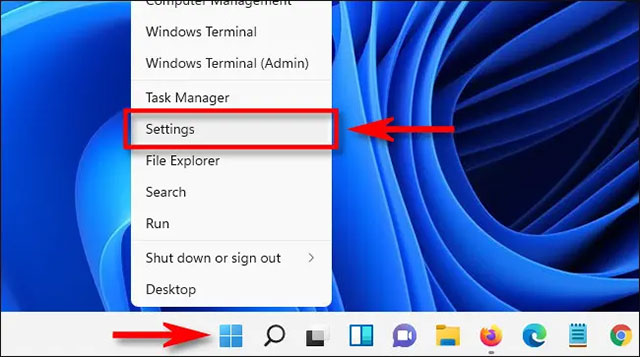
First, open the Settings app by pressing the key combination Windows + i. Or you can also right-click the Start button and select “Settings” in the list that appears.
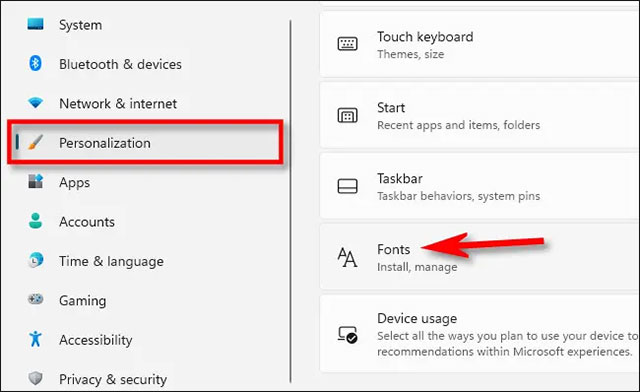
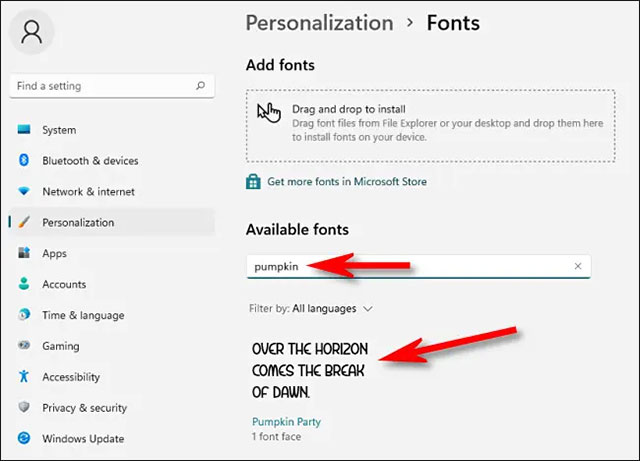
In the Settings interface, click on the item “Personalization” in the list on the left, then click “Fonts“.
In the font settings page you will see a list of all the fonts that are installed on the system under the “Available Fonts“. To quickly locate the font you want to uninstall (if you know its name), click the “Type here to search box, then enter the name of the font. Click on it in the corresponding results returned.
On that font’s options page, click the “Uninstall“.
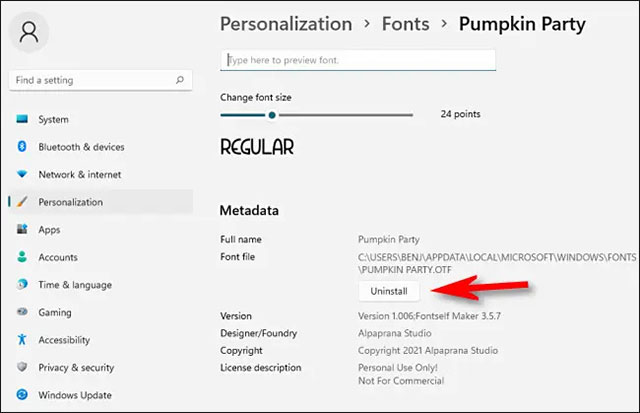
Windows will immediately remove the font from the system. If you need to remove more fonts, just repeat the above process. When done, close Settings.
Source link: How to install (and uninstall) fonts on Windows 11
– https://techtipsnreview.com/


