Aurora application will create aurora wallpaper on new Windows 10 with aurora colors for you to choose with the color you want. In addition, the application also has the option to adjust the speed of the aurora when you install the wallpaper on your computer. If you like the aurora pattern with beautiful colors, you can choose the Aurora desktop application. The following article will guide you to use the Aurora Windows 10 wallpaper application.
Instructions to install aurora wallpaper Windows 10
Step 1:
You install the Aurora application for Windows 10 according to the link below and then install it as usual on your computer.
Step 2:
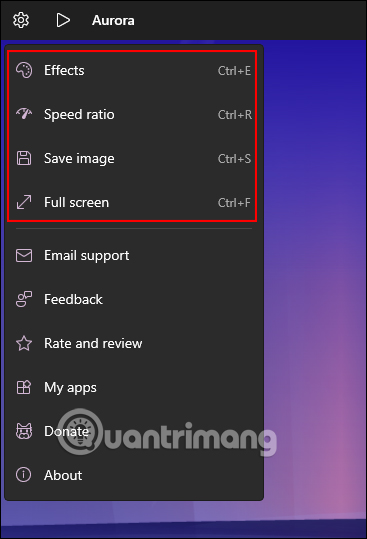
Displays the application interface with available purple aurora images. To change the color of the aurora as well as other aurora effects, click cog gear icon.

Step 3:
You will now see options to change the aurora to your liking.
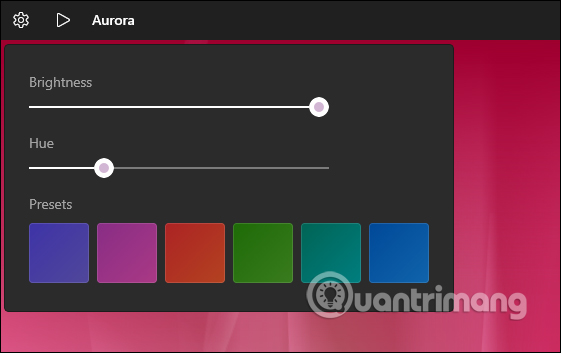
- Press Effects (Ctrl + E) to choose a new color and brightness adjustment for the image.
- Press Speed ratio (Ctrl + R) to adjust the speed of the aurora effect.
- Click Save image (Ctrl + S) to save the image in PNG format.
In the color adjustment section for aurora photochromic, there is a section to adjust the light and adjust the tone you want to use. The speed adjustment part can speed up or slow down the polar effect.
After the image is finished adjusting, download it to set it as a wallpaper. The image is saved as a still image, but the aurora animation will be captured. When hoping in the near future, the manufacturer will allow you to download images as GIFs or videos for you to set the video as your computer wallpaper.
Source link: How to install aurora Windows 10 wallpaper on Aurora
– https://techtipsnreview.com/


