Complete the following steps to install Deep Freeze Standard.
Note: All background utilities and anti-virus software should be disabled and all applications should be closed before installation. These programs may interfere with the installation process, possibly resulting in Deep Freeze not working correctly.
How to install Deep Freeze Standard?
1. Download Deep Freeze Standard and double click DFStd.exe to start the installation process. The following screen will appear:

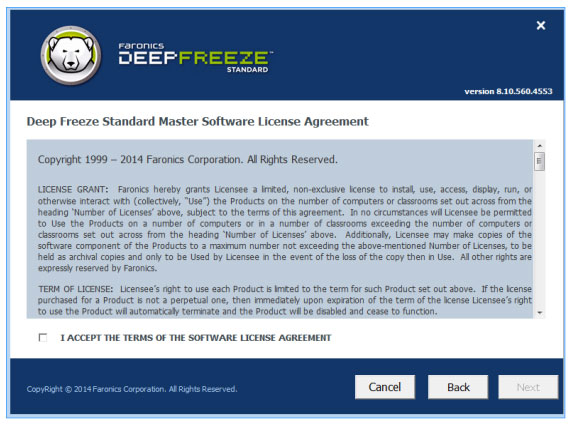
2. Click Next. Choose I agree to the terms in the License Agreement. Click next once again.
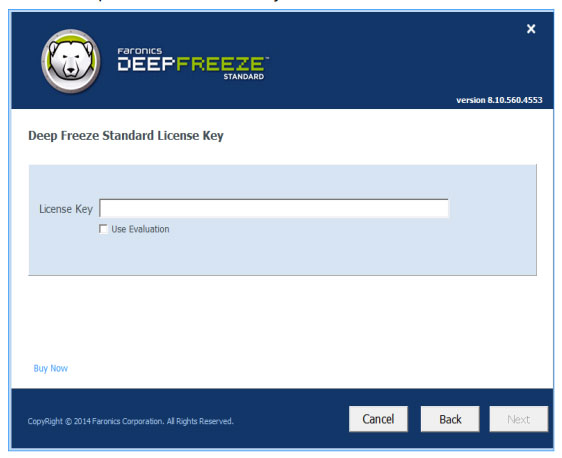
3. Enter the License Key or select the checkbox Use Evaluation to install Deep Freeze in Evaluation mode. The evaluation period ends after 30 days from the date of installation. Contact Faronics to purchase a license key. Click Next.
4. Select the drives from the displayed list. Click Next.
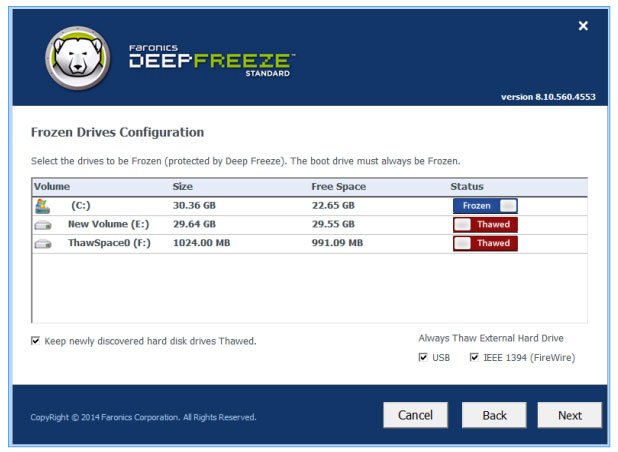
- Keep newly discovered hard disk drives Thawed – Select this option if you want to keep newly discovered hard drives in state Thawed. Changes made to newly discovered hard drives will be kept.
- Always Thaw External Hard Drives – This option has two checkboxes, USB and IEEE 1394 (FireWire) and both checkboxes are checked by default. This ensures that the IEEE 1394 (FireWire) or USB hard drive is always in state Thawed. If the USB and/or IEEE 1394 (FireWire) hard drive is erased, the drive will be in state Frozen or Thawed according to the character each drive is inserted into the screen Frozen Drives. Network and removable drives (floppy disks, memory keys, CD-RWs, etc.) are not affected by Deep Freeze and therefore cannot be frozen.
Note: When installing Deep Freeze, the option Always Thaw External Hard Drives (USB and IEEE 1394/FireWire) is selected by default.
5. ThawSpace is a virtual partition that can be used to store programs, save files or make permanent changes. All files stored in ThawSpace are retained after reboot, even if the computer freezes. ThawSpace can be created on a volume configured in Frozen or Thawed. Select check box Create ThawSpace.

To create a ThawSpace or multiple ThawSpaces, complete the following steps:
- Choose Drive Letter. The next available letter is automatically used if the selected drive letter already exists on the computer when Deep Freeze is installed. Drive Letter must not be the same as Drive Host.
- Import Size. This is the size of ThawSpace. The maximum size is 1024GB and the minimum size is 16MB.
- If you choose a size smaller than 16MB, ThawSpace will be set to 16MB.
- If you choose a size larger than 1024GB (1TB), ThawSpace is set to 1024GB (1TB).
- Select ThawSpace storage in MB or GB.
- Choose Host Drive.
- Host Drive is the drive where ThawSpace was created.
- The memory required for ThawSpace is used from the total available memory on Host Drive.
Note: When installing Deep Freeze, existing ThawSpaces are retained by default.
- Choose Visible or Hidden from the drop-down menu Visibility.
- If you choose Visible, drive will show up in Windows Explorer.
- If you choose Hidden, drive will not show up in Windows Explorer.
- However, the hidden drive can be accessed by entering the internal drive letter Start > Run, Windows Explorer or Windows Command Line interface.
6. Click Install to start the installation.
The computer restarts as soon as the installation is complete.
Hope you are succesful.
Source link: How to install Deep Freeze
– https://techtipsnreview.com/


