All Exchange Server admirers and those interested are aware of the latest version of Exchange Server i.e. Exchange 2019. Its advanced features and security measures are attracting Exchange users looking. change. This article will guide you through the manual process for installing Exchange Server 2019.
Manual installation of Exchange Server 2019
Several requirements need to be met by an Exchange user or administrator before starting the Exchange Server 2019 installation process. The main prerequisites include:
Hardware requirements
- 64-bit Intel processor (EM64T), 64-bit AMD processor
- 30GB minimum free disk space
- 128GB minimum storage (for Mailbox), 64GB (for Edge Transport)
- NTFS file system
- Screen resolution of 1024 x 768
Software requirement
Required operating system
- Mailbox and Exchange Transport: Windows Server 2019 Standard / Data Center
- Management Tools: Windows 10 (64-bit) or Windows Server 2019 Standard / Data Center
Requires Outlook Client
- Outlook 2013 / Outlook 2016 / Outlook 2016 for Mac / Outlook 2019 / Outlook (Mac) for Office 365
Requirements for network & directory servers
- Active Directory Forests: Windows Server 2012 R2 or later versions
- Active Directory Site with a Writable Domain Controller that cannot be deleted
- Domain Controller: Windows Server 2019 Standard / Windows Server 2016
- Standard / Windows Server 2012 R2 Standard
- DNS Namespace: Contiguous / Non-Contiguous / Disjoint / Single label domain
- IPv6 Support: Requires both IPv4 and IPv6
When all of the above requirements have been met, the Exchange administrator can continue to prepare the Active Directory.
For small organizations, it is enough to move to the Exchange setup stage as a member of the Schema Admin as well as the Enterprise Admin security groups.
But for larger organizations with multiple mailboxes, an Active Directory environment needs to be prepared before going through the Exchange setup process.
Prepare the Active Directory environment for Exchange 2019
1. First install the .NET framework (4.7.2 or 4.7.1), Visual C ++ Redistributable Packages for Visual Studio and the Unified Communications Managed API on your Exchange system.
2. After all of the above software requirements are installed, reboot the system.
3. Launch Windows PowerShell (as admin). Here, run the command as shown below.
Install-WindowsFeature RSAT-ADDS4. The next step is to run another command in Windows PowerShell to install the Server requirements.
Install-WindowsFeature NET-Framework-45-Features, RPC-over-HTTP-proxy, RSAT-Clustering, RSAT-Clustering-CmdInterface, RSAT-Clustering-Mgmt, RSAT-Clustering-PowerShell, Web-Mgmt-Console, WAS-Process-Model, Web-Asp-Net45, Web-Basic-Auth, Web-Client-Auth, Web-Digest-Auth, Web-Dir-Browsing, Web-Dyn-Compression, Web-Http-Errors, Web-Http-Logging, Web-Http-Redirect, Web-Http-Tracing, Web-ISAPI-Ext, Web-ISAPI-Filter, Web-Lgcy-Mgmt-Console, Web-Metabase, Web-Mgmt-Console, Web-Mgmt-Service, Web-Net-Ext45, Web-Request-Monitor, Web-Server, Web-Stat-Compression, Web-Static-Content, Web-Windows-Auth, Web-WMI, Windows-Identity-Foundation, RSAT-ADDS5. Now mount Exchange Server 2019 Preview Installation Media on the system.
6. Enter cmd into the box Search, right click Command Prompt and choose the option Run as administrator. On the window Command Prompt opened, run the following command:
Setup.exe /PrepareSchema /IAcceptExchangeServerLicenseTerms7. Next, run this last command to prepare the domain:
Setup.exe /PrepareAllDomains /IAcceptExchangeServerLicenseTerms8. You have successfully prepared an Active Directory environment (Schema and Domain) to install Exchange Server 2019.
Now, you need to move on to setting up Exchange Server with the application setup on the Exchange system.
Exchange Server 2019 installation and setup process
Follow these steps to complete the Exchange 2019 setup.
1. Enter Setup.exe, double click on it to start the installation process.
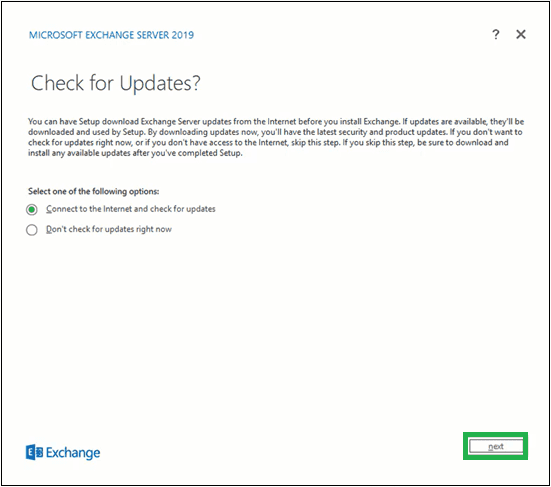
2. Enter the window Check for updates? Next, choose one of the options – Connect to the Internet and check for updates and Don’t check for updates right now according to your needs and click Next.
3. Next, the process of copying the Exchange files required to install Exchange Server will begin. Let’s see the process!
4. Screen Initializing Setup will be displayed next.
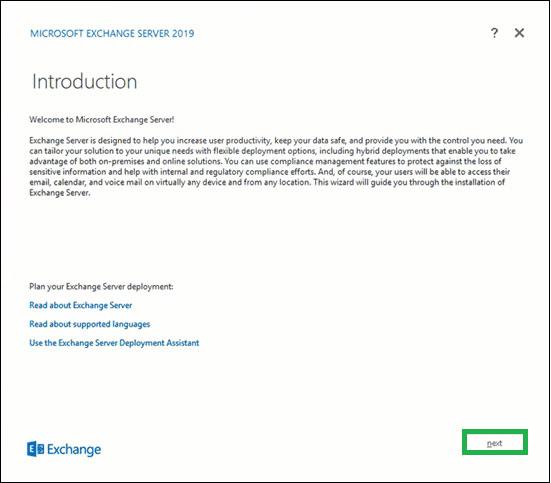
5. You should now see the Exchange Server 2019 intro page. Read this brief introduction. You can click on the links provided for more information. Press next to continue.
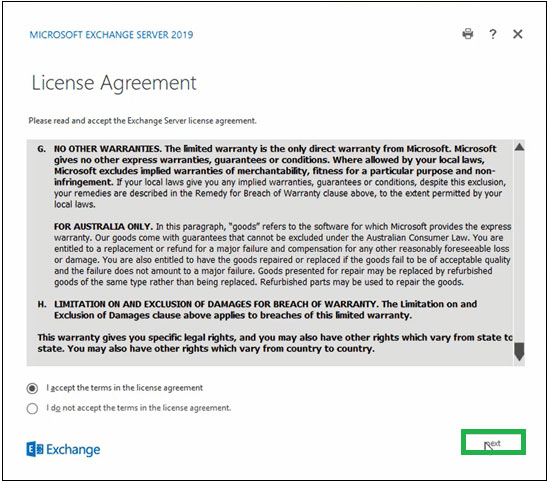
6. On the page License Agreement, read all the instructions, select the option to accept the terms in the license agreement and click Next.
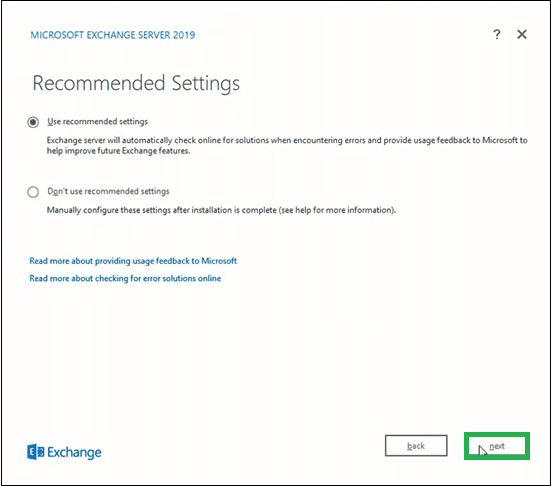
7. On the page Recommendation Settings, choose the option Use recommendation settings and click Next.
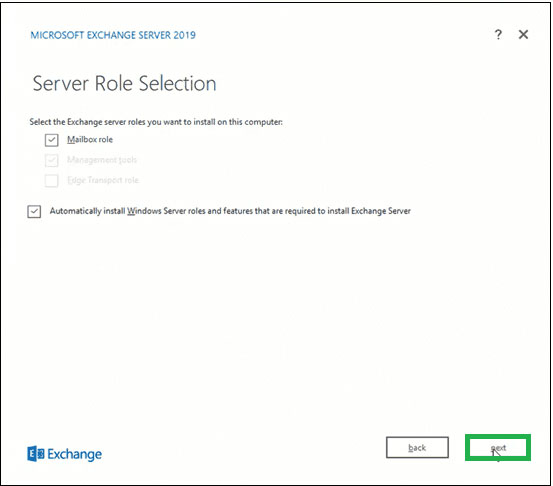
8. Here, select the option Mailbox role in section Exchange Server roles and select the checkbox Automatically install Windows Server roles and features that are required to install Exchange Server. Press Next.
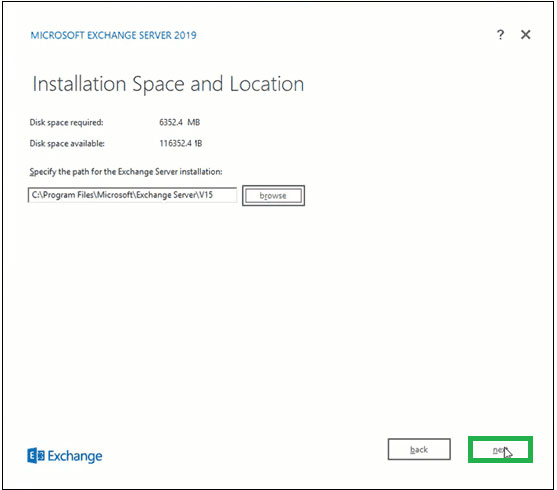
9. Click Browse to specify the path for the Exchange Server installation or leave it at the default selected path. Press Next.
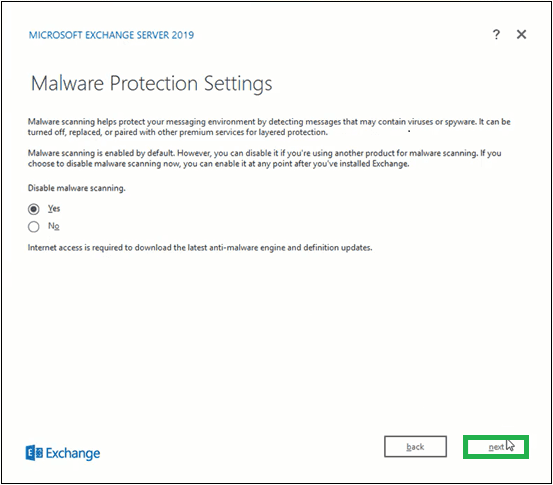
10. For Malware Protection Settings, please select the option Yes or No (to turn off malware scanning) and click Next.
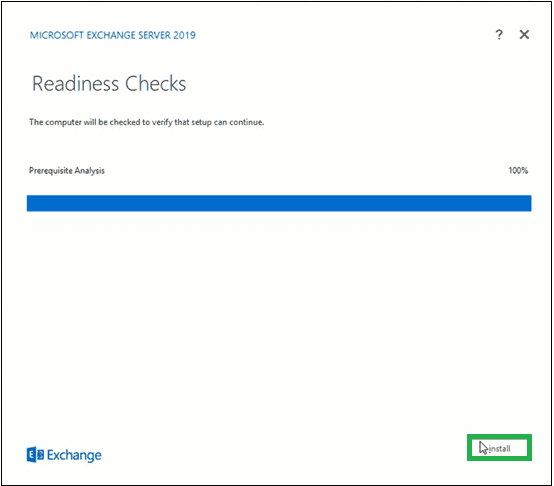
11. Wait for the process Readiness Checks complete to verify the setup and then click Install.
twelfth. Setup Progress will start copying Exchange files.
13. Once the setup is complete, it will display the page Setup Completed.
To start Exchange Server immediately, select the check box Launch Exchange Administration Center after Finishing Exchange setup. Click Finish.
Exchange Server 2019 has been successfully installed on your system. By running these two commands in the Exchange Management Shell, you will get complete information about your newly installed Exchange Server.
Get-ExchangeServer
Get-ExchangeServer -Identity MailboxName | Format-List
An Exchange 2019 administrator can also log in to the Exchange Admin Center to confirm a successful Exchange Server installation.
Note: Exchange administrators are required to follow the following setup for Exchange Server, such as providing an Exchange product key, installing Exchange management tools on client computers, signing up for Edge, configuring security certificates, etc. ..
Source link: How to install Exchange Server 2019
– https://techtipsnreview.com/


