If you are really security conscious and don’t want to spend money on expensive software, then Qubes OS is the option that will cover all your security concerns.
Qubes, as an operating system, works in isolation. It creates isolated stacks, all of them based on Xen-based virtualization technology.
This helps create and manage “qubes” (isolated stacks). Each individual qube limits the interactions between software and hardware, to advance the concept of secure delivery.
This tutorial will show you how to install the latest version of Qubes OS on Oracle VirtualBox.
Prerequisites for installing Qubes OS
You will need Oracle VirtualBox to create a virtual machine. If you don’t have VirtualBox installed on your system, you can download the latest version from the official website.
Another important prerequisite is the Qubes OS installation image. Access qubes-os.org and download the latest ISO version to continue.
How to install Qubes OS on VirtualBox
Step 1: Create a new virtual machine for Qubes OS
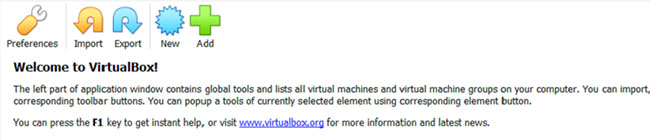
Once you’ve downloaded the Qubes ISO image, it’s time to launch VirtualBox and start setting up a new virtual machine.
In VirtualBox you need to click on the option new to display configuration options. This step allows you to start loading the functionality for your new virtual environment.
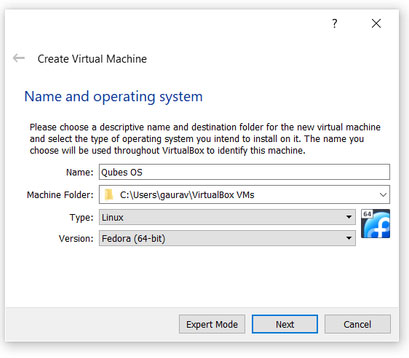
In the following screen, enter the name of your virtual machine. For convenience, it’s best to keep a name related to the distribution you’re installing.
If optional Type is not automatically populated in Linux, you can select this option manually from the drop-down menu. Also, choose Fedora (64-bit) in category Version, as Qubes OS is a distribution based on Fedora.
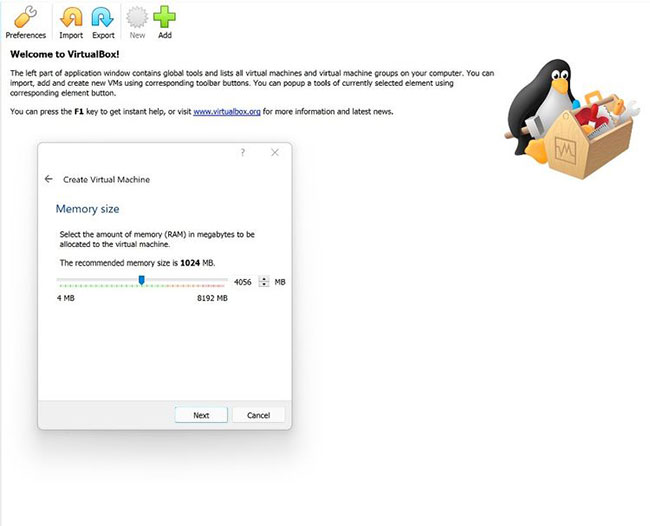
As soon as you move to the next screen, you need to allocate memory for your new virtual machine. Move the cursor or manually enter 4056 (MB) in the corresponding field. Then click Next.
On the next screen, select Create a virtual hard disk now from the list of available options and click Create. Then select VDI as the hard drive file type. Click next to move to the next screen.
For storage on a physical hard drive, leave it at the default value, i.e. dynamically allocated. Press Enter to continue.
On the next screen, you will need to specify the file location and size of the virtual environment. Under the file location, the path you specify becomes the storage directory where VirtualBox will store the data associated with the operating system. If the default path is incorrect, you can change it to another folder location.
In the size slider you can choose from 4MB arrive 2TB. Depending on your system configuration, select the appropriate value. To install, 8GB is the minimum recommended size.
When you click Create, the initial configuration will be complete. However, keep in mind that you have not specified the path from where the virtual machine will load the ISO image. Before launching the newly created machine, it is necessary to update the ISO path.
To do this, click on the icon Settings or right-click the newly created machine, then Settings. Then click option Storage from the left sidebar.
In options Controller: IDE, choose Empty. In the title Attributes On the right side, click the disc icon to load the ISO image. Choose Choose a disk file from the drop-down menu.
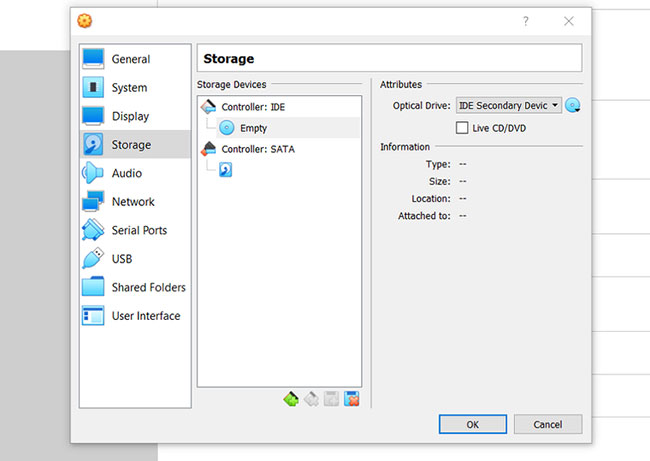
In the following pop-up window, you can specify the path where the ISO image is stored so that the virtual machine can use it during the startup session. Click OK once the path is updated.
You can now start the machine as all configurations are finally completed.
Step 2: Install Qubes OS on the virtual machine
On the left panel, you will see a virtual machine icon, with the Fedora logo and the name of the virtual machine (Qubes OS) clearly identified. Double-click this button to power the machine.
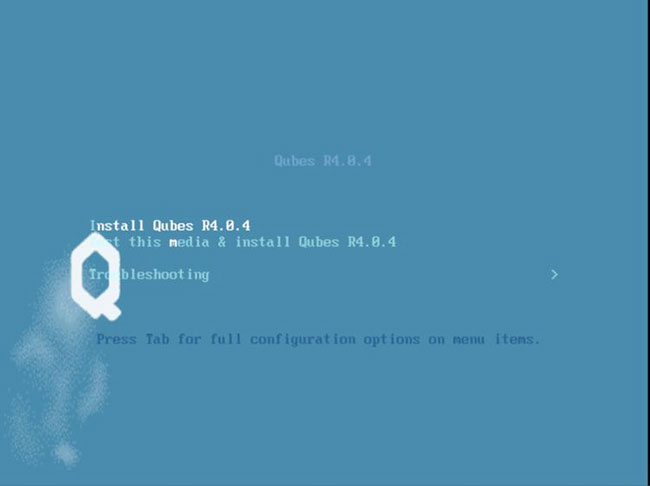
When the machine loads, you will be prompted with several options. Choose the first option Install Qubes R4.0.4. There will be some internal configuration when the machine loads the files for installation.
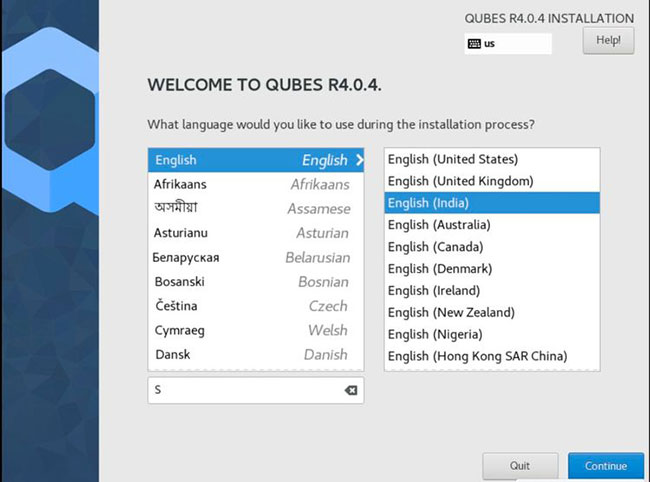
On the welcome screen, select the language of your preference. You can use the arrow keys to navigate through the options. Click tiếp tục after selecting a preferred language.
When you get to the screen Installation Summary, click the option Installation Destination in the title System.
Scroll to the bottom of the screen and uncheck the option Encrypt my data.
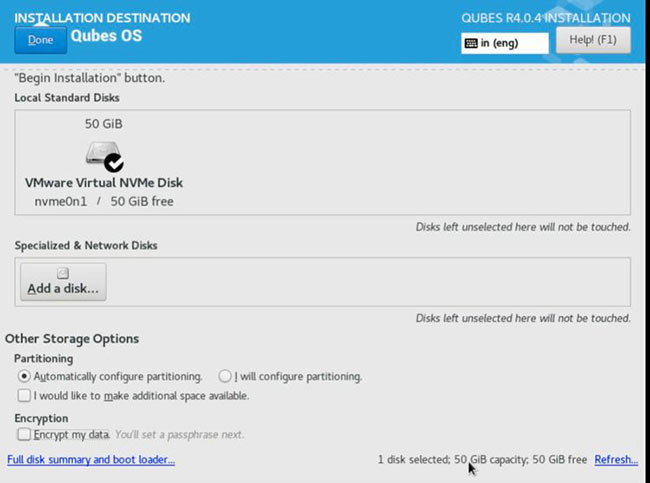
Click the button Done at top.
You can start the installation by clicking on the option Begin Installation available on screen Installation Summary. As soon as you click this button, the installation will begin. On the same screen, you will also have two additional buttons: Root Password and User Creation.
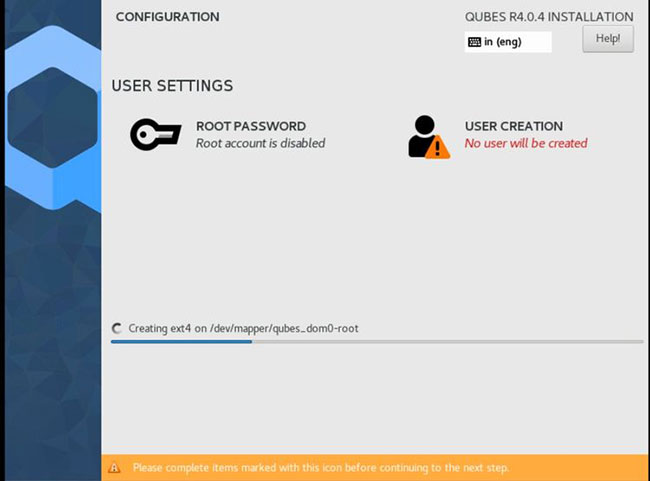
If you need a root user, you can set the details as needed. Alternatively, you can enter user details for additional users in the User Creation, along with the password to access the system after installation.
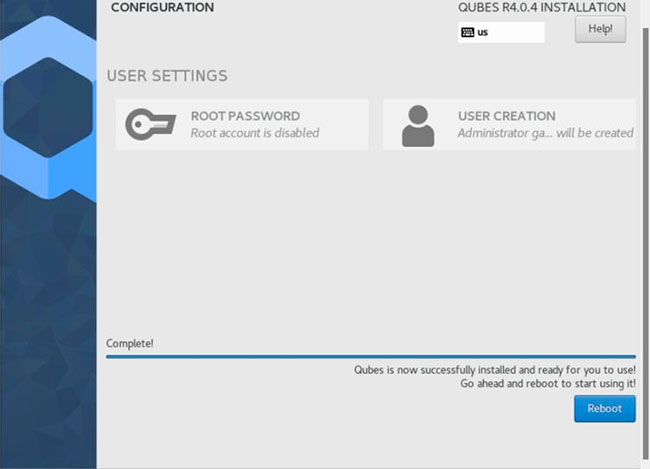
It will take a few minutes for the installation to complete with the requested details. Once the installation is done, you need to reboot your system for the changes to take effect.
After the system restarts, you will see the initial installation message: QUBES OS. Uncheck the following sub-options:
- Enable system and template updates over the Tor anonymous network using Whonix – Enable system and template updates via Tor anonymous network using Whonix
- Use sys-net qube for both networking and USB devices – Use sys-net qube for both network devices and USB devices
- Do not configure anything (for advanced users) – Don’t configure anything (for advanced users)
Click Finish Configuration.
As soon as you reboot, the system will show you a login screen in which you need to enter your previously set username and password. All operations done! You’re ready to work on your own secure Qubes OS environment.
Source link: How to install Qubes OS on VirtualBox
– https://techtipsnreview.com/


