On Windows 10 2004, Microsoft is introducing Windows Subsystem for Linux version 2 (WSL 2), which is a new version of the architecture that allows running Linux on Windows 10 natively (using lightweight virtual machines) and eventually replace WSL 1.
In the new version, this feature running the Linux kernel will actually improve performance and application compatibility compared to the previous version, while maintaining the same experience as the first version.
In this guide, Quantrimang.com will guide you through the steps to install Windows Subsystem for Linux on Windows 10.
Install Windows Subsystem for Linux (WSL) with a single command
In the latest Windows Insider Preview builds, you can install everything you need to run WSL with a single command:
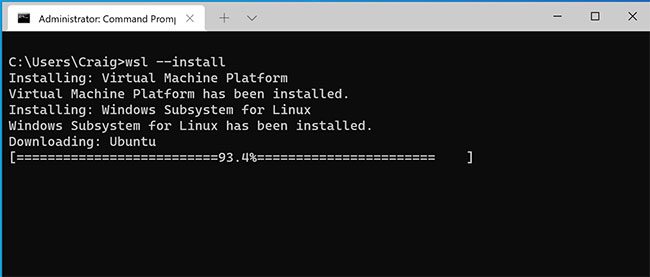
wsl.exe --installToday, July 30, 2021, Microsoft announced that this functionality is now officially supported for Windows 10 version 2004 and later.
Microsoft says the previous WSL setup process was too complicated, involving enabling multiple settings and installing too many packages. The company has simplified the process down to just one order. Windows 10 users can now simply open a Command Prompt window with admin rights and run the command:
wsl.exe --installAfter you press Enter, the process will automatically enable the necessary WSL optional features, install the Ubuntu distribution by default, and install the latest version of the WSL Linux kernel on the computer. Once the process is complete and you reboot your machine, the distro will start running, completing the installation.
Alternatively, you can find a list of Linux distributions available for installation by entering the following command in PowerShell or Windows Command Prompt:
wsl --list --onlineTo install a non-default Ubuntu distribution, use the following command:
wsl --install -d <DistroName>vInstead of, replace
Additional Commands
Microsoft also includes some additional commands to help you manage your WSL instances.
You can use wsl –update to update the WSL Linux kernel manually and wsl –update rollback to restore to a previous WSL Linux kernel version.
Finally, you can use wsl –status to view general information about your WSL configuration, such as default distribution type, default distribution, and kernel version.
You can get this backport just by updating Windows as usual. To do this manually, open Windows Settings, go to Updates and Security and press Check for Updates.
This update is part of the version KB5004296. At the time of writing, when you click “Check for Updates”, you may see optional updates available. Make sure the update has the number KB5004296, install it and you will have access to wsl –update.
How to install WSL2 on Windows 10 version 2004
Windows Subsystem for Linux 2 is built into Windows 10, but you need to follow a few steps to start using it, including enabling WSL1, Virtual Machine Platform, converting existing releases, and setting WSL2 as an option new defaults for future Linux installations.
Activate Windows Subsystem for Linux 1
If you are not using Linux on Windows 10, you must activate Windows Subsystem for Linux version 1 with the following steps:
1. Open Start.
2. Search Turn Windows features on or off and click on the top result to open the experience.
3. Tick the option Windows Subsystem for Linux.
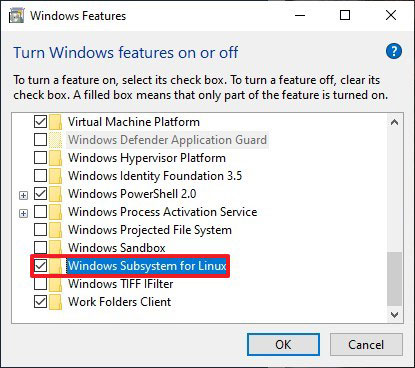
4. Click the button OK.
5. Click the button Restart.
Once you complete the steps, you need to enable the Virtual Machine Platform feature. According to Microsoft, this is an optional step, but without enabling virtualization, you cannot use the new architecture.
Enable Virtual Machine Platform
To enable Virtual Machine Platform on Windows 10, follow these steps:
Important Note: The motherboard and processor must support virtualization, and the option must be enabled on BIOS/UEFI.
1. Open Start.
2. Search PowerShell, right click on the top result and select option Run as administrator.
3. Enter the following command to enable the Virtual Machine Platform feature and press Enter:
Enable-WindowsOptionalFeature -Online -FeatureName VirtualMachinePlatform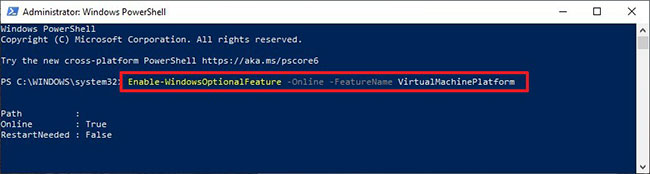
4. Restart the computer.
After completing the steps, you can set up Windows Subsystem for Linux version 2 to the new default architecture and switch existing distros.
Activate Windows Subsystem for Linux 2
To start using WSL 2 or convert WSL 1 distributions to WSL 2, follow these steps:
1. Download this WSL 2 kernel update (required).
2. Double-click the file wsl_update_x64.msi and apply the update.
3. Open Start.
4. Open PowerShell with admin rights.
5. Type the following command to make Windows Subsystem for Linux 2 the default architecture for new releases you install and press Enter:
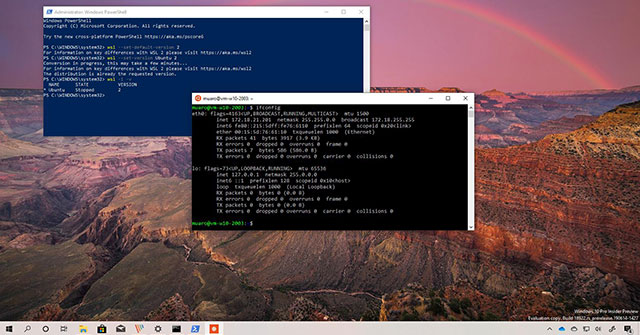
wsl --set-default-version 2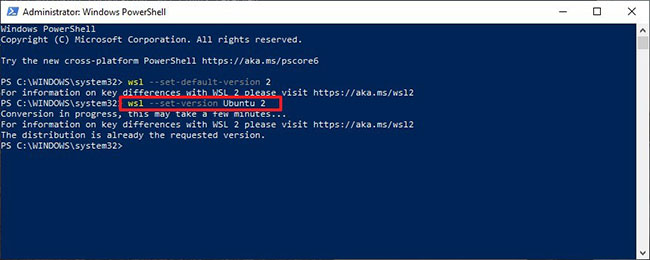
6. Enter the following command to convert the distribution from WSL 1 to WSL 2 and press Enter:
wsl --set-version Ubuntu 27. In the command, make sure to change Ubuntu to the name of the distribution you want to convert. If you don’t know the name, you can use the command wsl -l -v.
Once the steps are completed, your device will start using the new version of Windows Subsystem for Linux as the default architecture.
Verify the distribution platform
To confirm that your distributions are using Windows Subsystem for Linux 2, follow these steps:
1. Open Start.
2. Open PowerShell with admin rights.
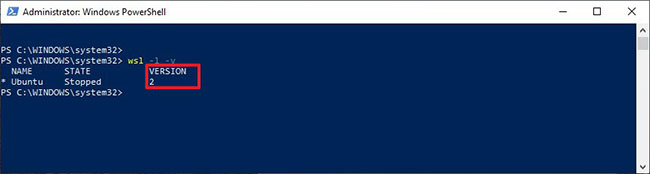
3. Enter the following command to verify the version of the distribution and press Enter:
wsl --list --verbose4. Confirm the distro’s version is set to 2 not yet.
After completing the steps, you will know if the progress was made successfully or if any steps need to be remedied.
Source link: How to install Windows Subsystem for Linux 2 on Windows 10
– https://techtipsnreview.com/


