The preview image on the Taskbar will display when we hover over the open software icon to see through the content on that interface. By default, this preview image is relatively small in size, so many people do not clearly see what is open on the software or application. If you want, you can increase this preview image on the Taskbar to make it easier to see. The following article will guide you how to increase the preview image size on the Taskbar.
Instructions to increase the preview image size on Taskbar
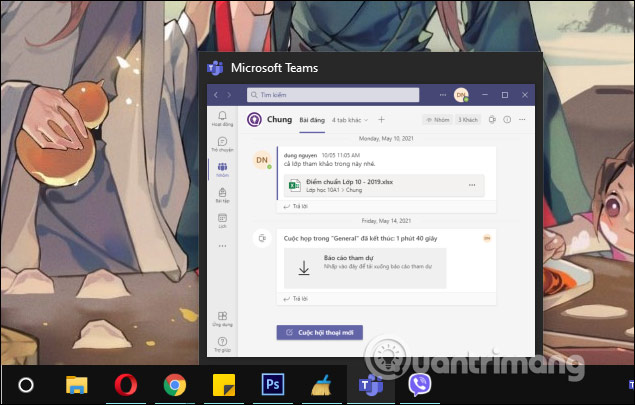
Step 1:
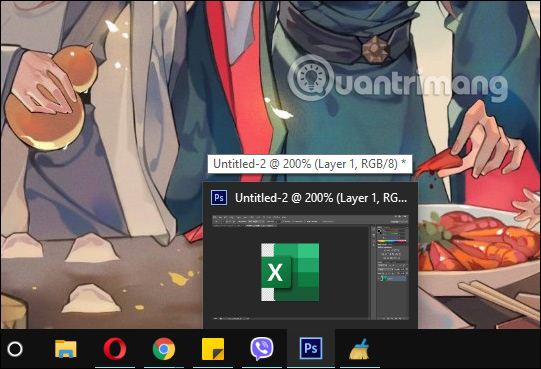
The default thumbnail image on the Taskbar is as shown below.
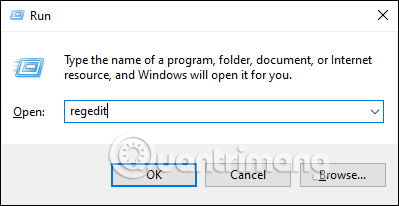
First of all we press Windows + CHEAP key combination to open the Run interface and then enter the keyword regedit to open the Registry Editor tool.
Step 2:
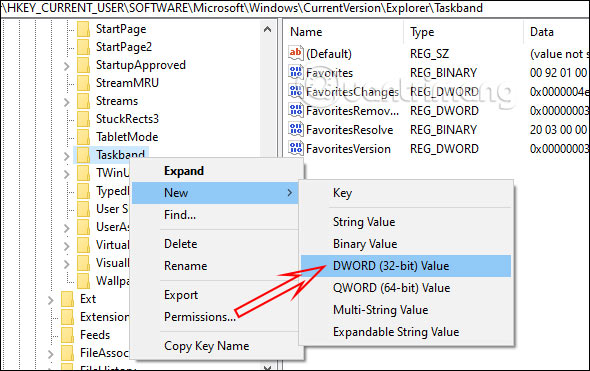
Next in this interface we access the path as below.
ComputerHKEY_CURRENT_USERSoftwareMicrosoftWindowsCurrentVersionExplorerTaskband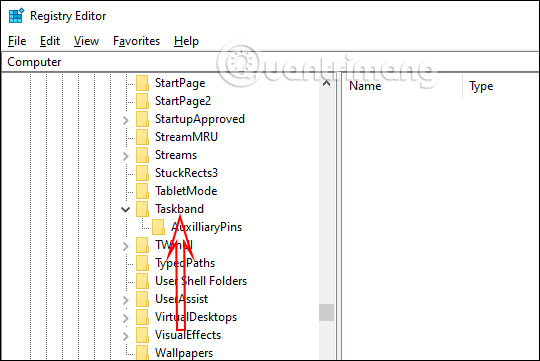
Step 3:
Press right click on Taskband folder then choose next new and press select DWORD (32-bit) Value to generate a new key.
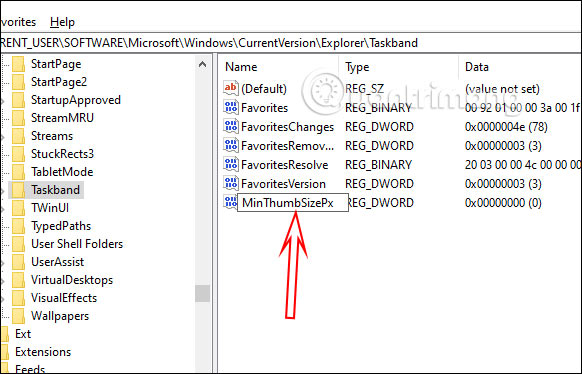
You name the new key MinThumbSizePx. We right-click New Value #1 and then select Rename and enter a new name for this key.
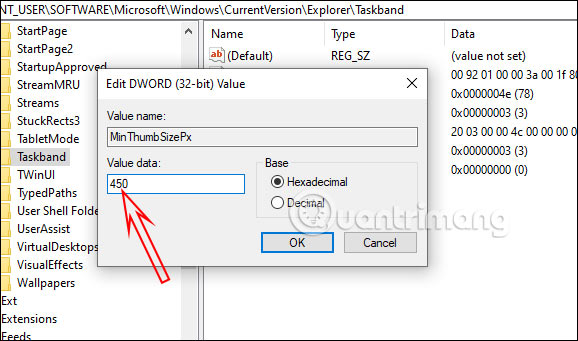
Step 4:
Double click on this key to change value at Value. Friend Enter the size in px for the thumbnail image displayed on the Taskbar that you want to change. Note the size will be less than 500px.
After entering the new size, click OK to save.
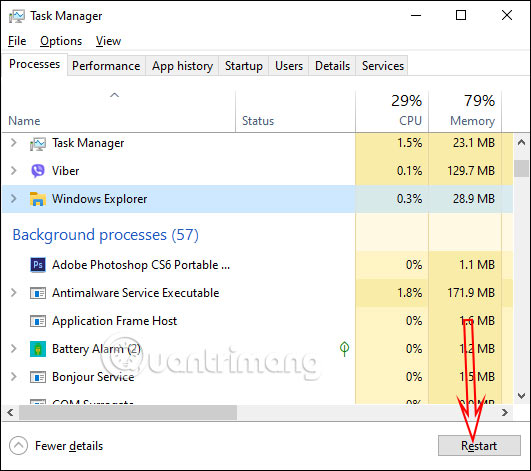
Step 5:
Press right click on the taskbar then choose Task Manager. Now click on Windows Explorer and then press the Restart button below as shown to restart Windows 10’s Explorer.
Immediately after restarting, hover over the icons of open programs on your computer and you will see the preview image size has changed, increasing according to the size you enter.
If you want to return to the old size, you just need to delete the MinThumbSizePx key, then you also need to restart Windows Explorer in Task Manager.
Source link: How to resize preview image on Taskbar Task
– https://techtipsnreview.com/


