
#first. What is Track Changes?
Track Changes in Word is a feature that allows us to track changes, if any, in formatting or in content in Word documents.
Similar to the Comment feature, Track Changes is often applied in lesson plans, contracts, drafts, etc. However, this feature will allow users to directly edit the content of the document..
And all changes will be automatically marked with Color, Bold, Italic, Underline, Strikethrough, …
#2. How to turn on the Track Changes feature in Word
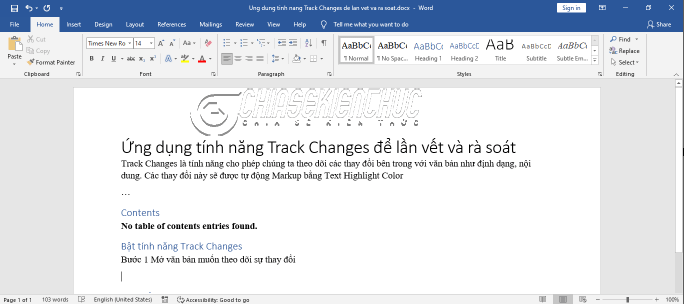
+ Step 1: Open the text you want to track changes to. For example, I have a text file as shown below:
+ Step 2: Choose card Review => in group Tracking => choose Track Changes

#2. Customize Track Changes options
When you insert certain documents, they will be automatically formatted Underline with Blue colorand when deleted, they will be automatically formatted Strikethrough in Bright Green…
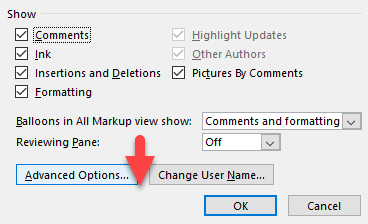
As for how to mark it, it depends on your settings in the dialog box Advanced Track Changes Options. The steps are as follows:
+ Step 1: Choose card Review => in group Tracking => choose ![]()
![]()

+ Step 2: Dialog box Track Changes Options appears => please select Advanced Options …
+ Step 3: Dialog box Advanced Track Changes Options appears with the interface as shown below, customize the options:
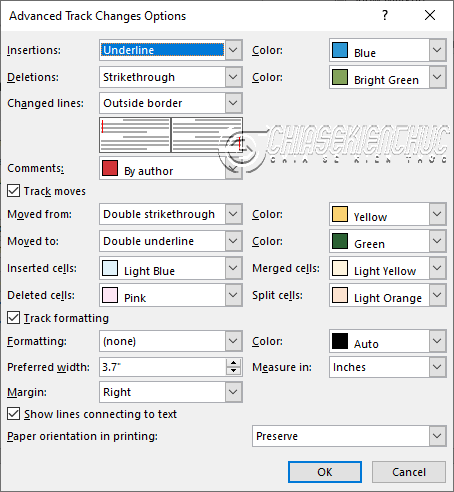
- Insertions select the format for the inserted characters and words
The supported formats are Color only, Bold, Italic, Underline, Double underline and Strikethrough. The default format/color is Underline/ Blued
- Deletions Select a format for characters and words to be deleted.
- Changed lines Format the border style for the line containing characters and words to be changed. Left border, Right border and Outside border are the supported types.
- Moved from choose a formatting style for the text in place before moving it.
- Moved to choose a formatting style for the text in the position after it’s moved.
#3. How to show changes in a document
Choose ![]()
![]()
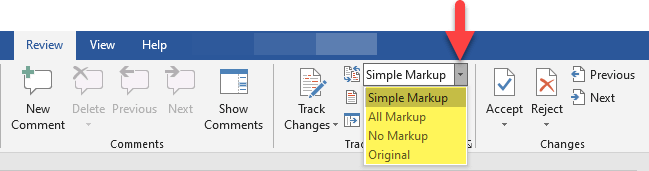
Display for Review => choose one of the four display ways that the software provides..
- Simple Markup.
- All Markup display the content markup changed.
- No Markup do not understand the display of the changed content markup.
- Original show only the original text.
The figure below illustrates how . is displayed Simple Markup, All Markup, No Markup and Original in order from left to right from top to bottom:
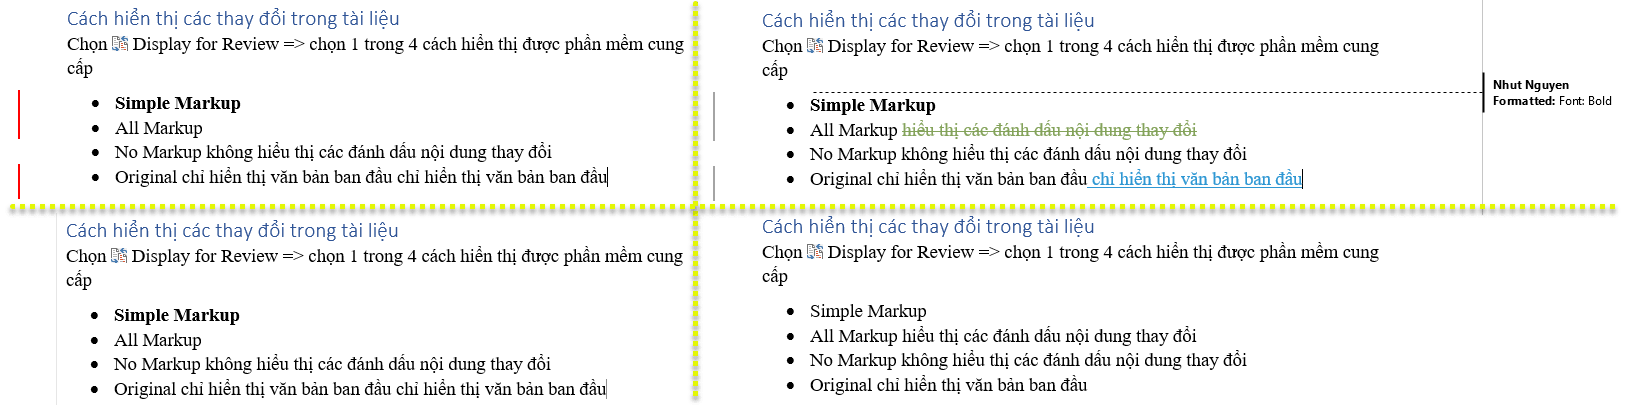
Here the body of the text is edited like this:
- Phrase
Simple Markupbolded - Phrase
“hiển thị các đánh dấu nội dung thay đổi”deleted - Phrase
“chỉ hiển thị văn bản ban đầu”be inserted
#4. Customize the type of markup to display in the document
Choose ![]()
![]()
Show Markup => choose the type of markup to display in the document:
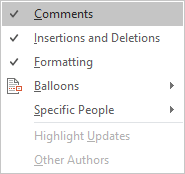
- Comments comments and reviews.
- Insertions and Deletions operations to add and delete the content of the document.
- Formatting formatting operations.
- Balloons:
- Show Revisions in Balloons show corrections in Balloon.
- Show All Revisions Inline shows all corrections on the line.
- Show Only Comments and Formatting in Balloons Show only comments and formatting in
Balloon.
#5. How to handle changes to the document
Examples are:
After editing the document, the members will send it back to the group leader or (department leader, team leader, administrator, …). This person will see and decide to accept or remove the changes of the members..
#5.1 Accept the changes
Choose ![]()
![]()
Accept => choose…
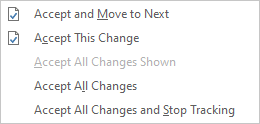
- Accept and Move to Next Accept the change and move to the next changed location.
- Accept This Change Accept the change at the edit cursor position.
- Accept All Changes Shown accept all visible changes.
- Accept All Changes Accept all changes in the text.
- Accept All Changes and Stop Tracking Accept all changes in the text and stop tracing.
#5.2 Discard the changes
Choose ![]()
![]()
Reject => choose…
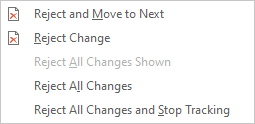
- Reject and Move to Next discard the change and move to the location with the next change.
- Reject Change Removes the change at the edit cursor position.
- Reject All Changes Shown discard all visible changes.
- Reject All Changes discard all changes in the text.
- Reject All Changes and Stop Tracking discard all changes in the text and stop tracing.
#6. Epilogue
Well, as you can see, the using Track Changes in Word to trace and review in the document is extremely useful, isn’t it.
We need to know when to use Comments and when to use Track Changes to use them appropriately. The easiest way to tell the difference is:
- Only have the right to comment and comment => then use the feature
Comment. - If you have the right to comment, give suggestions and have the right to edit directly into the content of the document, use the feature
Track Changes.
Hope this article will be useful to you. Goodbye and see you in the next posts!
Read more:
CTV: Nhut Nguyen – techtipsnreview
Note: Was this article helpful to you? Don’t forget to rate the article, like and share it with your friends and family!
Source: How to use Track Changes in Word to track and review
– TechtipsnReview