
Sometimes in certain situations, you may need to change the name of your Microsoft account (Microsoft Account) in Office 365 or Windows 11. Whatever the reason you are facing, the setup operation Overall nothing complicated. Find out how to do it right here.
How to rename a Microsoft account
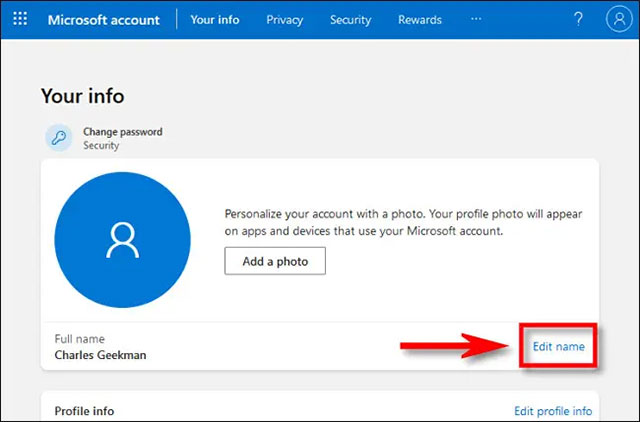
First, open any web browser on your PC, and navigate to the Microsoft Account Profile website. Next, sign in to the Microsoft account that you want to rename by providing the corresponding password and authentication code.

After you have successfully logged in, on the “Your Info” page that appears you will see all your account information, as well as editable areas. The most prominent is the circle box containing your avatar (your account avatar. Right below that is the current Microsoft account name. To change the account name, click the blue “Edit Name” link at the bottom of the page. the right.
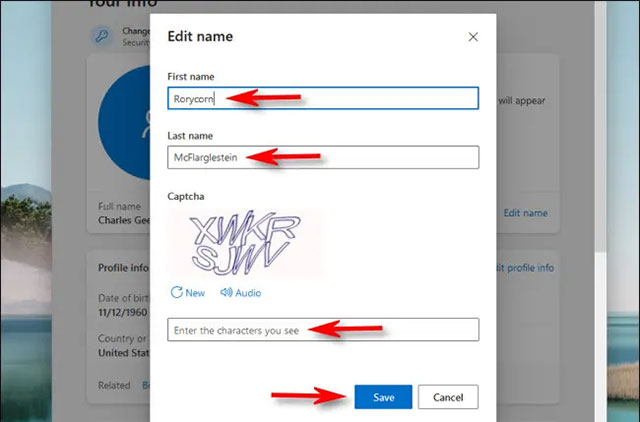
Immediately, the “Edit Name” dialog box will pop up on the screen. Here, you enter the new first and last name that you want to change, then enter the corresponding Captcha code and click “Save”.
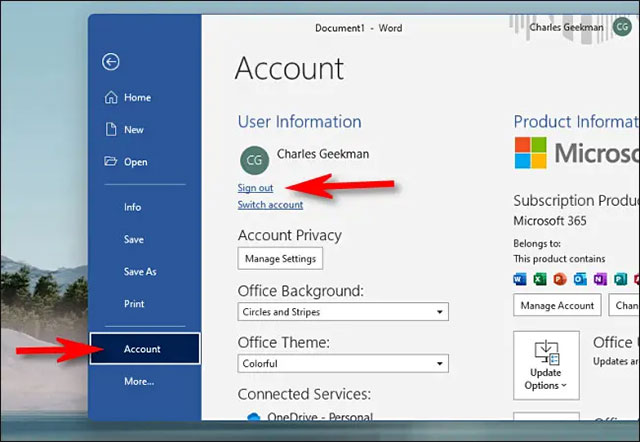
Your changes will be saved. For the change to take effect in Windows 11, restart your PC and sign in again. To see the new name in Office 365, open the Office app, click File > Account, and select “Sign Out.”
Then click “Sign in” and sign in with your Microsoft account. The new name will appear in your Office applications.
Hope you are succesful.
Source link: Instructions for renaming Microsoft account
– https://techtipsnreview.com/


