Why are GIFs such a great tool for marketing? That’s because they can be used with ease, allowing them to capture the reader’s attention in a new way, and at the same time have a powerful impact on their emotions. And it’s those strong emotions that make us want to share more widely, so you should take some time to try exposure to these interesting animations.
The coolest thing about GIFs is that they aren’t hard to make at all. If you have Photoshop and a few minutes to spare, you can instantly create an animated GIF in the blink of an eye. In this article, GhienCongListen will guide Create GIFs with Photoshop in 9 super quick and simple steps!
Advertisement
Steps to create GIF images with Photoshop
Here’s an example of the GIF we’ll be making in this tutorial:
Alright, let’s get started!
Advertisement
Step 1: Upload photos to Photoshop
*In case if you already have a photo…
Put those photos in a separate folder. To upload to Photoshop, select File > Scripts > Load File into Stacks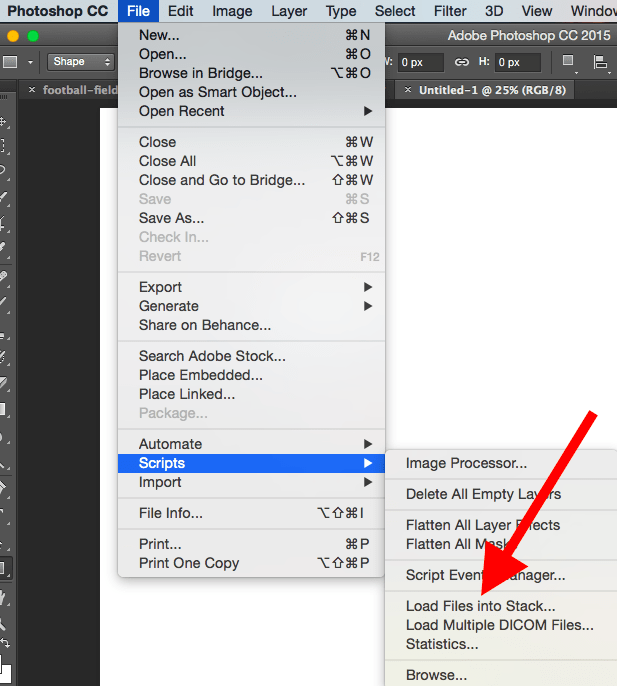
Advertisement
Then choose Browse, and select the files you want to make a GIF. Done and choose OK
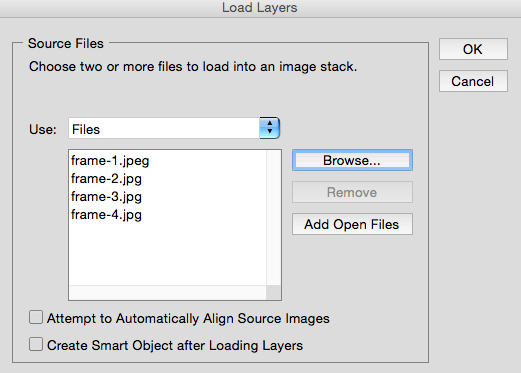
Photoshop will create a separate layer for each image you have selected. When you’re done, go to Step 2.
*In case you don’t have photos available…
Create a different Photoshop layer for each frame (frame) of the animated GIF. To add a new layer, select Layers > new >Layers.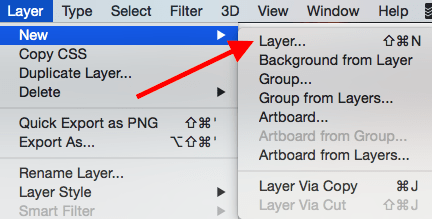
Make sure the layers are named for easy tracking when creating the GIF. To name the layer, go to Layers box In the bottom right corner of the screen, double click on the default name of the layer, and name it as you wish. Press Enter to complete naming.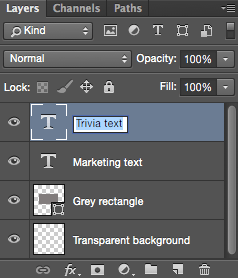
After creating and naming the layers, you are ready to go to Step 2.
Good tip: If you want to merge all the layers so that they appear in one frame of the GIF image, click the eye icon to the left of each layer so that only the layers you want to merge are visible. Next, press the combination Shift + Command + Option + E (Mac) nice Shift + Ctrl + Alt + E (Windows). Photoshop will create a new layer containing the merged content, when done, you should also rename it to be easy to work with.
Step 2: Open the Timeline window
To open Timelinein the top toolbar select window > Timeline. The Timeline tool will allow you to toggle different layers at different times, thereby turning your still image into a moving GIF.
The Timeline window will appear in the lower corner of the screen. It will look like this: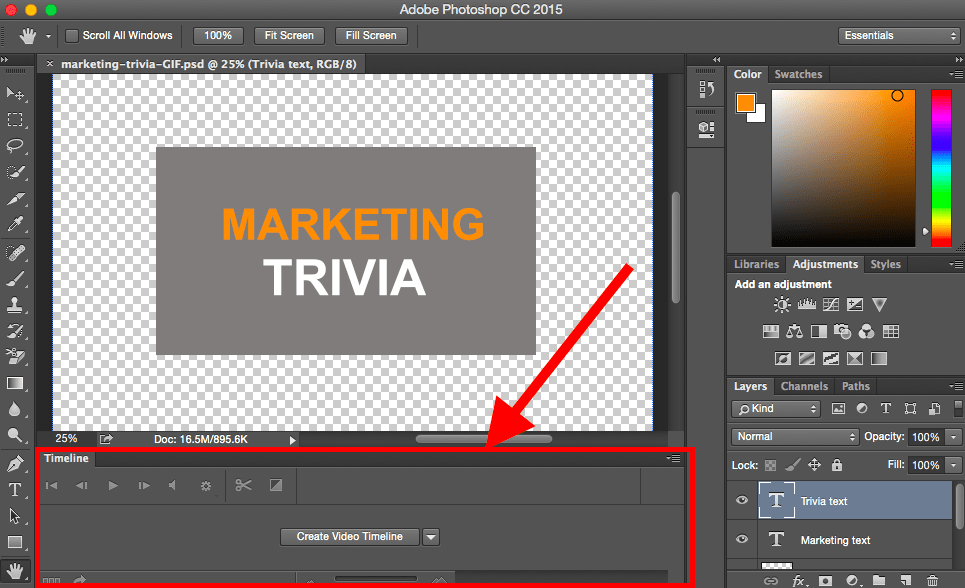
Step 3: In the Timeline window, select “Create Frame Animation”
If it’s not automatically selected, select it from the menu – make sure you actually click on it, or the Create Frame Animation panel won’t appear.
Your Timeline will now look like this:
Step 4: Create new layer for each new frame
To do so, first need to select all the layers by going to the top toolbar and selecting Select > All Layers.
Then, click on the menu icon in the right corner of the Timeline section.![]()
It will bring up the menu item, select Create new layer for each new frame.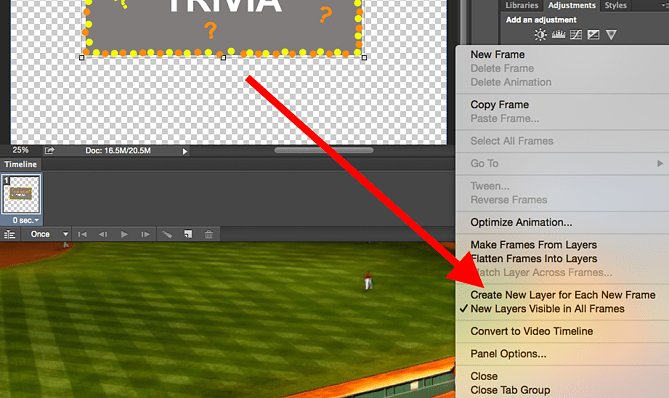
Doing so will create a frame for each layer of the GIF image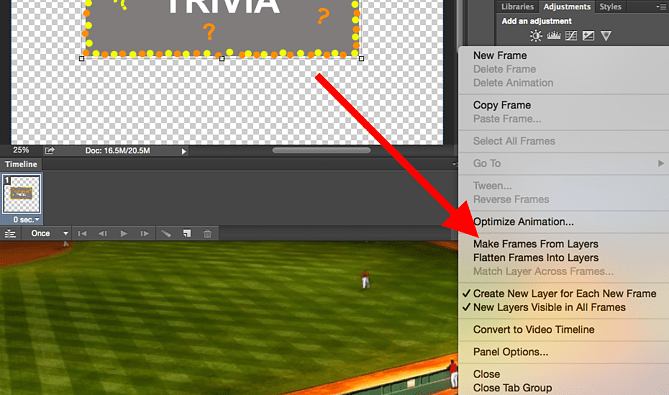
Step 6: Under each frame, choose how long it should appear before moving on to the next frame.
To do so, choose the time under each frame according to your wishes. In this post, we will choose 0.5 seconds/frame.
Step 7: At the bottom of the toolbar, select the number of loops you want
By default it will be Once (once), but you can have it loop as many times as you want, can loop Forever (forever). Select Other if you want to select specific number of iterations.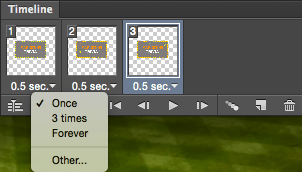
Step 8: Review GIF images by clicking the run icon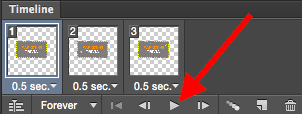
Step 9: Save and export GIFs
Are you satisfied with your GIF? Save it for online use by going to the toolbar and selecting File > Export > Save For Web (Legacy)…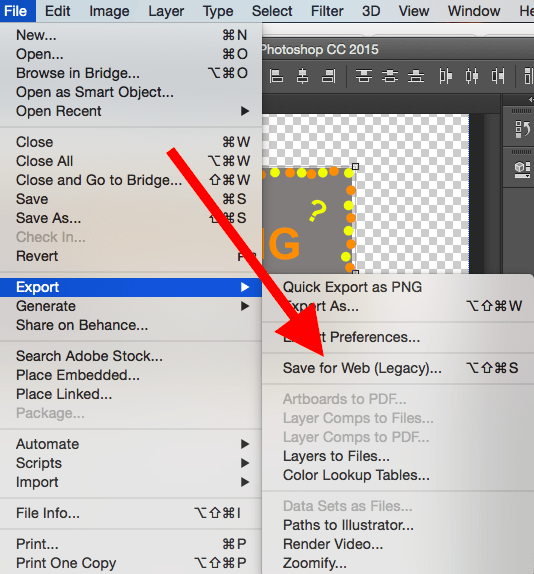
Next, choose the type of GIF file you want to save at Presets. If you have a GIF with a gradient, select Dithered GIFs to avoid color mixing.
The number next to the GIF file determines how large (and precise) the color of the GIF will be compared to the original JPEG and PNG images. According to Adobe, the higher the percentage of high-pitched vibrations, the more color and detail will be produced – but also increase the file size.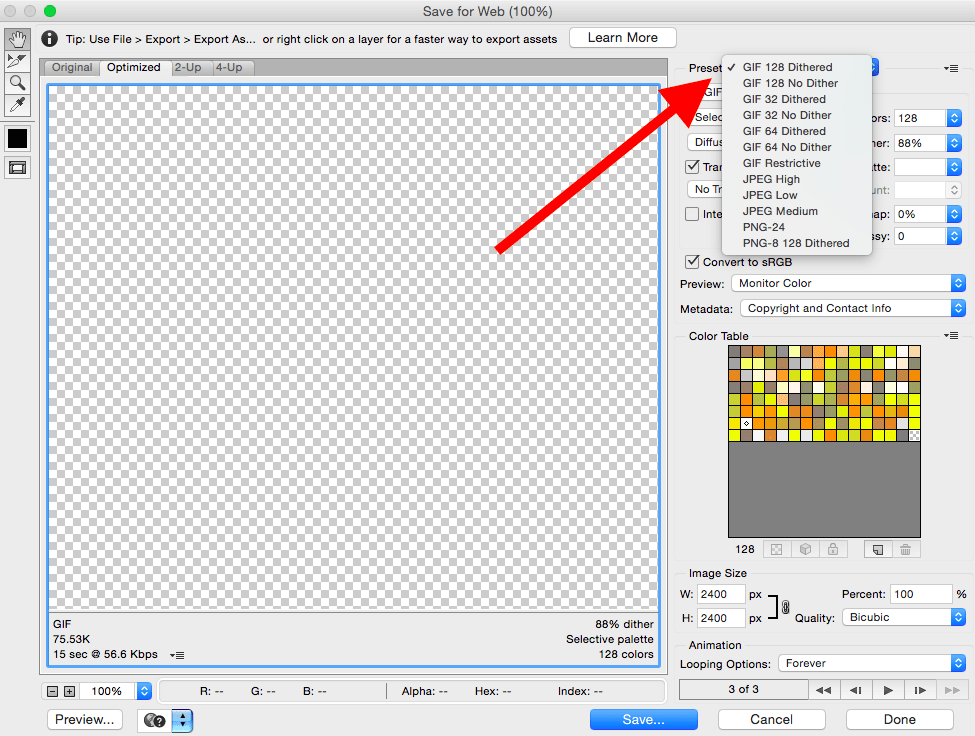
Press Save at the bottom corner to save to the computer. Now you’re ready to upload this GIF for marketing purposes.
Upload this GIF online and it will run flawlessly. Here is our finished product:
So GhienCongList has provided you with steps to create GIF images in Photoshop with 9 extremely fast and simple steps. Now use your finished product to share with friends or apply to your marketing. If you find the article useful, please like and share widely!
According to blog.hubspot.com
Source: Instructions on how to create GIF images with Photoshop – 9 super fast and simple steps
– TechtipsnReview


