
When you no longer want to use the old Facebook account to switch to a new account, or want to pause using Facebook for a period of time, we need to lock Facebook. Locking Facebook has 2 options: temporarily locking Facebook, or deleting Facebook account permanently.
When conducting a Facebook lock, only some of your information is hidden from Facebook, but the information data is still retained. They will be restored as soon as the user logs back in. Unlike a temporary lock, deleting Facebook permanently will delete all data and information about you. Facebook accounts will no longer appear in your friends’ News Feeds. All information and data of personal Facebook accounts will disappear, from photos, messages, … Note before proceeding to delete you need to back up Facebook account data to avoid losing important information .
1. Temporarily Lock Facebook iPhone/iPad
Video tutorial to disable Facebook iPhone
A Facebook account that is temporarily locked will be disabled for a period of time chosen by you. And Facebook is reactivated automatically, or you log back in yourself.
Step 1:
We log in to our Facebook account and then click 3 dashes icon at the bottom. Next click on Settings & Privacy. Next we click on the Setting.
Step 2:
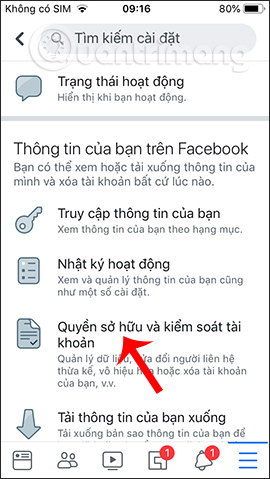
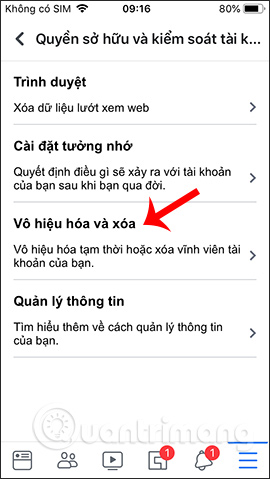
Switch to Facebook’s settings interface, scroll down to Your Info section on Facebook and tap option Account ownership and control. Then we will see the option Disable and delete to press select.
Step 3:
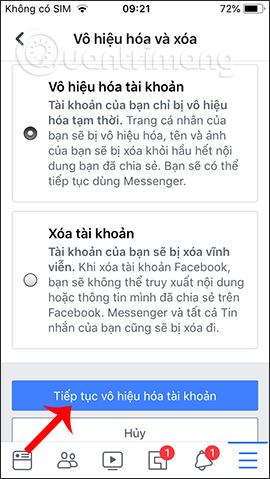
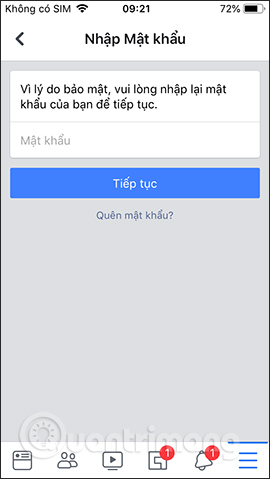
We click on Deactivate the accountthen press Continue to deactivate the account to proceed to lock Facebook account. Next, the user can password required Facebook account.
Step 4:
Display interface for you to choose choose the reason you want to lock Facebook temporarily. There are many different reasons available, or you can fill in your own. Then each selected reason will have different help and content. Click next Continue under.
If you want to manually reactivate Facebook for a period of time, select This is a temporary action. I will be back. If you choose to return, you will have more time to manually activate Facebook for the selected period. Click Continue below.
Step 5:
Switch to the Deactivate account interface, the user ticks Do not receive notifications from Facebook in the future, then tap Continue. The user then presses Deactivate my account To confirm. Immediately the Facebook account was disabled.
2. How to permanently delete Facebook iPhone/iPad
Step 1:
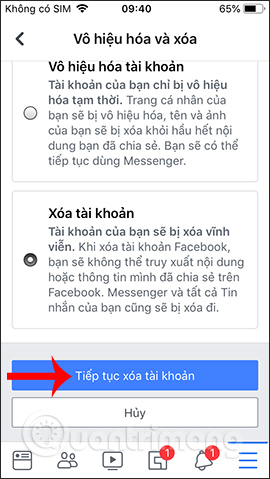
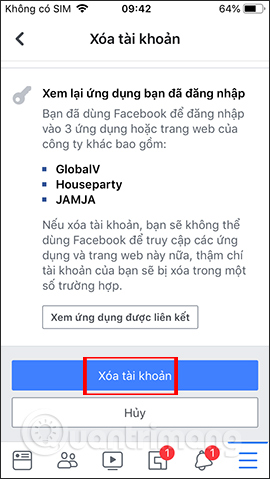
We quickly access the link below to enter the interface to choose to delete the account, or the user also access the account Ownership and control interface, and then select Delete the account. Click next Continue deleting accounts.
https://m.facebook.com/account/delete/Switch to the note interface before deleting your Facebook account permanently. When the deletion period expires, the Facebook deletion process is conducted and you cannot reactivate it as temporarily disabled, the data cannot be retrieved, so you need to pay attention. Press Delete the account below bottom.
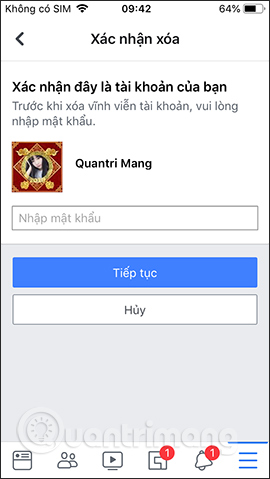
Step 2:
The user is then requested re-enter Facebook password To confirm. We are then asked by Facebook if we are sure we want to delete Facebook permanently, if so, press Delete the account.
Within 30 days the user is allowed to reactivate his account, cancel not delete. After 30 days, the deletion is done immediately.
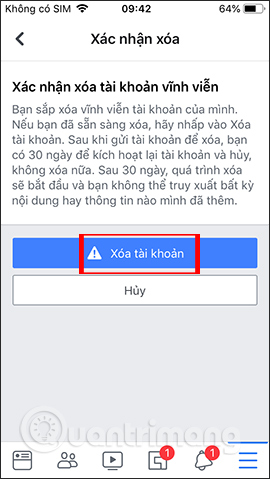
Both temporary locking and permanent deletion of Facebook can reactivate the account to cancel the operation. However, with permanent deletion, you only have up to 30 days to reactivate, before the account disappears completely.
Wishing you success!
Source link: Instructions to temporarily and permanently lock Facebook iPhone / iPad
– https://techtipsnreview.com/


