
In the previous articles, I showed you how to create a very simple and professional rescue boot usb already.
And in this article I will guide you a way to quickly rescue when the computer fails again that is to integrate rescue DLC or Hiren’s Boot or any other set of rescue tools. calculator that you like to hard drive to perform rescue quickly.
This way is simple, but I think there are still some newbers who still do not know how to do it or have not had time to learn. Therefore, in this article I will guide you in the most detailed and simplest way for you to easily imagine.
Okey! On the main issue in today’s article. For this way, you need to prepare a number of tools and software before starting to do.
#first. What needs to be prepared?
Note: Basically, you just need to choose one of the 2 rescue DLC or Hiren’s Boot, but if you want to integrate both then OK! Or in addition to the 2 rescue kits that I mentioned above, you can integrate any toolkit you like, the way is the same.
#2. Guide to integrate DLC rescue tool into the hard drive
For DLC BOOT then the integration into the hard drive is too easy, with just 1 click to finish and the author has almost set up auto all for you already.
Perform:
+ Step 1: Please use Winrar to extract the DLC BOOT file that you just downloaded above. Or you can Mount the DLC file to the virtual drive (recommended because mounting the file will be much faster than decompressing the file).
Next, run the file DLC1Menu.exe to open the control panel.

+ Step 2: Select an icon Other Tools => and click Install Menu 7/8 to integrate DLC into the hard drive. This method applies to Windows 7 and up.
=> As for Windows XP, please click Install Menu XP Please.

The program is doing decompressing and integrating onto the hard drive, please wait a few minutes.

Notice that the integration has been successful!
+ Step 3: Now reset your computer and try to access DLC BOOT and see if it’s OK ?

Done! That’s it, it couldn’t be simpler, right guys ?
# 3. How to install Hiren’s Boot, HKboot, Anhdv Boot… on the hard drive
Many of you do not like to use DLC BOOT, you can use the familiar rescue tool Hiren’s Boot, how to do it as follows:
Note: The instructions below apply only to Windows 7 and above. If you are using Windows XP but also want to integrate, download this guide.
And one more thing is that you can apply this to the DLC above, or any rescue toolkit that has been packaged into a single * .iso file. For example, AnhDV BOOT or HKboot… for example.
+ Step 1: Please unzip the file Hiren’s Boot and we only use the file Hiren’s.BootCD.15.1.iso Come on.
Please copy the file Hiren's.BootCD.15.1.iso into 1 partition other than the partition containing windows. Drive partition example C If the partition has not yet won, please copy the file to drive D, E, F .. okay.
+ Step 2: Install EasyBCD software on your computer.
+ Step 3: Start up the EasyBCD software and perform the following steps in turn:
- Click
Add New Entry. - Select a tab
ISO. - At section
Namethen you can change the display name of the Boot Menu. - At section
Patch: Please select the path to where you saved the file Hiren’s BootCD.15.2.iso. - In the Mode section there will be 2 modes for you to choose from
Run from Disk(ie run Hiren’s Boot iso file directly from the hard drive) and modeLoad from Memory(means load Hiren’s Boot iso file into RAM to run). Here I will choose Run from Disk. - Click
Add Entryto create a Boot Menu.

+ Step 4: Check if Hiren’s Boot has been added Boot Menu Not yet by clicking Edit Boot MenuIf the screen is displayed as shown below, you have successfully created the Boot Menu.
Tips: Here you can also edit or delete any menu.
Once customized as you like, then click Save Settings to save your settings.

+ Step 5: Restart the computer to check if it’s OK?
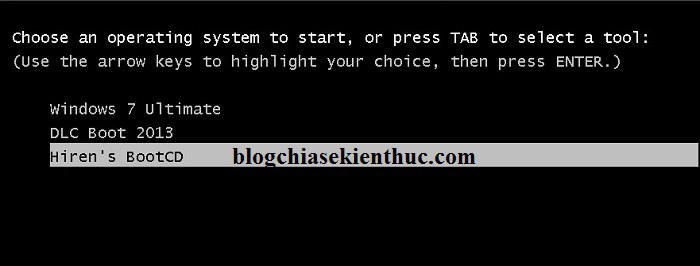
As you can see I have tested very OK already ?

Go to test Mini Windows XP always!

# 4. [UPDATE] Integrate Win PêE into your computer’s hard drive – applicable for both UEFI and Legacy standards
Method 1: Do it manually
Note: For computers running UEFI standards, integrating WinPE into the boot menu is the most effective way.
I update more ways integrate WinPE into the hard drive to rescue the computer for anyone who likes to use WinPE.
Also completely similar guide Hiren’s Boot integration that we still use the EasyBCD software to perform.
Link to download Win PiE versions In the preparation section, you can, or you can use any Win PèE suite you like. There are many blogs on the blog, please choose the version you like.

+ Step 1: Open the EasyBCD software and set up as follows:
- Click
Add New Entryto create a Boot Menu. - Click Tab
WinPE - At the Type line you let be
WIM Image (Ramdisk) - At line
Nameyou name will show up in the Boot Menu. - At the Patch section, select the path to the WinPE file you want to use (eg
W10pe32.wim, w10pe64.wim....) - Once setup is complete, you click
Add EntryTo add.
+ Step 2: You create folders named APPS and WIM located in the root directory of any partition, then copy the files to the respective directory as follows:
Note: Package Apps.wim is shared by all WinPE, packages Apps64.wim Only used for Win 10/8 PE 64 bit
- Win10PE: Copy W10pe32.wim, W10pe64.wim to the folder
WIMthat you just created. - Mini XP: Copy the XP.wim file to the entry
WIMjust created (need to copy XP.7z to the APPS entry) - Application package: Copy Apps.wim to the folder
APPSIf you need to use 64 bit software, Copy Apps64.wim to APPS - Package Driver: Drv10x32.wim, Drv10x64.wim…. then you copy to the directory
WIMPlease.
+ Step 3: Just check the results ?
Method 2: Download 1-click file to integrate WinPE into SSD / HDD
This 1-click file integrates WinPE 10 64bit into the hard drive to rescue your computer easily.
Actually, the way to do it is completely similar to method 1, but here it comes pre-packaged into 1 executable file * .exe including 1 64-bit WinPE 10 to be able to run on both standards. UEFI / LEGACY and EasyBCD software to create Boot Menu.
+ Step 1: Right-click the downloaded exe file => select Run as administrator to run as administrator.

+ Step 2: A new window appears, click Accept to integrate.

+ Step 3: Actually, the steps already have instructions, so I don’t need to say much.
In this step you can choose Browse... and choose another partition to extract. Or keep the defaults.

+ Step 4: Install EasyBCD software on your computer and follow the instructions only. Very simple !

+ Step 5: Reboot your computer and see the results ?
# 5. Epilogue
Very simple like that, as I said above that integrating the rescue tool into the hard drive or in other words creating a rescue boot menu on the computer is a very simple job, that’s why There are many ways to do this.
However, in this tutorial framework, I only guide you to some of the fastest and simplest ways to Integrated DLC, WinPE and Hiren’s Boot into the computer in the easiest way only.
Okay! Hope the article will be useful to you, wish you success!
Kien Nguyen – techtipsnreview
Note: Was this article helpful to you? Don’t forget to rate, like and share with your friends and relatives!
Source: Integrate DLC, Hiren’s Boot, WinPE into the hard drive to rescue the computer
– TechtipsnReview


