
NOTE: Welcome to the Knowledge Sharing Blog! If you encounter any errors during use, such as error in download link, slow loading blog, or unable to access a certain page on the blog … please notify me. via Contact page. Thanks!
Yes, the recycle bin is one of the most important components in the Windows operating system, it helps you to keep the integrity of the files you have deleted, and when you delete a file by mistake, you can still. in the trash and Restore Right back.
However, if you are lazy or forget to pay attention to deleting junk files on your computer, it will take a long time to make the drive C (operating system drive) your space is occupied, and means that the processing speed of the operating system, as well as the performance of the machine will be affected.
Therefore, to free up space for the recycle bin, to delete files that you no longer need, and to save you from having to run commands. Empty Recycle Bin manual for each cleaning period….
…. Then today, I will share with you a pretty good tip, that is schedule to periodically delete the trash on your computer. Help your computer automatically delete files in the trash when there is no need to Restore again.
Read more:
Okay, now we will go into a detailed tutorial too!
How to schedule to manually delete files in the recycle bin on Windows computers
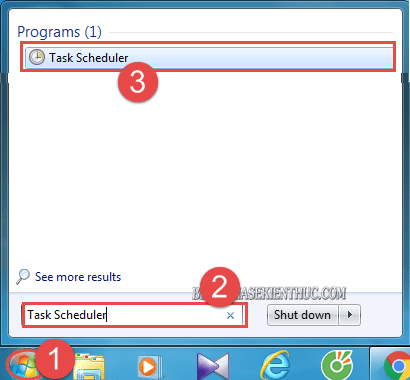
+ Step 1: If you are using Windows 7 then click on the menu Start => and type the command Task Scheduler into the box Search program and files => then press Enter. Or You can also click Task Scheduler same picture.
Note: If using Windows 8, 8.1 or Windows 10, press the key combination Windows + S to open the search window => and enter keywords Task Scheduler go to search.
+ Step 2: Then you right click and select New Folder tab Task Scheduler as shown below.
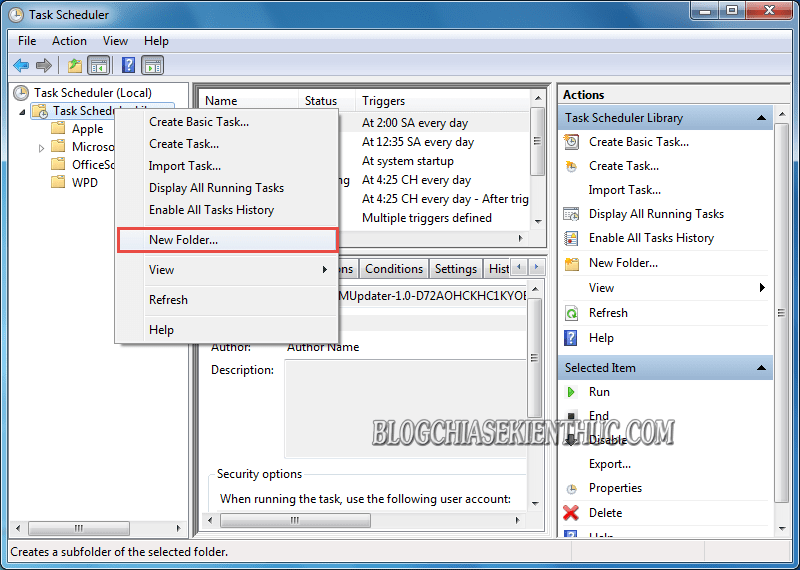
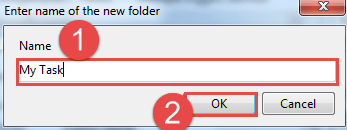
Here, in section Name You name the Folder My Task => and press OK.
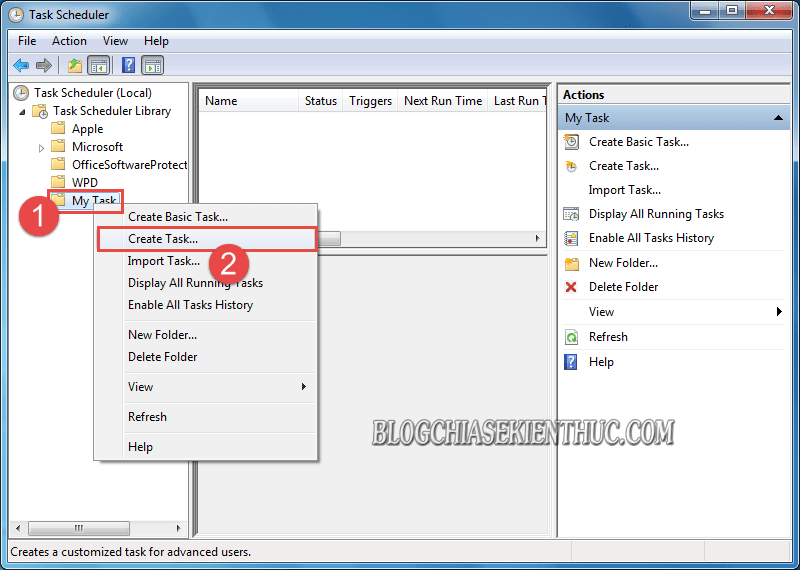
+ Step 3: Continue, right click on the newly created Folder => and select Create Task…
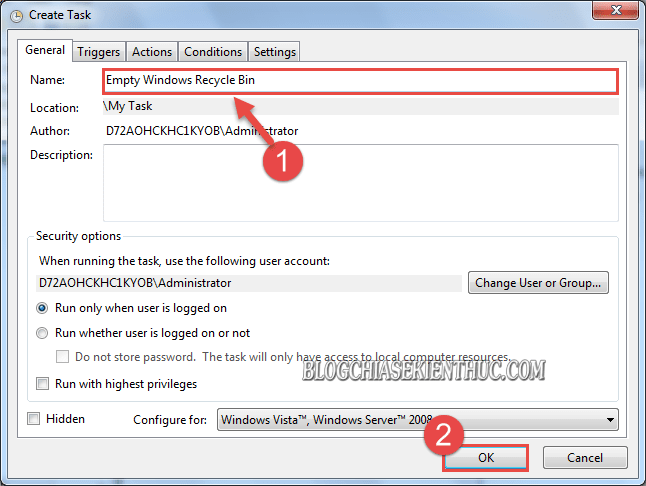
Now the dialog box Create Task open. At tab General, in the Name you set is Empty Windows Recycle Bin => and click OK to create.
+ Step 4: Next, click the tab Triggers => and select New.
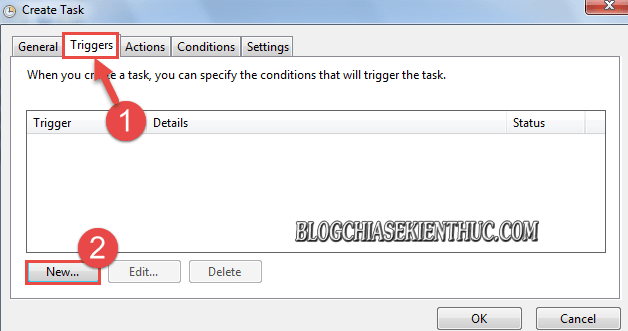
Then set the mode Regin the task was On a schedule => you tick Daily => and customize the number of days will automatically delete files in the recycle bin Recur every.
Here I am for a month, ie 30 Days => press OK to establish.

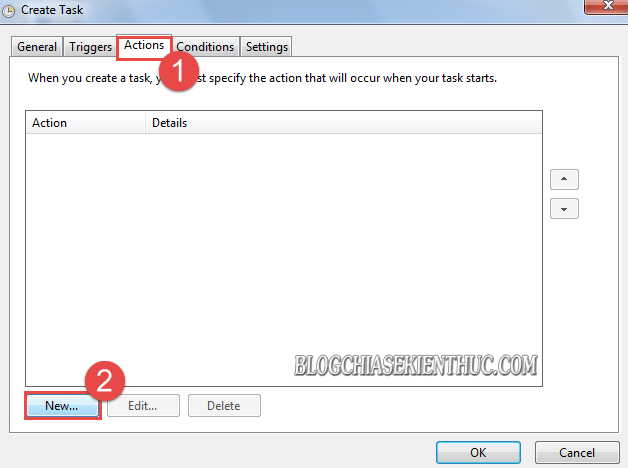
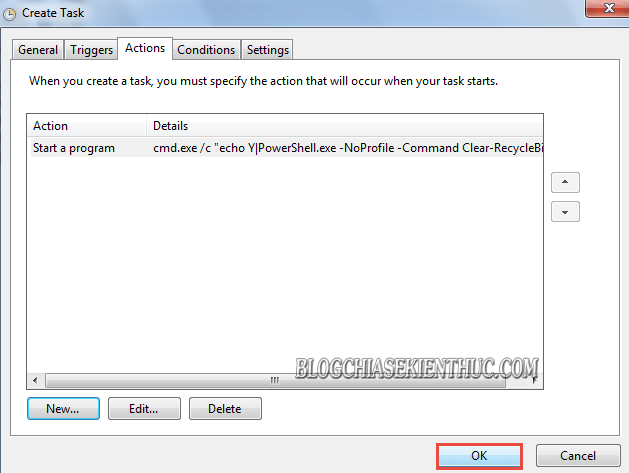
+ Step 5: Then you click on Tab Actions and New to enable Auto delete file mode for Windows.
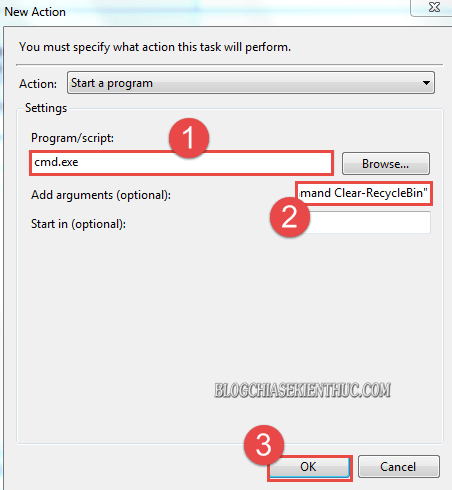
At the dialog box New Action, part Program/scrip: you type the command cmd.exe.
And at Add arguments (optional) => you enter the command line /c "echo Y|PowerShell.exe -NoProfile -Command Clear-RecycleBin" => then press OK.
+ Step 6: Then click OK at the dialog box Create Task, and exit the dialog box Task Scheduler => to enable automatic file deletion in the recycle bin according to the schedule you set.
Epilogue
Okay that’s it. It’s very simple to enable the feature Automatically delete junk files on Windows computers according to schedule is not it. Now you do not need to waste time cleaning manually as before.
Especially, this feature is very useful for girls who are often less concerned with performance improvement and computer care ?
And here, the tutorial on how to schedule to delete files in the recycle bin on my Windows operating system is also finished. Hope that today’s tips in using your computer will be helpful to you.
Good luck !
CTV: Luong Trung – techtipsnreview
Note: Was this article helpful to you? Don’t forget to rate, like and share with your friends and relatives!
Source: Schedule to automatically delete files in recycle bin on Windows 7 / 8/10
– TechtipsnReview


