
NOTE: Welcome to the Knowledge Sharing Blog! If you encounter any errors during use, such as error in download link, slow blog loading, or unable to access a certain page on the blog … please notify me. via Contact page. Thanks!
Microsoft introduced Shared Experiences in a Big Update called Creators Update (Windows 10 Version 1703). This feature allows you to share web links, messages, app data, etc. with other Windows 10 PCs or linked Android phones. In addition, experience sharing also allows you to share or transfer videos, photos and documents with other Windows 10 devices via Bluetooth or Wi-Fi.
This feature is very useful if you really need it. But if you seldom or never use this feature and you don’t want to make your Windows 10 system detected by other devices on the same network, here’s how you can turn off Shared Experiences in Windows 10.
As in the title of the article, in this tutorial I will guide you through 3 easiest ways to do this easily.
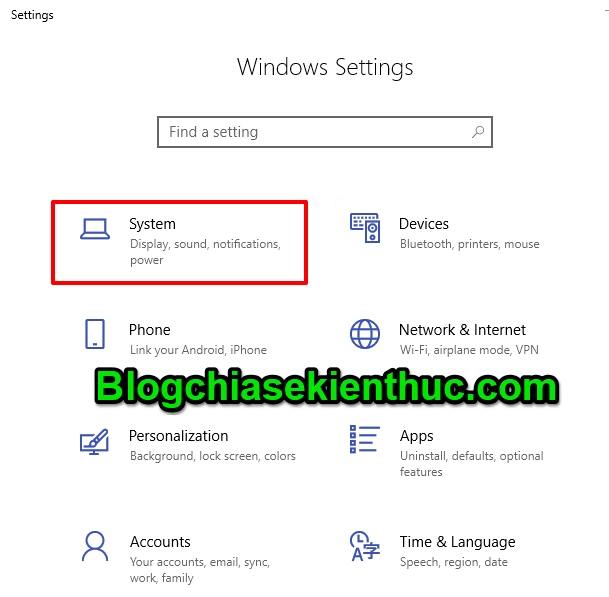
+ Step 1: First you need to open Windows Settings up. You can use a combination of keyboard shortcuts Windows + I.
+ Step 2: Click to select System.
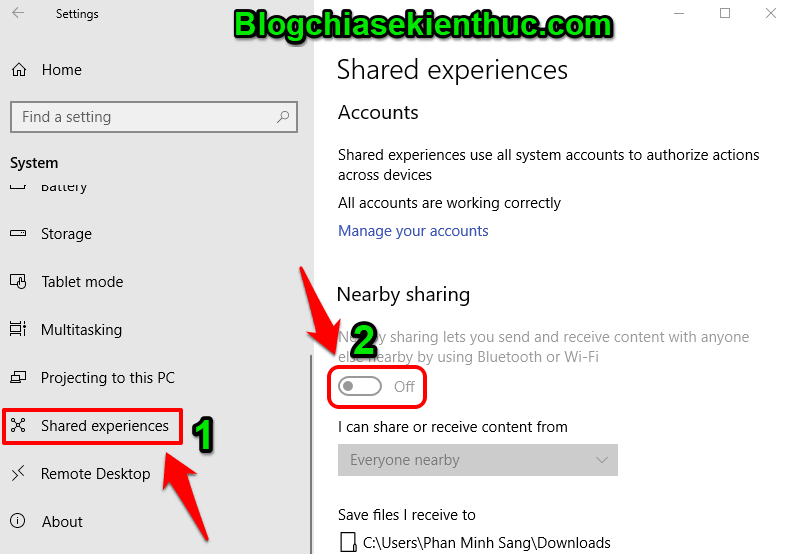
+ Step 3: Click on the item Shared Experiences and then press OFF to turn off the feature.
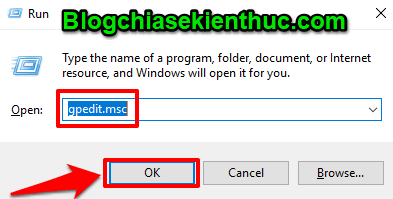
+ Step 1: You press the key combination Windows + R to open the Run command box. Then enter or paste the command line: gpedit.msc into the search box and press Enter or click OK to open Group Policy Editor.
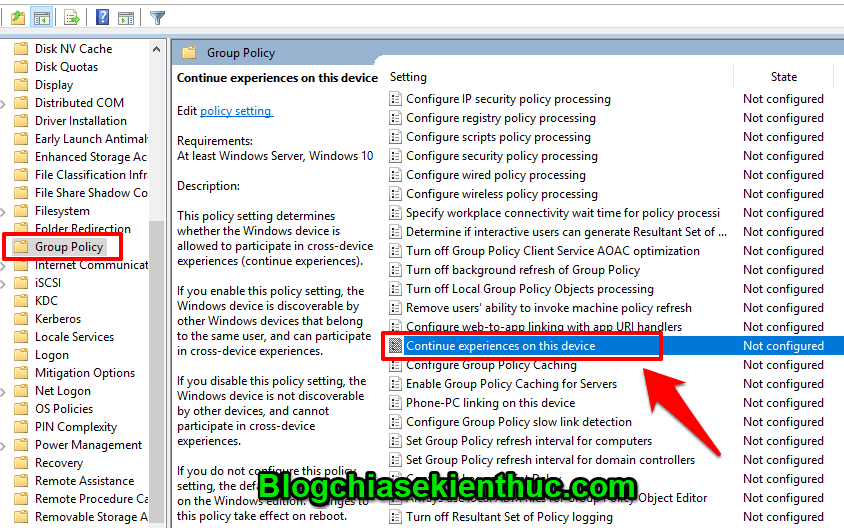
+ Step 2: In Group Policy Editor. You navigate to the directory under the following path: Computer Configuration => Administrative Templates => System => Group Policy.
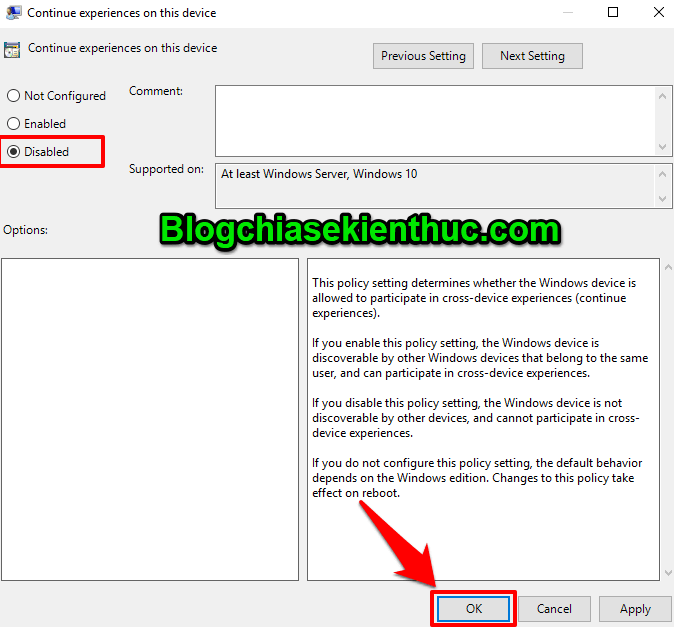
Section Group Policy, you double-click on this folder to open the settings interface in the right bar. Double-click to select the item Continue experiences on this device in the right toolbar.
+ Step 3: There will be a custom board appear, please click to select Disabled and press OK to save any changes.
+ Step 1: Press the key combination Windows + R to quickly open the Run command box. Then enter regedit or regedit.exe and press Enter or click OK to open Registry Editor.

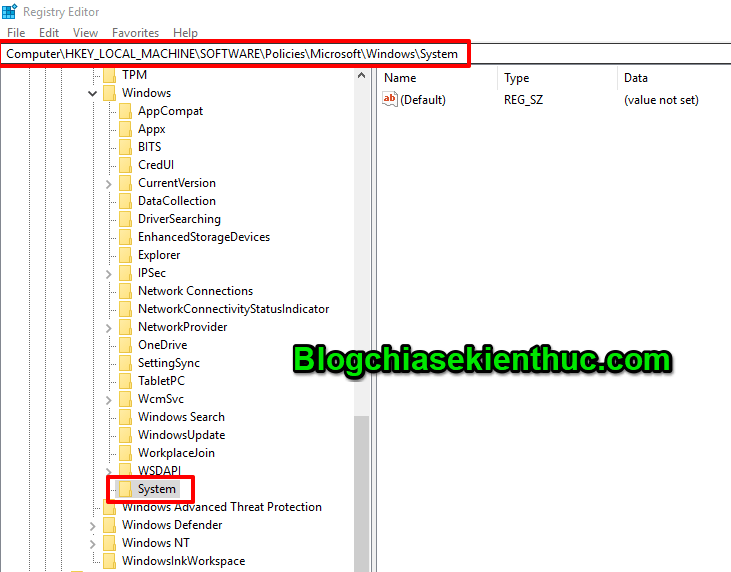
+ Step 2: In Registry Editor, navigate to the folder below (See how to quickly open a Registry path).
Computer HKEY_LOCAL_MACHINE SOFTWARE Policies Microsoft Windows

+ Step 3: You need to create a new Key named System in the Windows folder. If yes, then skip this step and no longer need to create.
Perform: Right click on the folder Windows => select New => select Key.

This is the key System that you just created, now press select folder System this.
+ Step 4: In the key System Just created, you right click on the white area in the right frame => select New => select next DWORD (32-bit) Value.
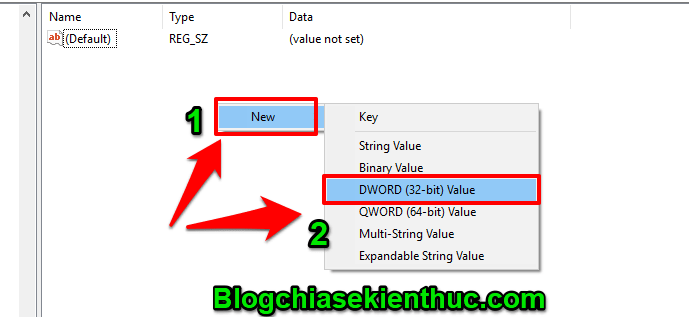
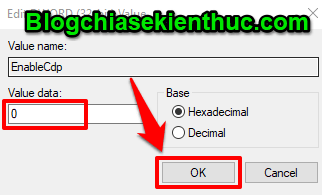
+ Step 5: Name the value Value that is EnableCdp.
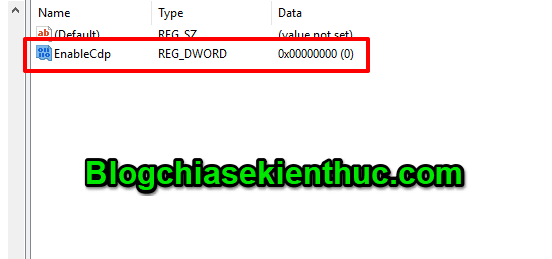
+ Step 6: Double click System just created. A small command box appears, in the section Value dataYou enter the value as 0 and press OK to save.
Epilogue
Ok, so I have detailed instructions for you how to disable Shared Experiences in Windows 10 Alright. Very simple and easy, right?
If it feels right, then apply this tip to your computer right away. Thank you for watching the article. Good luck !
CTV: Phan Minh Sang – techtipsnreview
Note: Was this article helpful to you? Don’t forget to rate, like and share with your friends and relatives!
Source: Share 3 ways to turn off Shared Experiences in Windows 10
– TechtipsnReview


