NOTE: Welcome to the Knowledge Sharing Blog! If you encounter any errors during use, such as error in download link, slow blog loading, or unable to access a certain page on the blog … please notify me. via Contact page. Thanks!
Yes, in the previous article, I have detailed instructions for you how to install standard uefi windows using WinNT Setup software, and in my opinion it is also the simplest and most popular way today.
However, talking about computer rescue in general or more accurately, it is the improvisation to apply the tricks flexibly, not all technicians can do it.
Therefore, as you can see, there is only one topic, but maybe I will share and guide you with many different solutions, the purpose is for you to have more choices in rescue. , repair the computer.
Read more:
As you all know, the WinNT Setup is one Win installation support software It is very good and the proof is that a lot of people are using it, from mainstream users to auditors.
Therefore, in this article I will share with you some of the most common cases in the process of installing Windows under UEFI standard using WinNT Setup, hope this article will be useful for those who are having trouble. Installed according to this new standard.
I. What needs to be prepared before implementation?
- A USB BOOT: You can create a usb bootable uefi like this tutorial or this article.
- A Windows Installer (7,8.1,10) 64-bit depending on your needs. You can go here to download the original version of Windows from Microsoft.
- You must first set up UEFI in BIOS, if you do not know how to set it up, please review this tutorial.
- If you do not know how to use Partition Winzard Partition management software, please refer to this tutorial first.
II. Install Windows UEFI standard with WinNT Setup
TH 1: Your computer has installed Win standard UEFI before
If you have previously installed and used Windows standard UEFI, your hard drive will be formatted as GPT and you can skip BIOS setup step above.
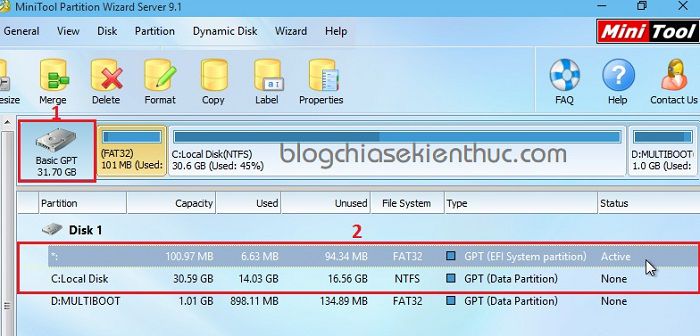
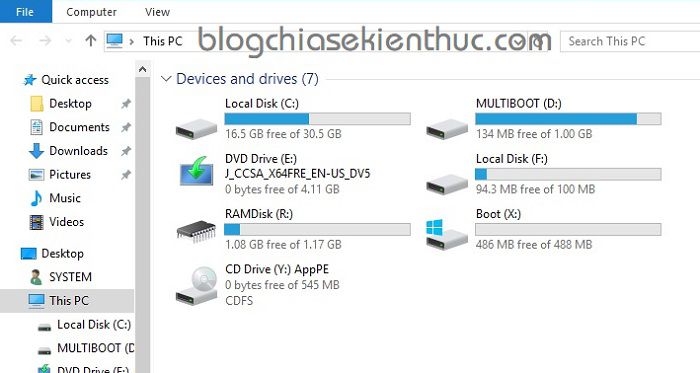
+ Step 1: Access Win PêE (Mini Win) => then open Partition Winzard software, you will see an EFI boot partition (<500 MB)
+ Step 2: Right-click the partition you want to install Win (in this case, the drive partition C) => select Format.
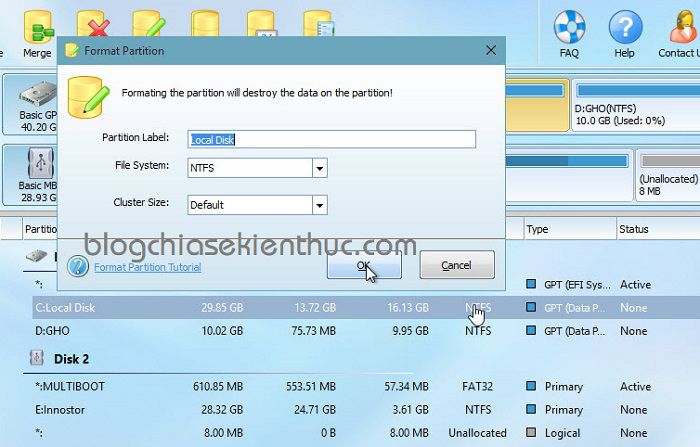
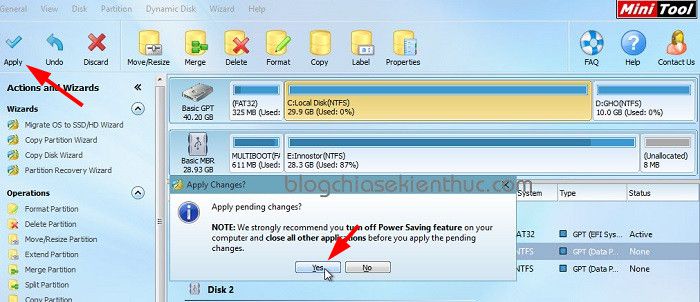
To apply the change, press Apply => select Yes to agree => then you can turn off the software Partition Winzard Okay then.
+ Step 3: Next, you need to mount the Windows installer to a virtual drive, or if you have an available installation disc, insert it into the DVD drive.
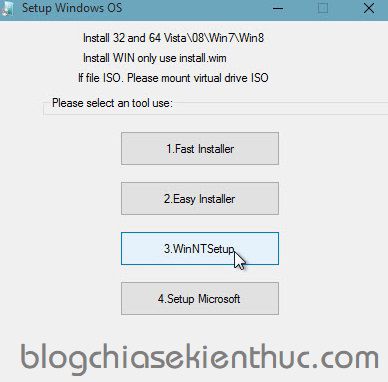
+ Step 4: Now open it WinNT Setup Up, depending on the set of boot tools you use will have a different interface and opening.
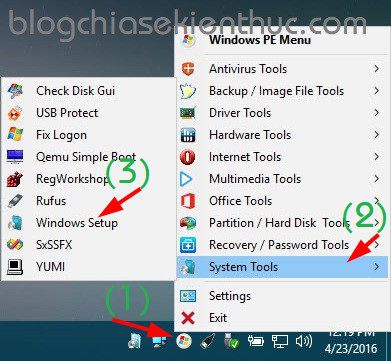
As long as you open the software WinNT Setup is okay ?
+ Step 5: At the main interface of WinNT Setup, pay attention to the conditions to be able to install standard Windows UEFI, which are:
- Hard drive is in format GPT.
- Boot partition EFI.
=> These 2 lines have a blue check mark as shown below is OK.
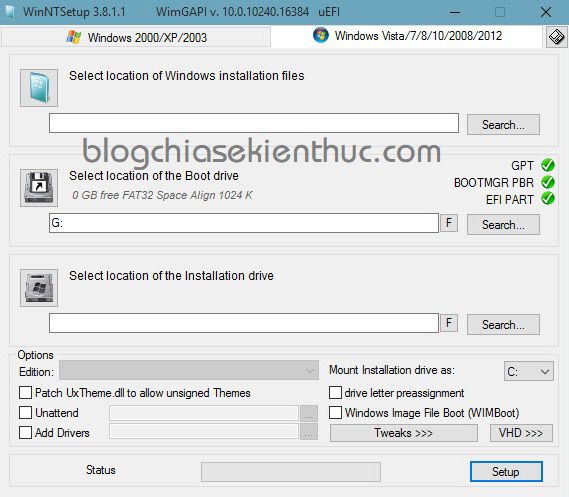
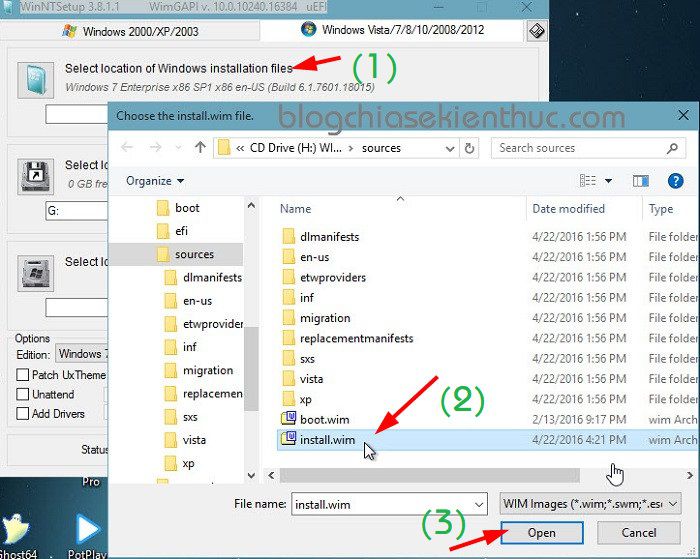
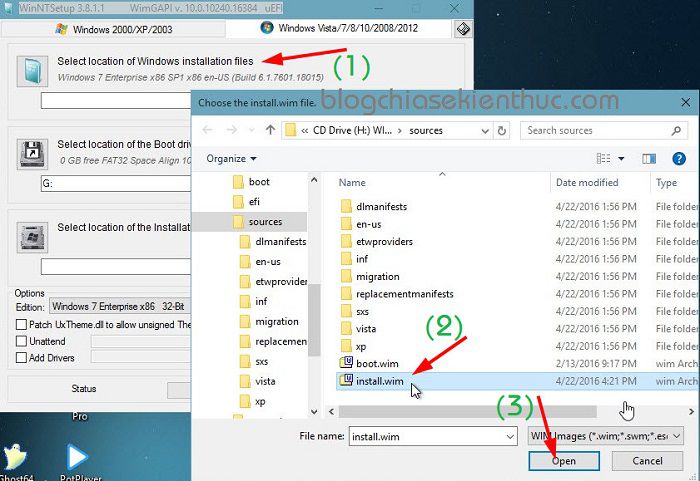
+ Step 6: At section Select location of Windows installation files => please press the button Search => find select file install.wim included in the installer that you mounted on the virtual drive earlier. (file install.wim located in the directory sources of the installer)
+ Step 7: Because before that, your computer has installed and used Windows standard UEFI, that’s why in the section Select location of the Boot Drive software selected for you already.
Note: If it is not optional then press the button
Search=> points to the boot partitionEFIis to be.
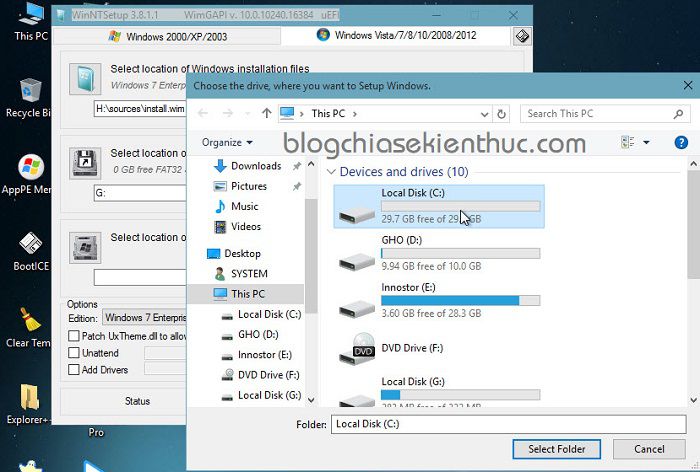
+ Step 8: Next, in the section Select location of the Installation drive => click the button Search => select the partition you want to install win.

That is the partition you have Format in Bước 2 there.
+ Step 9: Finally, click the button Setup to begin the Windows installation process only.
TH 2: The computer is using LEGACY standard and has a boot partition
In case you are using the old standard boot operating system, LEGACY – MBR standard, and now you want to install the new standard, UEFI – GPT standard, you can refer to the following method.
+ Step 1: Complete the steps above.
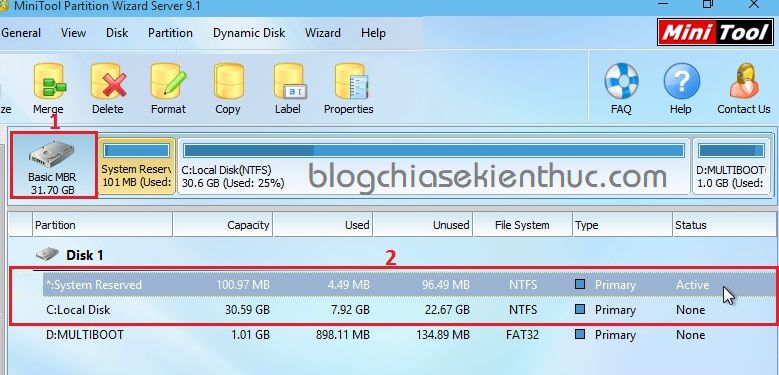
+ Step 2: Open the software Partition Winzard ra => now you will see 1 drive partition appear C (containing the operating system) and a named boot partition System Reserved (with an amount of <500 MB).
+ Step 3: Please take word Bước 2 come Bước 4 as instructed in TH 1.
+ Step 4: Select location of Windows installation files: Find the file install.wim of the Windows installer after Mounting the virtual drive.
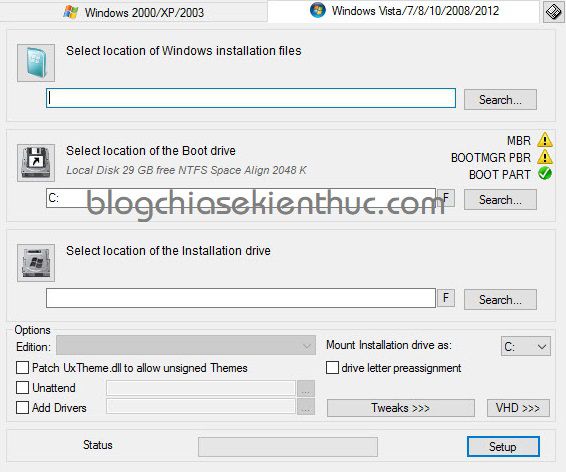
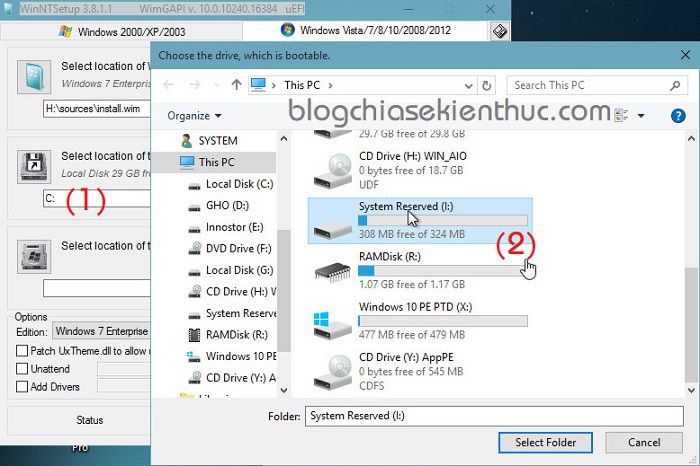
+ Step 5: Select location of the Boot Drive: You find the boot partition named System Reserved as shown below.
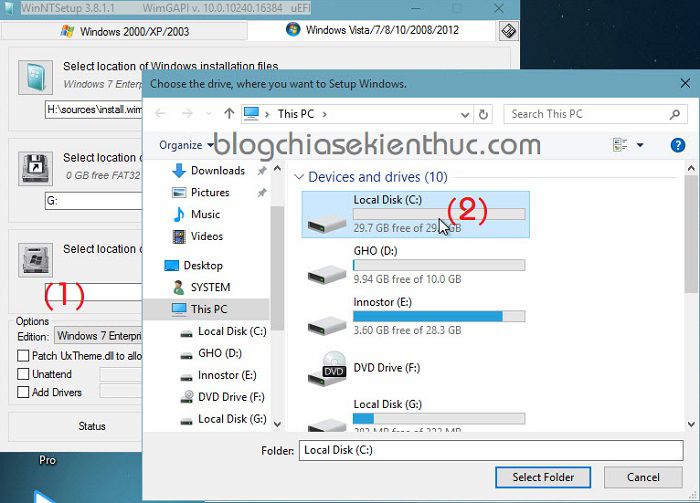
+ Step 6: Select location of the Installation drive: Navigate to the partition you want to install Win.
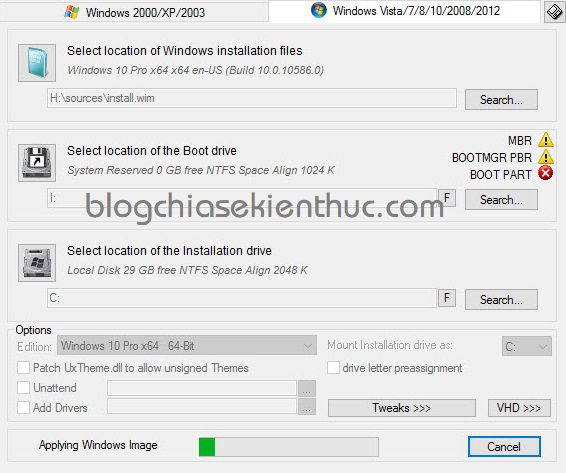
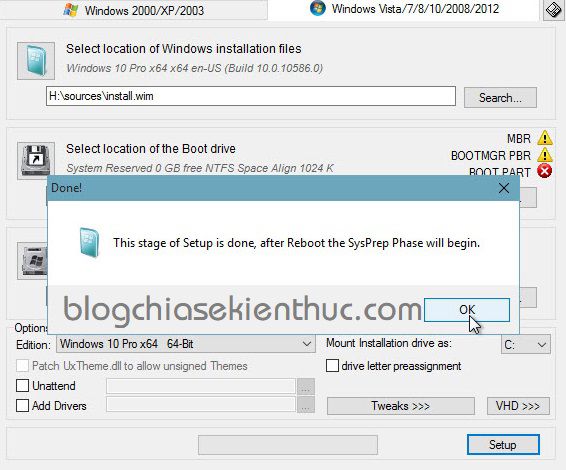
+ Step 7: Once you are done setting up, you will see the results as shown below. You are wondering why it is being exclamation mark with sign x That red?
DO IT! you just press the button Setup to start the installation process.
+ Step 8: After the installation is complete, click OK and turn off the WinNT Setup software. But that is not done, now you need to convert the hard drive from MBR format to GPT format so that at boot Windows there is no error.
+ Step 9: In this case, use software AOMEI Partition Assistant to convert. This software converts from MBR to GPT very well.
In addition it also moves the boot partition itself System Reserved (NTFS) to EFI (Fat32) without error.
In this case, if we use Partition Winzard to convert, there will be an error.
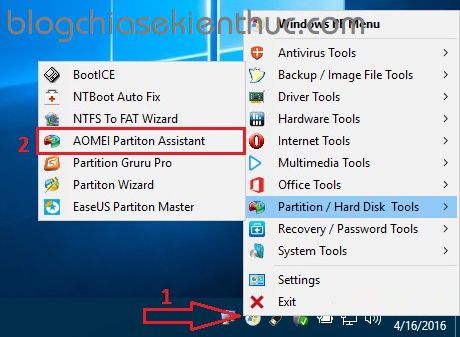
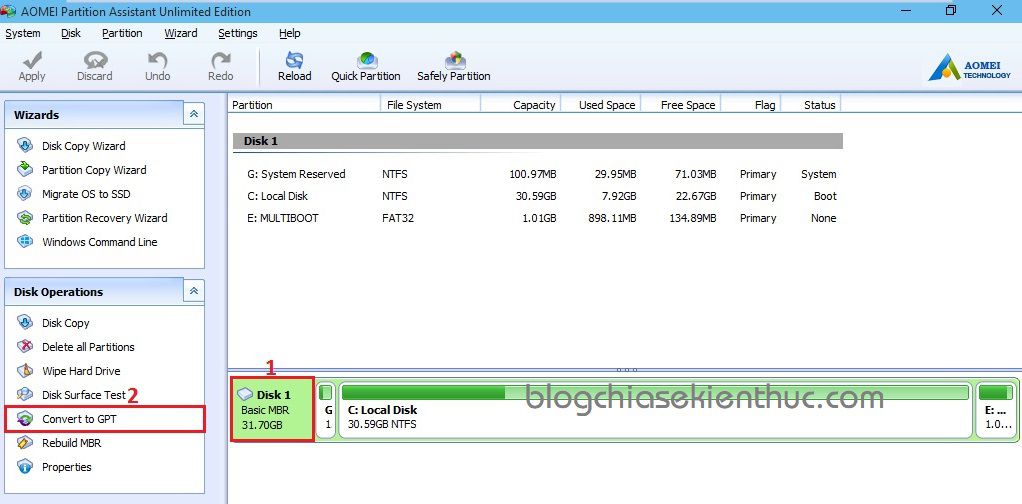
+ Step 10: After opening the software AOMEI Partition Assistant Then you do as in the image below.
Perform: Select the hard drive you want to convert => click Convert to GPT.
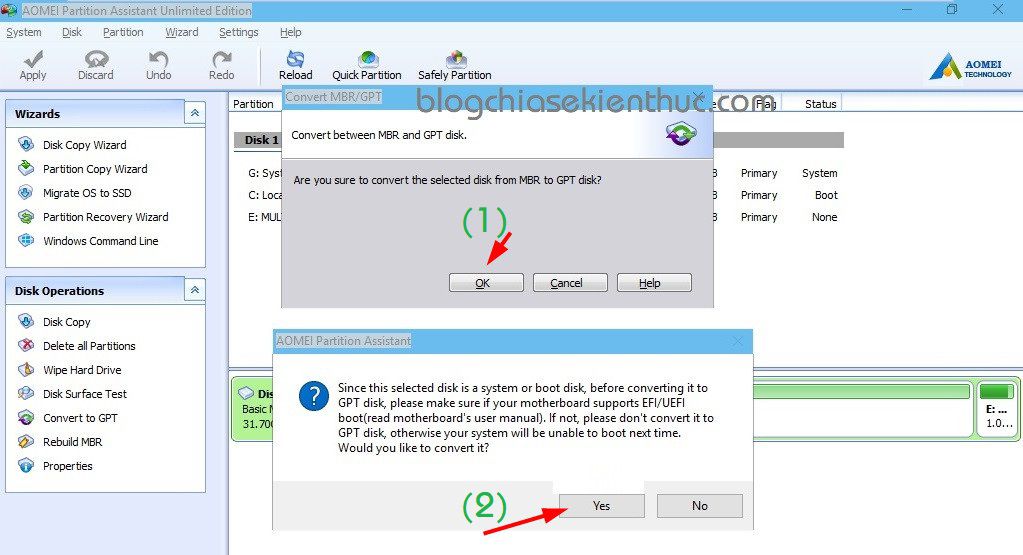
+ Step 11: At this time a dialog box will appear, click OK to agree => click YES to turn off the warning dialog box.
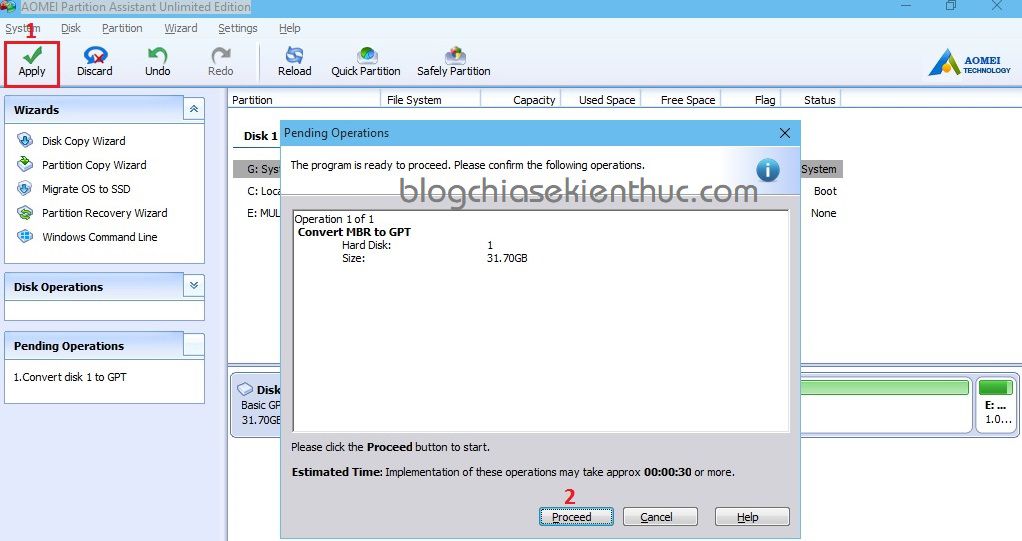
+ Step 12: Finally, don’t forget to press Apply => select Proceed to apply the entire change.
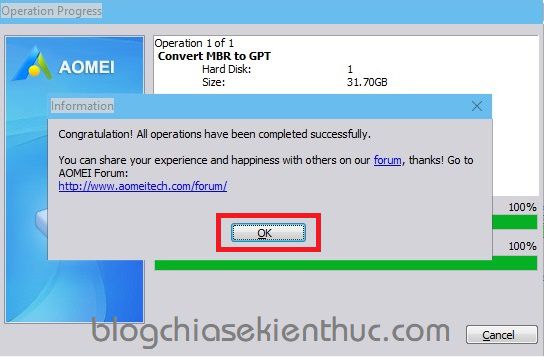
+ Step 13: Press OK => now the software has moved the boot partition from System Reserved (NTFS format) to EFI (Fat32 format) already.
At this point, start your computer to perform the next Windows installation steps.
TH 3: The computer is using LEGACY standard and does not have a boot partition
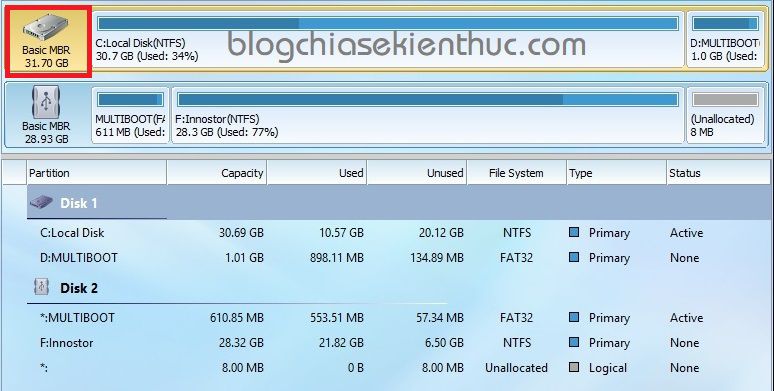
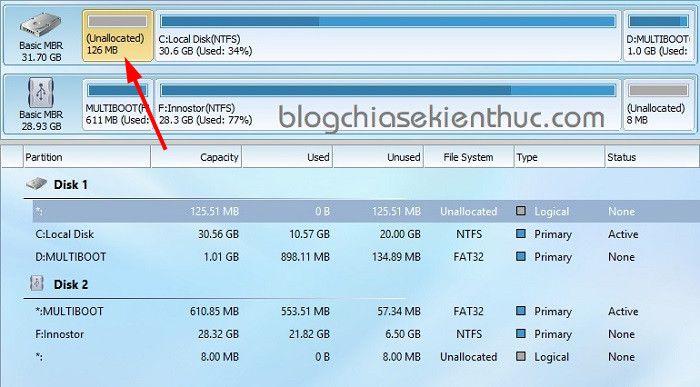
This case is also very common, which means that the boot partition is located with the partition containing the operating system as shown below.
You won’t see a boot partition at all, so our job at this time is to create a boot partition for it.
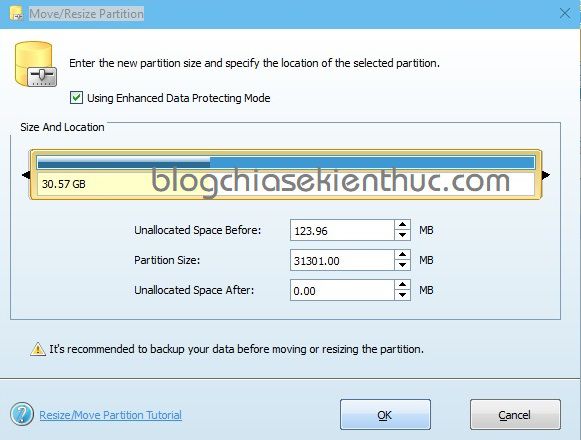
+ Step 1: Now we will perform cutting out 1 partition with a capacity of about 100 – 500 MB (located in front of the drive C, ie the drive in which the operating system is located).
Perform: Right-click the C drive partition (the drive containing the operating system) => select Move/Resize to perform cutting.
If you do not know how to cut, please read the instructions on how to use Partition Winzard in the preparation step.
+ Step 2: After cutting, you will get a new unformatted partition (Unallocated) as shown below. It’s in front of the nest C Please.
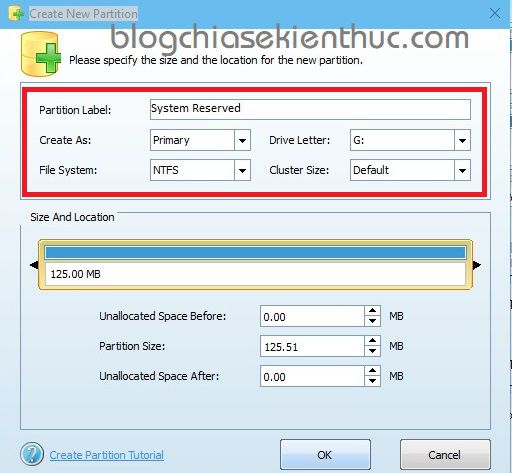
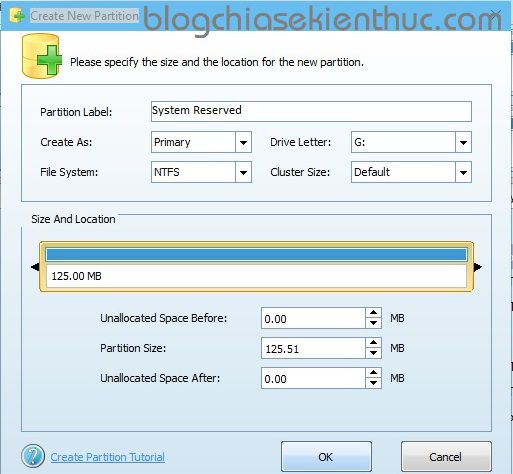
+ Step 3: Now we will name and format it by => right click on the partition you just created => select Create with the following information:
- Partition Label: Name the partition.
- Create As: You let be
Primary(primary partition). - File System: You let be
NTFS.
Press OK to turn off the dialog => remember to press Appy to apply the change, guys.
+ Step 4: Now do it Set activate for that partition. If you do not know how to do it, please see this Set activate tutorial.
+ Step 5: Yes ! Now your hard drive has a boot partition, the rest you do in turn as instructed in TH 2 is done.
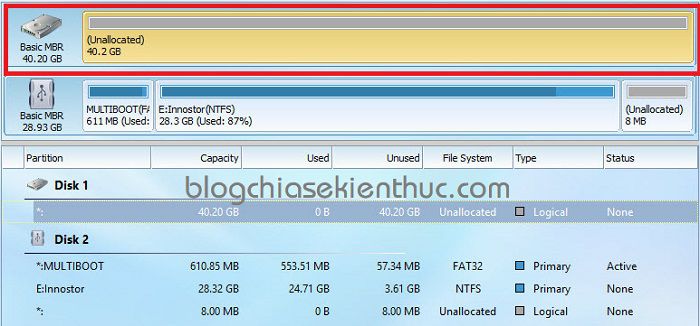
TH 4: The case of a new computer or a new hard drive that has not been formatted yet
In this case, your hard drive has not been formatted (Unallocated) as shown below. Now split the hard drive for use.
In this case, my friend will divide it into 2 partitions which is the drive partition C (the operating system drive) and a boot partition in front of the C drive is named System Reserved.
Depending on the size of your hard drive, how to divide it properly, how to divide the hard drive by Partition Winzard is already in the preparation, please read it again if you do not know.
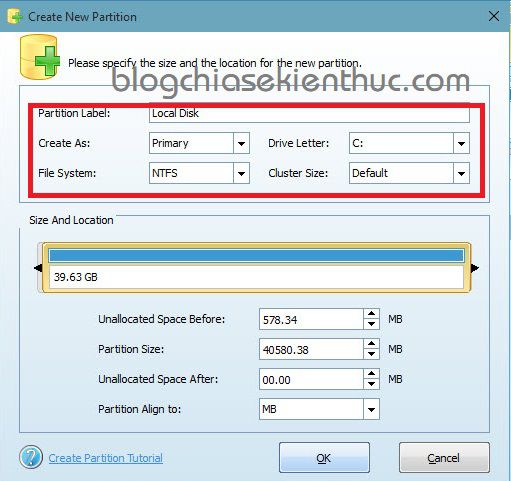
+ Step 1: Create drive partitions C (operating system drive) with the parameters shown below. Which means that:
- Create as: You can be Primary.
- File system: You leave it as NTFS
+ Step 2: Create a boot partition named System Reserved. This partition you can let the capacity range 100 – 500 MB offline.
+ Step 3: After finishing the partitioning, remember to press Apply to apply all changes.

Yes, getting here is easy. Please follow the instructions in turn TH 2 in the post is okay.
III. Epilogue
Okey, above are 4 cases that will help you Install Win standard UEFI – GPT by WinNT Setup be simpler.
After reading this article, I think you can easily install Windows by yourself, right, if you have any other good methods, please share by commenting below this article.
Hopefully the article will be useful to you, wish you success!
Author: Refer to the article of Nguyen Anh Tuan
Note: Was this article helpful to you? Don’t forget to rate, like and share with your friends and relatives!
Source: Update 4 cases of installing Win standard UEFI by WinNT Setup
– TechtipsnReview


