[alert color=”orange” type=”alert-message-background” title=”Chỉ áp dụng cho Mac hoặc Linux” size=”small”]This series is for Mac OS X or Linux operating systems only.[/alert]
In this article, I will detail how to install Vagrant and the VVV tool for Vagrant so that we can start creating a professional WordPress virtual machine.
Step 1. Install VirtualBox
If you have already installed VirtualBox, you can skip it, if you have not installed VirtualBox, go to the path https://www.virtualbox.org/wiki/Downloads and download the corresponding installation package.
Then run the setup file and install it like normal software.
Step 3. Install Vagrant
After installing VirtualBox, you can install Vagrant, first go to https://www.vagrantup.com/downloads.html and download the Vagrant installation package for your respective operating system.
And of course, open it up and install it.
Install Vagrant please restart the machine.
Step 4. Install Varying Vagrant-Vagrants (VVV)
First, you create a folder anywhere to save the VVV package and you have to remember it because you have to access it to use it, you also specify that you don’t need to move the folder later because it may be Some path related errors occurred.
Here I will choose the prime location is /Users/tên_user to create. I created a folder named vv-tut in this for easy identification.
Then open the operating system’s Terminal and type the following two Vagrant plugins in turn:
$ cd ~/vvv-tut
$ vagrant plugin install vagrant-hostsupdater
In there,
- vagrant-hostupdater: The plugin supports auto-editing the hosts file on the computer when adding a domain to the virtual machine in Vagrant.
- vagrant-triggers: To be able to automate operations such as creating a database, importing existing database data, etc.
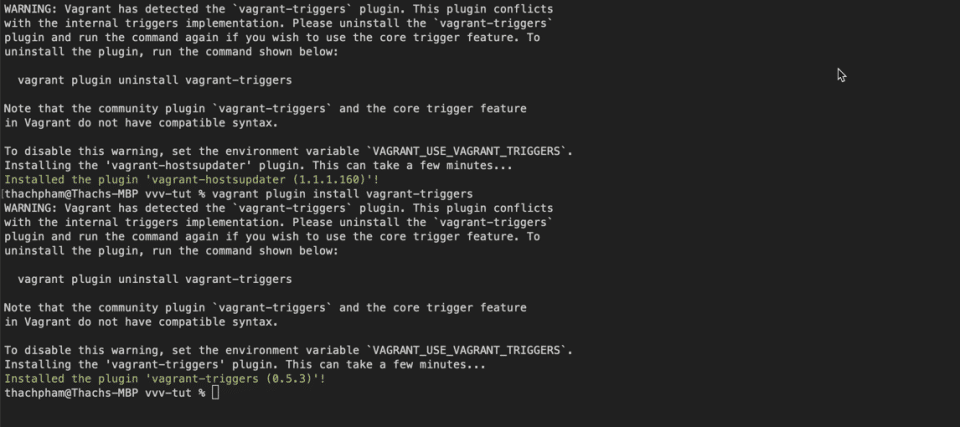
Image after installing 2 plugins for vagrant complete:

Then copy the VVV source code to the directory vv-tut with the following command:
$ git clone -b master --single-branch git://github.com/Varying-Vagrant-Vagrants/VVV.git .
Result:

Finally right at the directory vv-tutyou type the command vagrant up so it starts installing VVV for the first time. The first time it took a long time to install because it had to download a lot of things, so you go have lunch and come back.
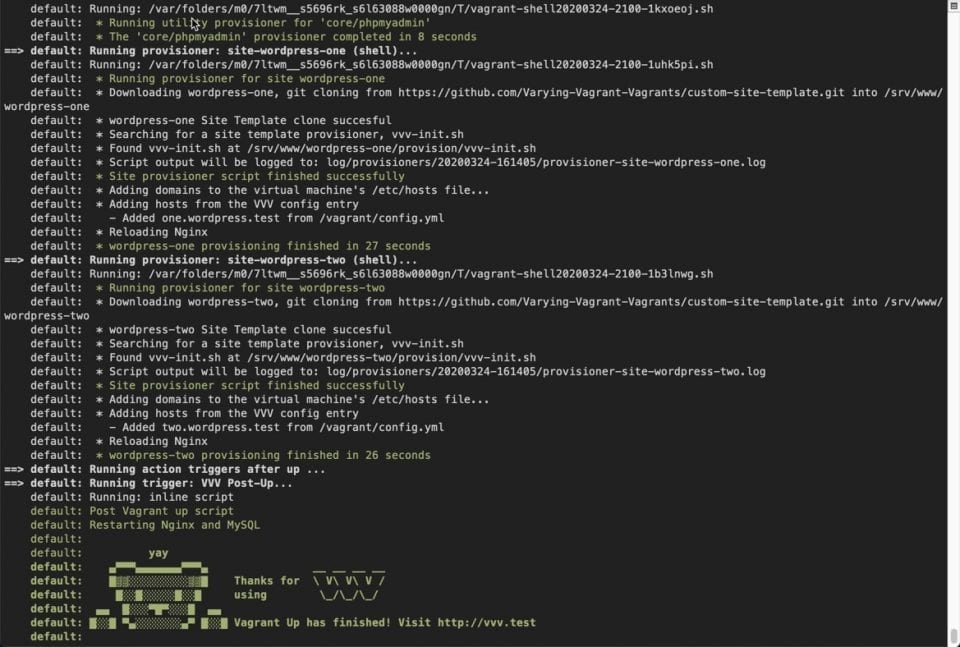
And here is the message after the installation is complete (I just slept 1 night):

Now try to access the following links, if it shows up on the website, it’s successful:
- http://vvv.dev – The main page of VVV, where some important links are displayed.
- http://local.wordpress.dev – Website sample install official stable version of WordPress.
- http://src.wordpress-develop.dev – Website sample install the latest beta version of WordPress.
- http://build.wordpress-develop.dev – The WordPress version is built using Grunt to contribute to the development of the source code. see more
If you can’t access those websites, then type the command vagrant provision in folder vv-tut let it regenerate.
Some default login information
MySQL root account
- Username: root
- Password: root
You can use it to login to phpMyAdmin by following the link http://vvv.dev/database-admin/
Login account for pre-installed WordPress websites
- Username: admin
- Password: password
MySQL account for pre-installed WordPress sites
- Username: wp
- Password: wp
Basic information of pre-installed WordPress website
WordPress Stable
- Path on the computer: $etcv/www/wordpress-default
- Path on the virtual machine: /srv/www/wordpress-default
- URL:
http://local.wordpress.dev - DB Name:
wordpress_default
- Path on the computer: $vvv/www/wordpress-trunk
- Path on the virtual machine: /srv/www/wordpress-trunk
- URL:
http://local.wordpress-trunk.dev - DB Name:
wordpress_trunk
- Path on the computer: $vvv/www/wordpress-develop
- Path on the virtual machine: /srv/www/wordpress-develop
- /src URL:
http://src.wordpress-develop.dev - /build URL:
http://build.wordpress-develop.dev - DB Name:
wordpress_develop - DB Name:
wordpress_unit_tests
In there, $vvv represents the directory path you are installing etc.
Customize some information of the virtual machine.
By default, the VVV virtual machine has been fixed with some information such as static internal IP address, number of CPUs used, amount of RAM. If you want to fix it, you can edit the file /vvv/config/config.yml.
Fix CPU count
You find the following line to edit the number 2 to the number of CPU cores you want for this virtual machine to use. Note that this number must be smaller than the CPU multiplier that your machine has.
cores: 2
Fix the amount of RAM
You find this line and edit:
memory: 2048
That’s it, the other information you should leave it as is.
After editing, remember to press the command vagrant reload to load new settings for the virtual machine.
Some familiar Vagrant commands
vagrant halt– Shutdown virtual machine.vagrant reload– Restart the virtual machine.vagrant destroy– Do not use, delete the virtual machine.
see more: https://docs.vagrantup.com/v2/cli/
Epilogue
In this article we have successfully installed VVV and Vagrant, since then it has been running. Continuing in the next article, I will show how we add a new domain name (of course virtual domain), add a new database and try to install a new WordPress website on VVV yourself.
Source: Install Vagrant and VVV for MacOS/Linux
– TechtipsnReview


![[Premium] 14 best plugins to create unique menus](https://techtipsnreview.com/wp-content/uploads/2022/09/Premium-14-best-plugins-to-create-unique-menus-400x245.jpg)


