Widget in WordPress everyone understands it is a content block placed in a specified area, this area is often called Widget Area or Sidebar. In addition to available widgets like Recent Posts, Recent Comments…then if you want more widgets you have to install plugins or some themes also give you some optional widgets.
So how to understand the process of creating a widget like? In this article, I will thoroughly analyze how to create a widget, but of course you need to have PHP knowledge, for example, you should understand what classes and objects in PHP are.
The concept of how to create widgets
Preview: Widgets API – WordPress Codex
In WordPress there is already a class named WP_Widgetin this class there are methods (methods), that is, you must write these methods according to its standard, neither missing nor redundant and must write the correct method name.

In class WP_Widget there are a total of 3 required methods, including:
__construct: This initialization method will be responsible for declaring the widget name, widget description.
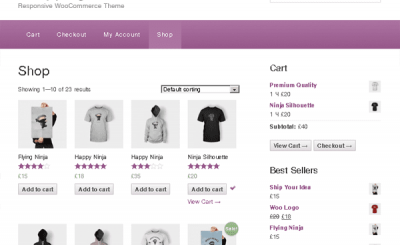
form: This method will help you to create input forms inside a widget, see the image below.

Form form in widget
update: This method will assist you to save the data that the user has entered into the forms that you have created with the form.
widgets: This method will help you call the data and display it on the website when you attach this widget.
In addition, in this class you must also declare a method of your choice to set the name and description of the widget. Some use the . method __construct() and some create another method themselves. Here I choose to create the method myself because it is easier to see and understand.
Prepare
You can practice this lesson by writing code in the file functions.php in the theme, but you’re better off creating a plugin. Create a file with a certain name in the directory wp-content/plugins and write this at the top of the file
<?php
/*
Plugin Name: Test Widget
Plugin URI: https://TechtipsNReview.com
Description: Thực hành tạo widget item.
Author: Thach Pham
Version: 1.0
Author URI: http://google.com
*/
Needless to say, the practice code in this article you write below the line above.
6 steps to create widget item
Step 1. Initialize the widget
First, to initialize a widget, we have the following 4 segments to initialize.
/*
* Khởi tạo widget item
*/
add_action( ‘widgets_init’, ‘create_thachpham_widget’ );
function create_thachpham_widget() {
register_widget(‘Thachpham_Widget’);
}
In there, Thachpham_Widget is the class that we will create in a bit.
Step 2. Create class and structure methods
As I said, now we will create a class named Thachpham_Widget that inherits the class WP_Widget By default, there will be 3 required methods: form, update, widget and include a method to name the widget. We have the following.
/**
* Tạo class Thachpham_Widget
*/
class Thachpham_Widget extends WP_Widget {/**
* Thiết lập widget: đặt tên, base ID
*/
function __construct() {}
/**
* Tạo form option cho widget
*/
function form( $instance ) {}
/**
* save widget form
*/function update( $new_instance, $old_instance ) {
}
/**
* Show widgets
*/function widget( $args, $instance ) {
}
}
I already have a clear comment in there.
Now try to save it and see if you see the Appearance -> Widgets My file appears an unnamed lump as shown below, if so, you did the right thing.

Step 3: Name the widget (__construct)
In this step we will work in the __construct() Please. Now we will create an array of the following values:
function __construct() {
parent::__construct (
‘thachpham_widget’, // id của widget
‘ThachPham Widget’, // tên của widgetarray(
‘description’ => ‘Mô tả của widget’ // mô tả
)
);
}
In it, the information I have noted in it already.
Now we attach this variable to the following paragraph.
Now save and enter Appearance -> Widgets Find the name of the widget you just created.

Title and Description of the widget
Step 4: Create a form for the widget (form)
Any widget should have an input form for guests to enter certain options or values here, you can use dropdowns, checkboxes, etc., but here I will use text input for simplicity.
In this step we will work in the form() Please. In this method we have a variable $instance.
First, declare an array like this:
//Biến tạo các giá trị mặc định trong form
$default = array(
‘title’ => ‘Tên của bạn’
);
This array is responsible for setting default values for each form. For example, if you have a form named title, its default value if the user has not entered it is your Name, if you have many forms, add more values in this array.
Next, write this paragraph
//Gộp các giá trị trong mảng $default vào biến $instance để nó trở thành các giá trị mặc định
$instance = wp_parse_args( (array) $instance, $default);
This paragraph you understand simply that it will pull the entire array value of the variable $default to turn $instance.
Continue writing this one more paragraph
//Tạo biến riêng cho giá trị mặc định trong mảng $default
$title = esc_attr( $instance[‘title’] );
I simply give $instance['title'] into a variable for easy remembering, easy writing. In there, $title is the variable that will contain the value of the title to get the keyword title in array $instance.
And finally the most important part, we will create an input field and it will display the value as the $title variable. This means that if we later pass a new value to $title, it will also be displayed.
//Hiển thị form trong option của widget
echo "Nhập tiêu đề <input class="widefat" type="text" name="’".$this->get_field_name(‘title’)."’ value=’".$title."’ />";
Now you save and open the widget, you will see that there is a default form and properties as follows:

You can try by entering something in the form and then pressing Save again and see that it is not saved but returns the default value. That’s because we haven’t written the code for the method yet update.
The entire code in this step:
/**
* Tạo form option cho widget
*/
function form( $instance ) {
parent::form( $instance );//Biến tạo các giá trị mặc định trong form
$default = array(
‘title’ => ‘Tiêu đề widget’
);//Gộp các giá trị trong mảng $default vào biến $instance để nó trở thành các giá trị mặc định
$instance = wp_parse_args( (array) $instance, $default);//Tạo biến riêng cho giá trị mặc định trong mảng $default
$title = esc_attr( $instance[‘title’] );//Hiển thị form trong option của widget
echo "Nhập tiêu đề <input class="widefat" type="text" name="’".$this->get_field_name(‘title’)."’ value=’".$title."’ />";}
Step 5. Save the value when entering the form (update)
In this step we will work with the method update(). In this method we have two main parameters $new_instance used to save the values after pressing the Save button and $old_instance is the old value in the database. After the input data is saved, we will return it.
We have
$instance = $old_instance;
$instance[‘title’] = strip_tags($new_instance[‘title’]);
return $instance;
That is, above I will save the values in the title input form. Jaw strip_tags() used so that the form does not execute PHP and HTML.
The entire code will be
/**
* save widget form
*/function update( $new_instance, $old_instance ) {
parent::update( $new_instance, $old_instance );$instance = $old_instance;
$instance[‘title’] = strip_tags($new_instance[‘title’]);
return $instance;
}
Now you try to write something in the form and save it, the values will be saved.
Step 6. Output the display data
We have created the form, then saved the data in the form. So how can it be displayed out here? In this step we will work with the widget method to display it.
In this method we have 2 parameters as $args to declare the attribute values of a widget (title, HTML tags,..) and $instance is the value that the guest entered into the form in the widget.
If you want to reuse the properties inside the widget, you’d be better off extracting the array in the widget into separate variables. We have:
extract( $args );
Then, to display the value of a form, we just need to echo $instance['form_name']. As in this example, we have $instance['title'].
But since this form is where we enter the title of the widget, you should add a filter hook for it to be correct in WordPress.
echo apply_filters( ‘widget_title’, $instance[‘title’] );
But wait, we can’t write like that, why? Because in Widget it has hooks like position hook before widget (before widget), after widget (after widget) and importantly, if you display widget title like that, it can’t be because we lack hook $before_widget and $after_widgetthese two variables are hooks that print out the heading tag so that the widget title shows the correct “style”.
Thus, we temporarily put the paragraph apply_filters() into a variable:
$title = apply_filters( ‘widget_title’, $instance[‘title’] );
Then we write the following:
echo $before_widget;//In tiêu đề widget
echo $before_title.$title.$after_title;// Nội dung trong widget
echo "ABC XYZ";
// Kết thúc nội dung trong widget
echo $after_widget;
Thus, when printing the widget, you must echo the variable $before_widget and $after_widget to wrap the content, without it there is no display.
And the result is:

The entire code in this step is:
function widget( $args, $instance ) {extract( $args );
$title = apply_filters( ‘widget_title’, $instance[‘title’] );echo $before_widget;
//In tiêu đề widget
echo $before_title.$title.$after_title;// Nội dung trong widget
echo "ABC XYZ";
// End content in widget
echo $after_widget;
}
It is too easy, is’nt it.
Download the source code
Practice – Create a random post widget
You already know how to create a widget, so why not practice it now? Here I will practice how to create a widget that displays random posts with the option to allow guests to enter the number of posts to display by applying the concept of Loop and Query.
</pre>
<pre>class Random_Post extends WP_Widget {function __construct() {
parent::__construct(
‘random_post’,
‘Bài ngẫu nhiên’,
array( ‘description’ => ‘Widget hiển thị bài viết ngẫu nhiên’ )
);
}function form( $instance ) {
$default = array(
‘title’ => ‘Tiêu đề widget’,
‘post_number’ => 10
);
$instance = wp_parse_args( (array) $instance, $default );
$title = esc_attr($instance[‘title’]);
$post_number = esc_attr($instance[‘post_number’]);echo ‘<p>Nhập tiêu đề <input type="text" class="widefat" name="’.$this->get_field_name(‘title’).’" value="’.$title.’"/></p>’;
echo ‘<p>Số lượng bài viết hiển thị <input type="number" class="widefat" name="’.$this->get_field_name(‘post_number’).’" value="’.$post_number.’" placeholder="’.$post_number.’" max="30" /></p>’;}
function update( $new_instance, $old_instance ) {
$instance = $old_instance;
$instance[‘title’] = strip_tags($new_instance[‘title’]);
$instance[‘post_number’] = strip_tags($new_instance[‘post_number’]);
return $instance;
}function widget( $args, $instance ) {
extract($args);
$title = apply_filters( 'widget_title', $instance[‘title’] );
$post_number = $instance[‘post_number’];echo $before_widget;
echo $before_title.$title.$after_title;
$random_query = new WP_Query('posts_per_page='.$post_number.'&orderby=rand');if ($random_query->have_posts()):
";
echo "
endif;
echo $after_widget;}
}
add_action( 'widgets_init', 'create_randompost_widget' );
function create_randompost_widget() {
register_widget('Random_Post');
}
Epilogue
So you already know how to create a widget, right? At first glance, the code may seem difficult, but it’s actually not difficult at all and I believe you can do it yourself after reading my post carefully.
If you have any questions, please comment below.
Refer: How to create widgets quickly with scbFramework – WordPressKite
Source: Instructions for creating Widgets yourself
– TechtipsnReview
![[Premium] 14 best plugins to create unique menus](https://techtipsnreview.com/wp-content/uploads/2022/09/Premium-14-best-plugins-to-create-unique-menus-400x245.jpg)