Excel is a spreadsheet software included in the Microsoft Office suite. This software helps users to record data, presenting information in tabular form. In this post GhienCongListen will guide you how to add lines in excel if you are new to Excel.
How to add lines in Excel
Adding rows in Excel makes it possible to efficiently complete your worksheet when you want to add information between two existing lines. Along with that will also help you easily track data and have a streamlined way.
Advertisement
How to add a line in Excel
Note: The inserted line in Excel will always be above the specified line.
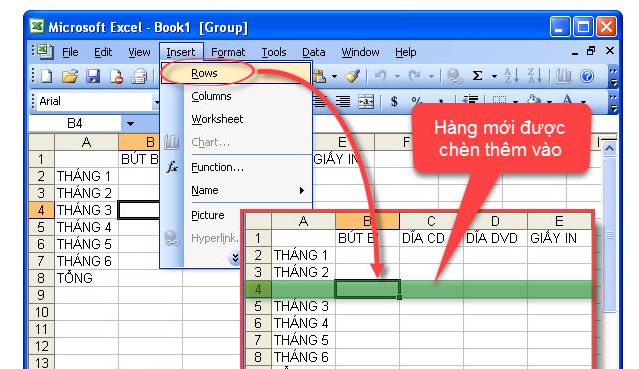
For Excel 2003
Advertisement
Step 1: Click on any cell in the line. Click the right mouse button and select Insert when the new tab appears.
Step 2: Here, you choose Entire row. Then click OK. Thus a row has been added.
Advertisement
For Excel 2007 and 2010 and later
Step 1: Click on any cell in a row, then right-click and select Insert.

Step 2: Now display a dialog box for the user to choose, click Entire Row to add rows.
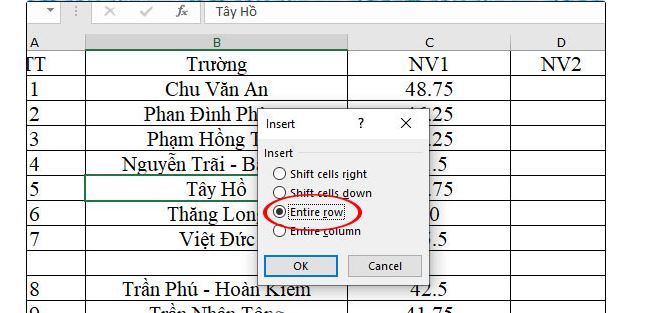
The result is a new row has been added to the Excel table as shown below, above the cell you clicked just now

How to add multiple lines in Excel
You press Shift + Space and then click on the lines after the lines you want to insert. The number of new lines inserted is equivalent to the selected lines. Next click on Insert at the top of the toolbar, or right-click and select Insert done.
Step 1: Select the line at the position to insert. To select, you click in the first cell of the lines or click any cell on that line and press Shift + Space to highlight the line automatically. As many lines as you need to insert, select the corresponding lines. The example in the image below needs 2 more lines.

Step 2: Right click inside the selection and select Insert.

Soon new lines were inserted as desired.

Shortcut to add lines in Excel
In addition to adding lines in Excel manually, you still have a small trick to add lines in Excel that is to use that shortcut.
Step 1: Select the line at the position to insert. To choose, you click on the first cell of the line (order cell) or click any cell on that line and press the . key Shift + Space to apply automatic lines.
Step 2: Press the key combination Alt + I. Then hold the . button Alt press CHEAP. You can also use the Ctrl + Y key combination.

You will see results showing more lines above the selected lines.
How to delete lines in Excel
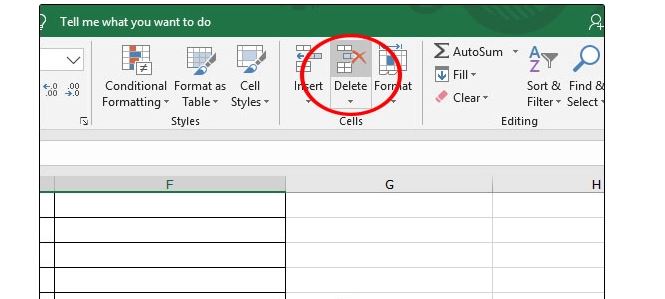
For deleting lines, the way seems much simpler. First you select the lines you want to delete in Excel (same as above). Then you choose Delete on the toolbar at the top of the screen.
But so you already know 3 ways to add lines in Excel, from now on, use keyboard shortcuts to add new lines in your spreadsheet quickly and simply.
See more:
Above are all the ways to add lines in Excel that everyone should know. Hopefully, this article will help you get used to the operations of adding lines and deleting lines in Excel. Don’t forget to follow GhienCongList to update more interesting knowledge.
Source: How to add lines in Excel quickly that everyone should know
– TechtipsnReview


