
Google Chrome is one of the most popular web browsers, and with good reason. With so many features that let you browse the Internet while saving data, Chrome is one of the best browsers out there.
A serious error that you may encounter when using Chrome is Server IP Address Could Not Be Found. This error does not have a single cause, so there are several things you will have to consider to resolve this issue.
1. Check Internet Connection
The first thing you should do when you get this error is check your Internet connection. You may not even be connected to the Internet, and if that’s the case then Chrome isn’t to blame. No browser can browse the Internet without a network connection.
A quick way to check an active Internet connection is to use the ping command in the Command Prompt.
B1: In the menu Start, let’s search Command Prompt and open it. This will display the interface of the Command Prompt tool.
B2: In Command Prompt, enter the following line and press Enter. This command will ping google.com 4 times and return the result.
ping google.comB3: Review the results.
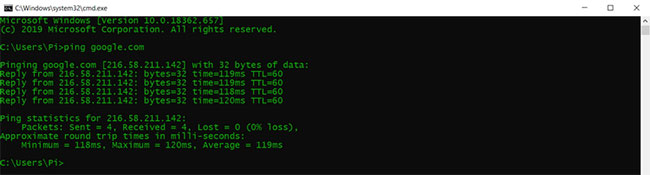
If you get a response within a reasonable time, your connection is fine. However, if you receive the error Request Timed Out or other errors, then you need to check your connection further.
2. Check proxy settings
Another possible cause of the error is an invalid or offline proxy server. You (or an application on your computer) may have set up a proxy that is currently not working. You can set up a new proxy or disable it completely in Proxy settings.
Here’s how to do this:
B1: In the menu Start, search Proxy, then select Proxy settings.
B2: In the window Proxy settings, turn off option Automatically detect settings.
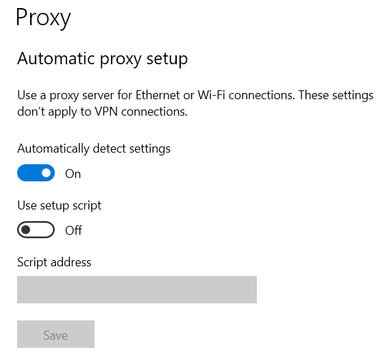
B3: Scroll down Manual proxy setup and disable that feature.
B4: Open Chrome and check if your problem is resolved.
3. Change network adapter settings
By default, the network adapter is set to use DHCP, allowing it to automatically obtain an IP address. However, if you have edited this setting, then IP and DNS will need to be configured manually for your adapter.
You can revert the settings to DHCP from the Control Panel. Follow these steps to do that:
B1: Open Control Panel and select Network and Internet.
B2: From here, select Network and Sharing Center.
B3: In Network and Sharing Center, click Change adapter settings from the menu bar on the left. This will open a window showing all your network adapters.
B4: Right-click the network adapter you are using, then select Properties.
B5: Double click Internet Protocol Version 4 (TCP/IPv4) to open its properties.
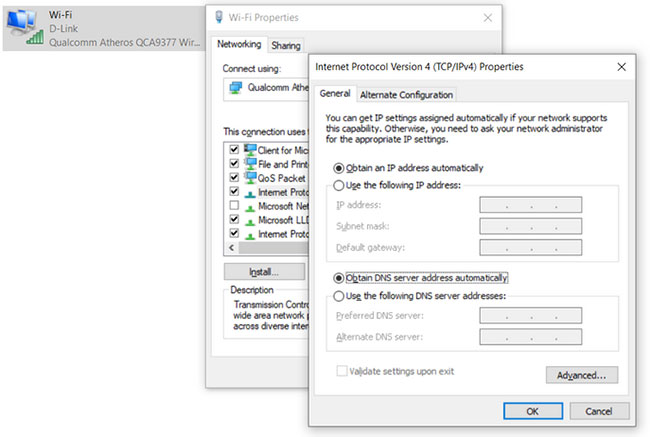
B6: Choose Obtain an IP address automatically and Obtain DNS server addresses automatically.
B7: Press OK to save settings.
B8: Open Chrome and check if your problem is resolved.
4. Update network driver
Another cause of network problems is the lack of appropriate drivers for the hardware. This can happen if your network driver is outdated or you have not installed the correct driver. Windows 10 does a great job of automatically finding and installing drivers, but you can’t be completely sure.
Here’s how to update your network driver:
B1: Open File Explorer.
B2: Right click on This PC. From the menu, select Manage. This will bring up the Computer Management.
B3: From the left sidebar, in System Tools, click Device Manager.
B4: In category Network adapters, right click on the adapter and select Update drivers.
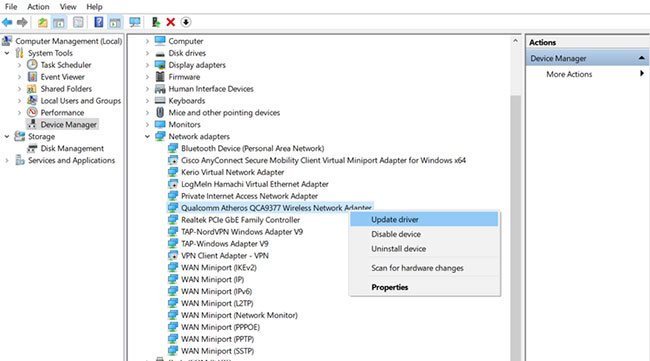
B5: Windows will then search for new drivers and install them if any are found. You can also manually install the drivers provided by the hardware manufacturer (e.g. Qualcomm or Realtek).
5. Using Windows Network Diagnostics
Google Chrome will not be able to function properly if your network is poorly configured. Fortunately, the Windows troubleshooting tool does a good job of finding and fixing configuration-related problems.
B1: In the menu Start, let’s search Troubleshoot settings and open it.
B2: In Get up and running, click Internet Connections.
B3: Click Run the troubleshooter.
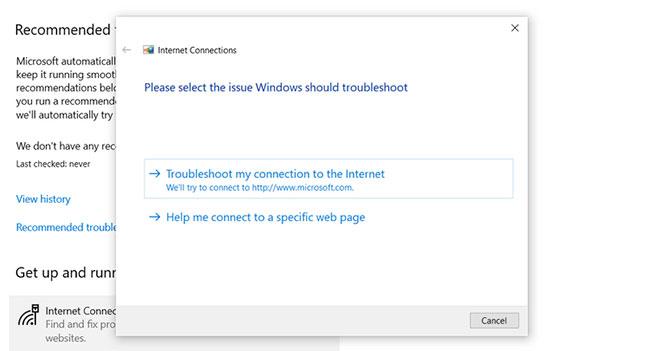
B4: Follow the instructions provided by the troubleshooter. In most cases, the troubleshooter can handle the detected problems on its own. However, it can provide you with instructions to fix the problem yourself if you don’t have the necessary privileges.
6. Restart Windows service DNS Client
Windows uses a service called DNS Client to cache DNS and register computer names. It’s possible that your DNS Client service is malfunctioning and needs to be restarted.
B1: Press Win + CHEAP on the keyboard to display the dialog box Run.
B2: Import services.msc in the text box and press Enter. This will bring up a window containing all the Windows services.
B3: Scroll down to find DNS Client.
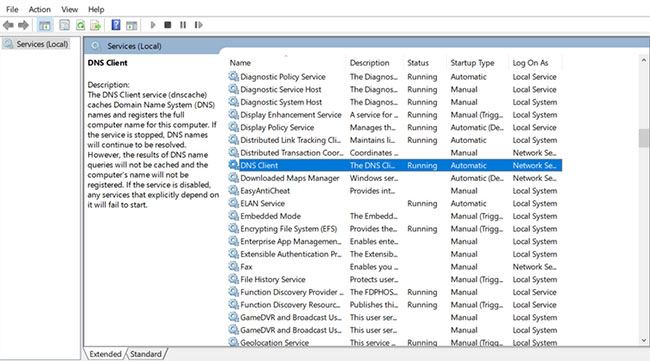
B4: Right click on the service DNS Client and choose Stop. Wait a minute or two for the service to stop completely.
B5: Then right click on the DNS Client service and select Start to start the service again.
If the DNS Client service options are grayed out and unclickable, you can disable the service through Windows config.
B1: Press Win + CHEAP on the keyboard to display the dialog box Run.
B2: Import msconfig in the text box then press Enter.
B3: In the opened window, go to tab Services And find DNS Client. Sort services by name to make searching easier.
B4: Uncheck the DNS Client service, then press OK to stop the service.
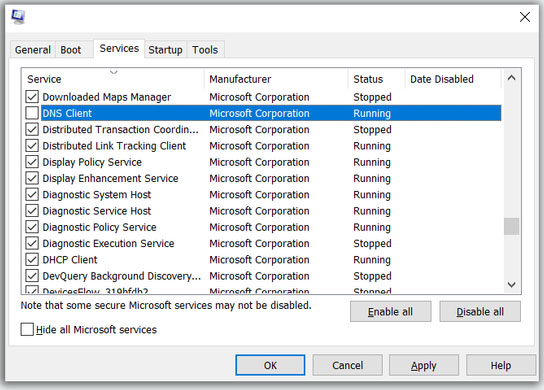
B5: Wait a minute and then check the service box DNS Client. Press OK to start the service again.
7. Reset Winsock and IPv4 Settings
If none of the above solutions work for you, you can try resetting Winsock and IPv4 settings to default. This will revert a large portion of the network settings to default and potentially fix conflicting configurations.
B1: In the menu Start, search Command Prompt.
B2: Right click on Command Prompt and choose Run as administrator.
B3: In Command Prompt, type the command below and press Enter. This will reset Winsock.
netsh winsock resetB4: After the command is executed, restart the computer.
B5: Launch Command Prompt with admin rights and enter the command below:
netsh int ipv4 reset reset.logB6: Restart the computer and then check if your problem is resolved.
Hope you are succesful.
Source link: How to fix “Server IP Address Could Not Be Found” error on Google Chrome
– https://techtipsnreview.com/


