
Do you know if anyone here still remembers the “private screen” feature on the legendary Nokia 1280 phone?
If you do not remember it can be visualized it is the same as on the Windows operating system (for versions from Windows XP to Windows 10), and it is called the standby screen.
Changing the desktop and the standby screen on Windows is too simple, there is already a detailed tutorial instructed by the Admin, so I will not mention it again.
The main purpose of this article is not to guide you to change your desktop or home screen, but to talk about how fixes the failure to install the standby screen, and can’t change the desktop on Windows 10 operating system.
I. Fix the error of unable to install the standby screen using Registry Editor, Local Group Policy Editor
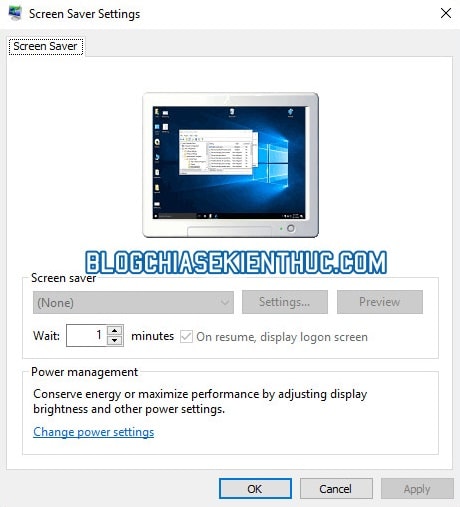
Standby screen is the screen that will automatically be displayed by the system instead of the content currently displayed on the screen when you hang up for a period of time equal to the time you have set the standby screen.
When you need to set up the standby screen for your computer and encounter the error that all settings are blurred as shown below, then try one of the two ways below.
Method # 1: Fix this error does not install the Local Group Policy Editor standby screen
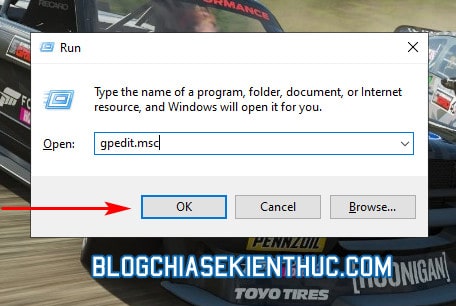
Use key combinations Windows + R to open the Run window => then enter the command gpedits.msc to open the tool Group Policy Editor on Windows.
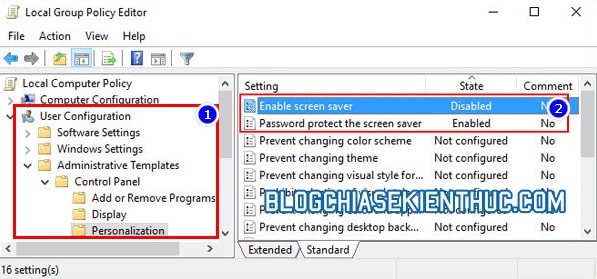
Please navigate to the directory Personalization follow the path (use the Sidebar on the right side).
User Configuration> Administrative Templates> Control Panel> Personalization
Look in the directory Personalization Those 2 policies are named Enable screen saver and Password protect the screen saver.
If these 2 policies turn to the state – State was Disabled or Enabled then you need to double-click on each value to edit. If not, close the window Local Group Policy Editor and move on to method 2 below.
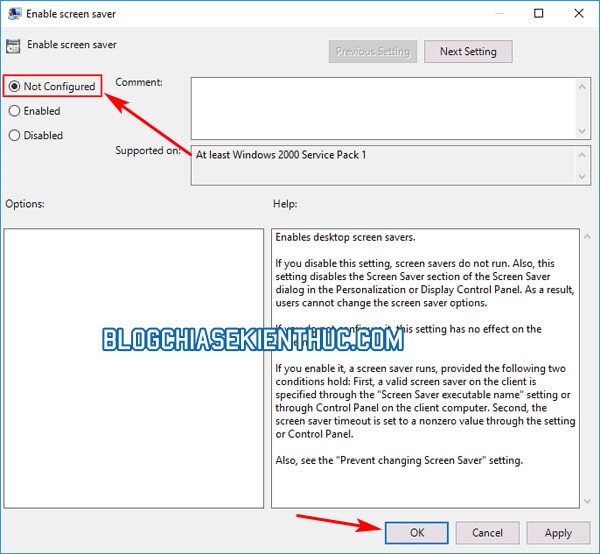
You double-click on each polices one by one and edit the state (Stateits about Not Configured (Not configured) => then press OK is considered done.
Now reboot the operating system and access the carrier monitor setup to try again.
Method # 2: Use Registry Editor
Policies As above method # 1, because editing this Registry is very easy to cause Windows errors if you do something wrong. That’s why you should back-up the entire system Registry before continuing to follow the instructions!Perform:
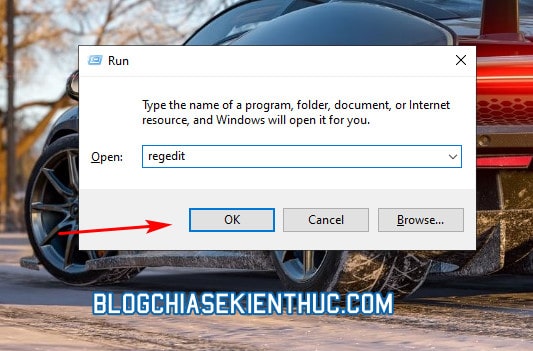
+ Step 1: Open the Windows Run window (Windows + R) => enter the command regedit => then press OK to open the Registry Editor window on Windows 10.
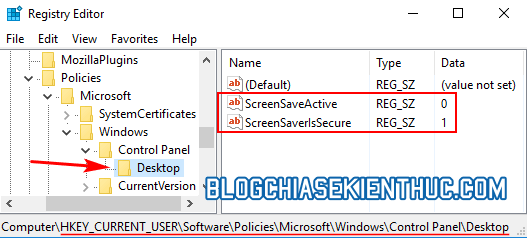
+ Step 2: Please access the directory Desktop in the Registry, follow the path with the sidebar on the right:
HKEY_CURRENT_USER Software Policies Microsoft Windows Control Panel Desktop
Or you can also get access faster by copying and pasting this path into the Registry Editor’s address bar (see how).
=> Then you find and delete two keys named ScreenSaveActive and ScreenSaverIsSecure in the right frame go offline => then close the Registry Editor window and restart the operating system only.
II. Epilogue
Well, above are 2 simple ways to help you Fix the error of failing to install the Home screen on Windows 10 operating systems.
If you find it interesting and useful, do not forget to rate 5 stars for this article and share it with others. Hopefully this article has helped you fix the above error. Good luck !
Note: Was this article helpful to you? Don’t forget to rate, like and share with your friends and relatives!
Source: How to fix the failure to install the Home screen on Windows 10
– TechtipsnReview


