
Outlook Web mail also has email sending timer similar to Gmail email. With this email delivery timer feature, users will set the time when emails are sent automatically in the future without you having to manually send them manually as before. We can choose when to send it at any time, depending on our email requirements. When you arrive on schedule, Outlook email will be sent. The following article will guide you to read how to schedule email sending in Outlook.
Instructions to send email on Outlook.com
Step 1:
You access Outlook.com web mail, and then enter personal information. Next we proceed to send email as usual, enter the address you want to send email and then enter the email content.
Next up at arrow icon Next to the send icon, you choose Send later to choose to send email later.

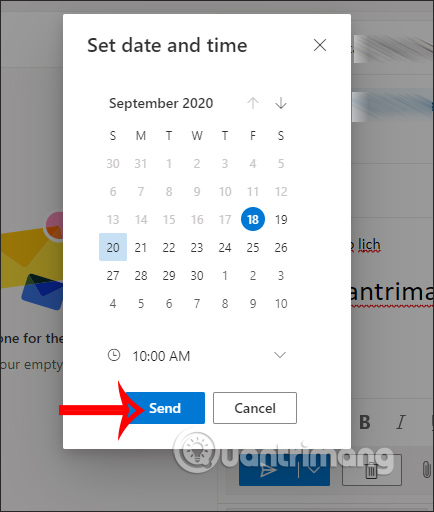
Step 2:
Now display the calendar interface for us to choose choose time to send mail automatically Future. Finally press Send button to send.
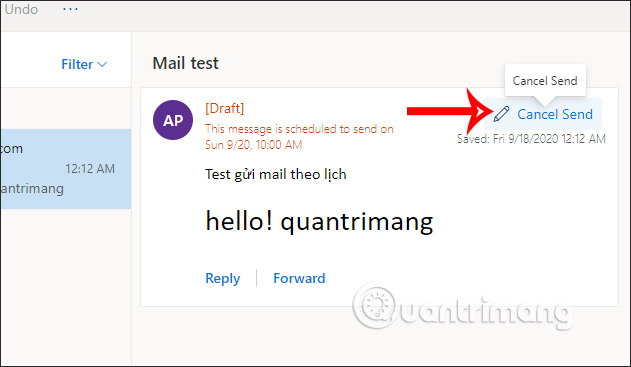
Step 3:
Email scheduled for sending in Outlook will be in the Drafts section. We access to edit the email if needed. Access to Folders, choose next Drafts on the left side then click done email. To edit first Click Cancel Send to cancel sending.
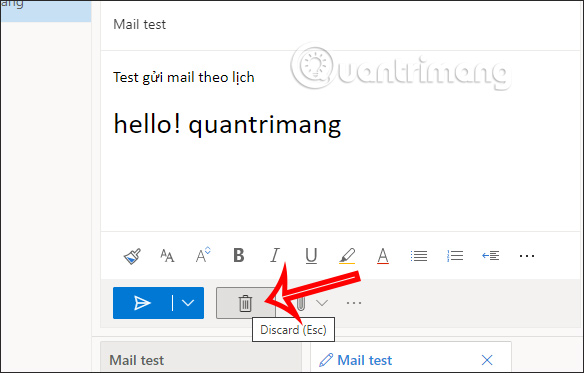
Step 4:
Now display the composing interface again. You also click on the arrow icon to select Send later and then select the sending date and time. Next, if you want to cancel the email sending schedule, click the trash can icon.
See more:
Source content: How to schedule email sending in Outlook.com
– Techtipsnreview.com


