Whenever you start up your PlayStation 5 (PS5) system, the DualSense controller’s built-in microphone turns on automatically. This can sometimes give you trouble when unwanted audio is accidentally recorded. In this case, you can mute the DualSense handheld microphone by default, and only re-enable it when needed, with a few simple setup steps.
Mute the DualSense PS5 controller microphone by default
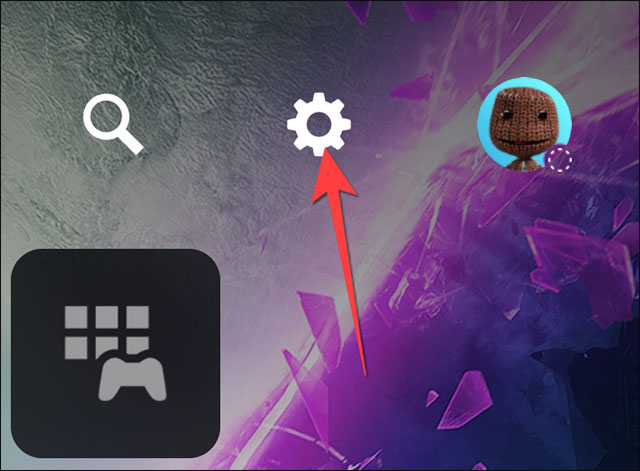
On the PlayStation 5 home screen, click the “Settings” shape of a gear in the top right corner.
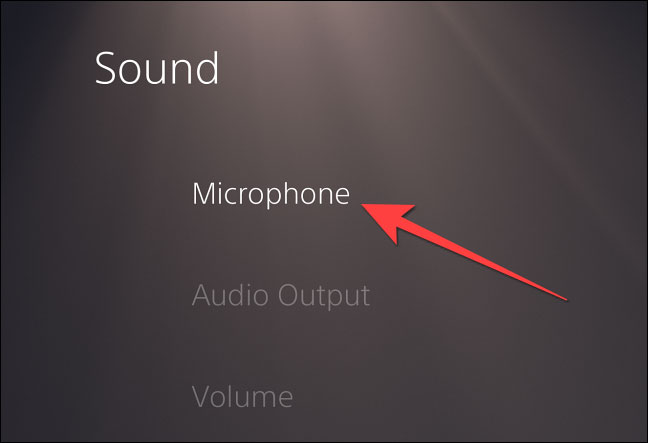
In the Settings menu, scroll down and select “Sound“.

In the list on the left, click “Microphone“.
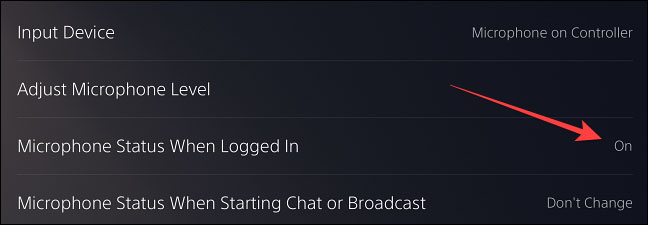
Click the option “Microphone Status When Logged In, the option will be in the state “On” (On) by default.
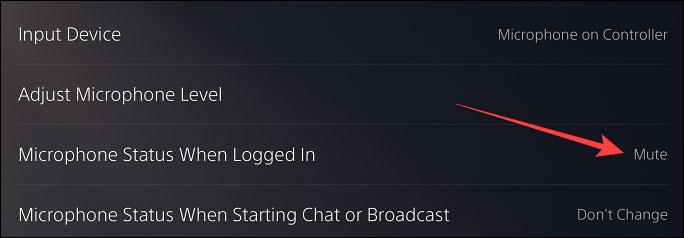
When the toggle option opens, select “Mute“. Then you will see “Microphone Status When Logged In” will display as “Mute“.
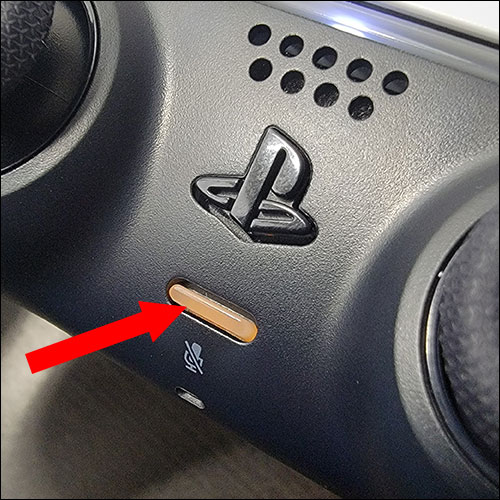
Now, on the DualSense controller, a uniform orange indicator light will appear on the Mute button when you start the PlayStation 5. To re-enable the microphone on the controller when you want to use it, simply press the Mute button and the orange light will turn on. will turn off, indicating that the microphone is ready to record.
It’s all as simple as that! From now on, you won’t have to worry about accidentally letting unwanted sounds or background noise into your game.
Source link: How to set up auto-mute DualSense controller microphone on PS5
– https://techtipsnreview.com/