
Microsoft 365 provides the option to view previously working versions in Word for users to check and restore versions whenever they need. This feature is similar to the history review feature on Google Docs. However, to use this feature, you need to save the Word document to OneDrive to store different versions of the document. The following article will guide you how to view versions in Word.
Direction to view the edited version in Word
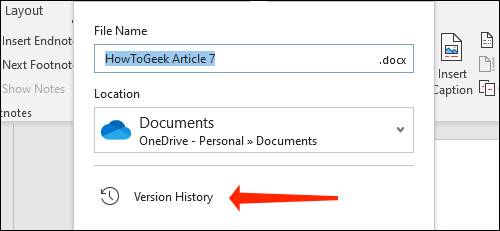
Step 1:
We open the document we want to check the versions click on the document name at the top. Now display the interface as below, we click Version History.
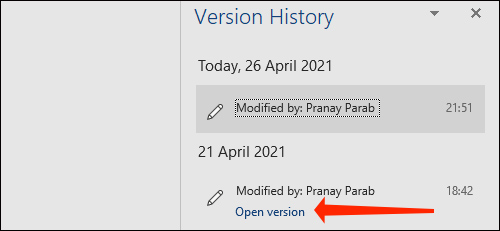
Step 2:
Now on the right side of the interface you will see version history information work with this Word document. The most recent work is at the top. Below will be sorted by business day order. That way you can easily keep track of old versions when needed.
To see what day the working version is, click on that version and then press Open version.
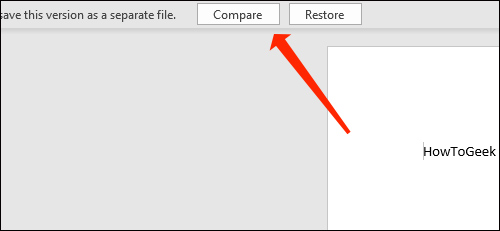
Step 3:
In this document version view, you can click Compare button above to see what has been added or edited since this version of the document. Then this version of the document will be copied to the new document and marked with the changes.
Step 4:
You look to the left edge and click arrow icon below Revisions. Now shows exactly what content or actions have been performed and how many changes.
Continue scrolling below to see the changes more clearly.

Step 5:
Look at the content next to it, there will be red vertical line to sign the text or content has changed.
Also you can Click Review to see the changes.
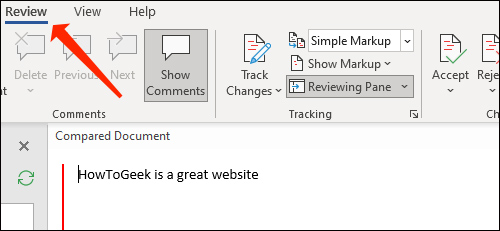
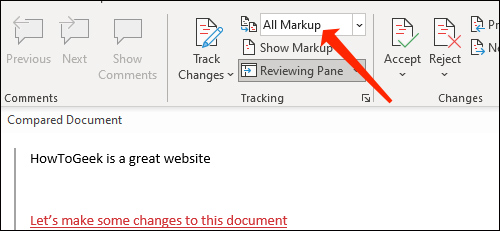
Looking forward Tracking section, at Simple Markup click arrow icon then choose All Markup. You will now see the deleted and added sections in red and underlined.
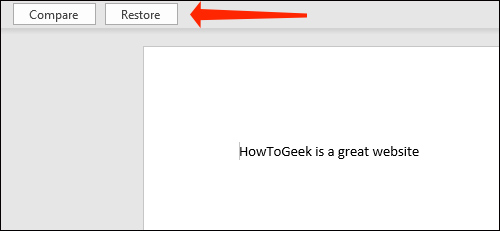
Step 6:
Close this document comparison and go back to the version you want restore and click Restore done.
Source link: How to view and restore Word document versions
– https://techtipsnreview.com/


