
The huge popularity of Microsoft Word is why users can take advantage of a wide range of features. Whether you use Word for personal or work purposes, it’s important to understand effective techniques to work with the software with ease.
For example, what do you do when a Word document has several images and you need to save one or several of them as separate files? Microsoft Word may not provide specific ways to do this, but there are several ways to do it. The following article will give you 3 ways to choose.
Manually save each image
This is the perfect method to use when you only have a few images in your document. How to do this:
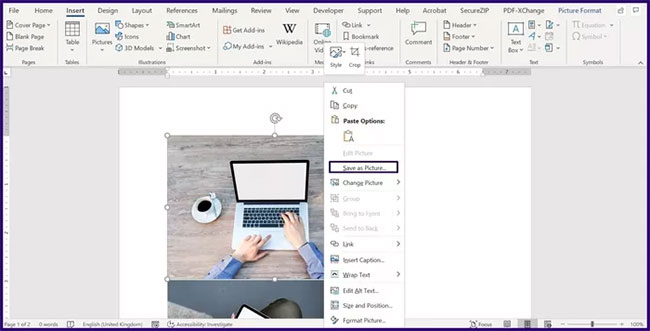
Step 1: Open a Microsoft Word document that contains an image.
Step 2: Select the image you want to save and right-click it.
Step 3: From the list of options, select Save as Picture.
Step 4: Above File Explorer, click the drop-down menu next to Save as type and choose the file format you prefer.

Step 5: Name your image file by typing in the box Filename.
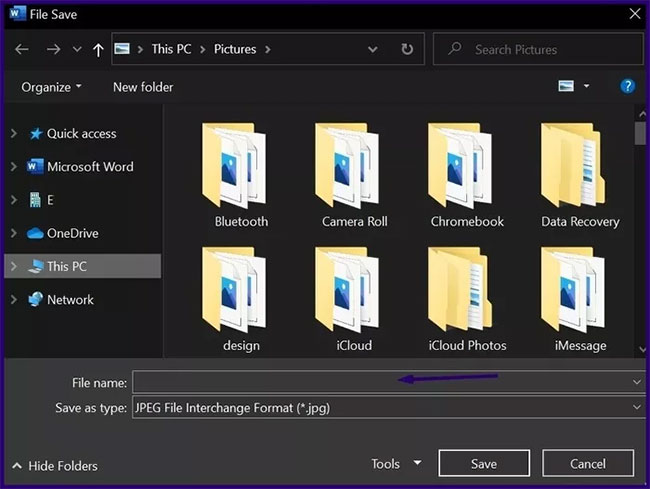
Step 6: Select the destination folder for the image you are saving.
Step 7: Click Save
However, if you have a lot of photos to save in the document, this method will take a lot of time and effort. See the next method to learn how to save multiple images.
Save multiple images by saving Word files as webpage
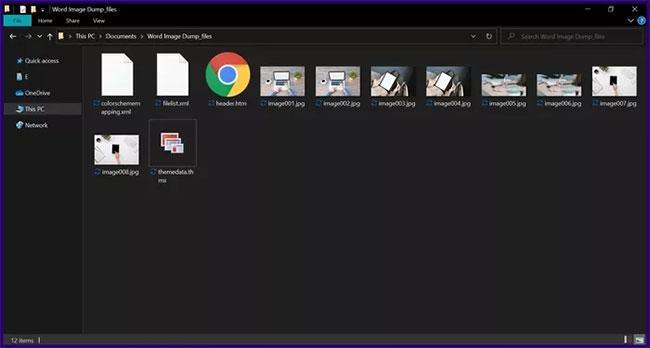
Certain Word documents contain up to 200 images. Imagine having to use the above method to save individual images. So terrible! There is a simpler way to save multiple images in a Word file. It involves saving the Word file as a webpage.
Webpage stores resources including images as individual files in HTML. Therefore, if you save your Word file as a webpage, the document will be changed to an HTML page. This will save all images in the document to another folder. Here’s what you need to do:
Step 1: Open a Microsoft Word document that contains an image.
Step 2: Click File from the Ribbon.
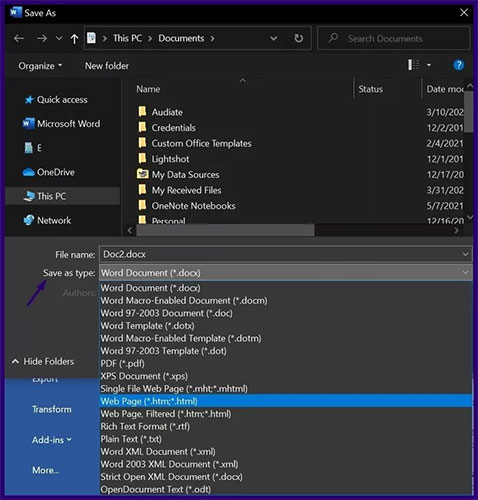
Step 3: Click Save As and choose Browse.

Step 4: On the menu File Explorer, click the drop-down list next to Save as type.
Step 5: Choose Webpage from the available options.
Step 6: Click Save to save your Word file as a webpage.
Step 7: Launch File Explorer and navigate to the location of the document.
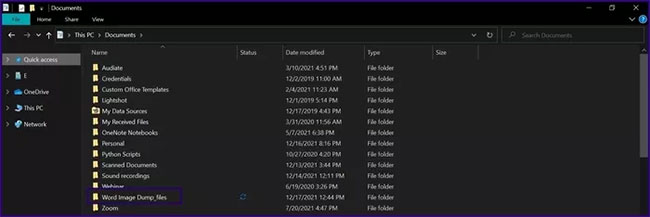
Step 8: After finding the location, you will see the latest folder named Word file you just saved. Open the folder and find all the images in the document.
Step 9: You can rename each photo and move them to a separate location if you want.
Save images by extracting with compression app
The last method we will discuss is to extract the images using a zip application. Note that this trick only works with Microsoft Word files that are saved as zip files. Using this format will store your document as a package so you can unzip the folder and extract its contents. The steps below will show you how to use this method:
Step 1: Launch File Explorer and navigate to the location where the Microsoft Word document contains the image.
Step 2: Right click on the file and select Rename.
Step 3: Change the file extension from .DOCX Fort .ZIP and press Enter on the keyboard.
Step 4: On the dialog, click Yes to confirm the file extension change.

Step 5: Right click on the renamed file and select Open. You will see all the images in the document.

Step 6: You can extract the contents of the folder using the . button Extract of the application zip or by copying the contents to a new location.
Above are some ways to save images from Microsoft Word documents. All the methods provided are quite simple and should not take more than 5 minutes to perform. You can also use the save as webpage option when saving images in a Google Docs file.
Source link: Save images in Word files as separate files
– https://techtipsnreview.com/


