
Microsoft PowerPoint is perhaps the most widely known software for creating presentations. From the boardroom to the classroom, individuals share content with audiences with slides in PowerPoint. With its growing popularity and demand for a richer media content experience, even PowerPoint includes a number of features needed to keep up with the times.
A good example is the ability to record video in Microsoft PowerPoint. Users can choose to record their presentation and make the recording available to those interested. If you want to record a video using Microsoft PowerPoint, try any of the methods below.
Record a video in Microsoft PowerPoint with screen recording
Microsoft PowerPoint has a screen recording feature that can be used to record videos. The recorded video may or may not have sound depending on your preference. This feature is useful if you need to add explanations to your presentation.
Follow the steps below for the necessary steps if you want to record a presentation using this method:
NOTE: Before you begin, make sure that the speakers and microphone on your PC are working properly. You also need speakers or headphones to listen to your recordings.
Step 1: Launch Microsoft PowerPoint.
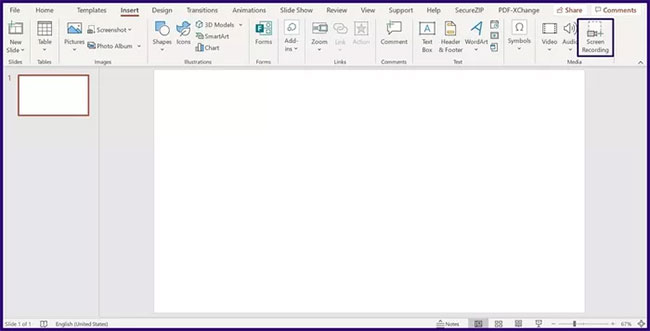
Step 2: From the Ribbon view at the top, click tab Insert.
Step 3: In Media Group, choose Screen Recording. This action will launch a pop-up window.
NOTE: When you choose Screen Recording, two of the options you will see on the dialog are Recorder Pointer and Audio Options. Microsoft PowerPoint will automatically enable these options. However, you can turn off those options by clicking on them.
Step 4: Click Select Area inside the pop-up window to select the part of the screen you want to record.
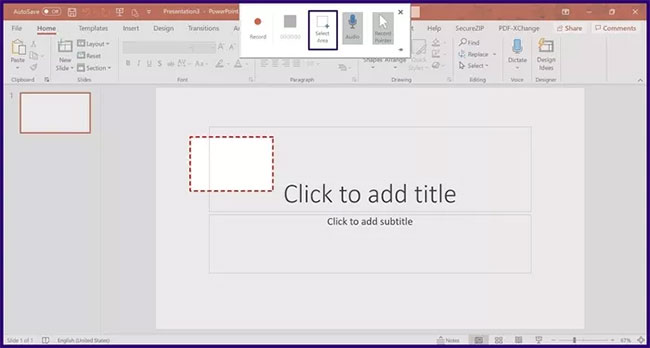
NOTE: The pointer changes to + when you choose Select Area.
Step 5: After specifying the area you want to record, drag the cursor from the top left to the bottom right. You’ll notice a dashed rectangle appear around the area you’ve selected for recording. That means PowerPoint will record anything in the selected area.
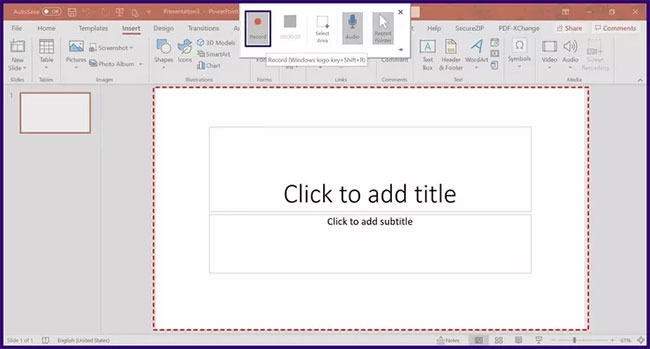
Step 6: To start recording you just need to click the . button Record. This button is in the pop-up window and has a red circle.
NOTE: There is always a 3-second countdown before recording starts. You can also use the . keys Windows + Shift + CHEAP to start recording.
Step 7: When finished recording the presentation, use the keys Windows + Shift + Q to stop recording.
Step 8: The recording appears as a new object in the current PowerPoint slide. To save the recording, right click on the object, select Save Media from the menu that appears.
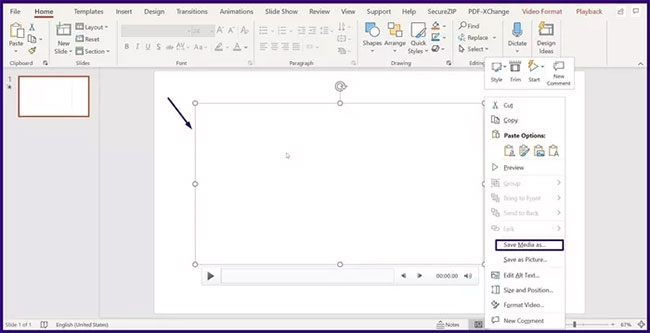
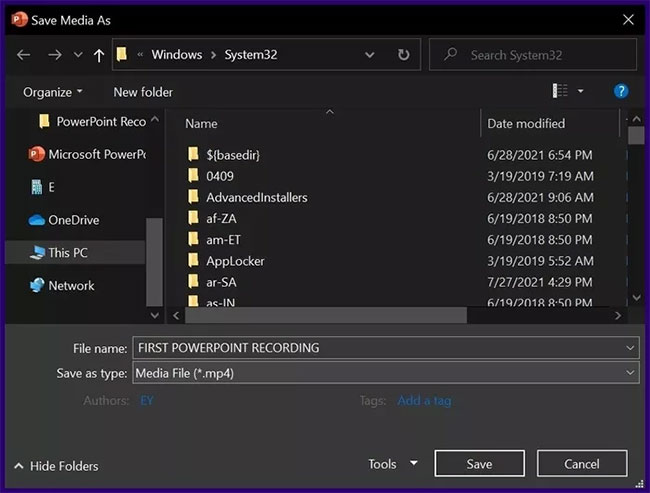
Step 9: Navigate to the location where you intend to save the recording in the next dialog. Enter the file name, then click Save.
NOTE: The default file type for all recorded videos is MP4.
With the above steps, you now have your Microsoft PowerPoint recording and can manipulate it as you like.
Record a video in PowerPoint with the Record Slide Show feature
While the feature Screen Recording on PowerPoint allows users to record anything on the PC, the feature Record Slide Show just record the presentation. This feature is useful when you need to include narrations for your presentation. Here’s how it works:
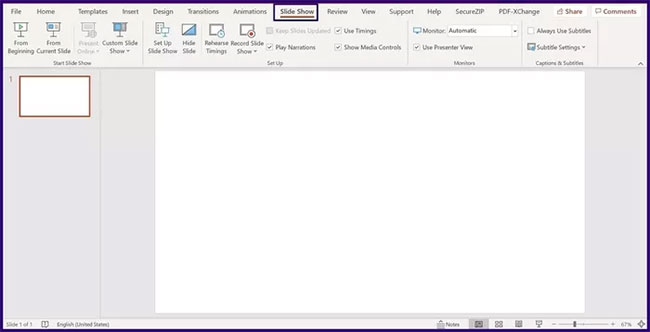
Step 1: Launch Microsoft PowerPoint.
Step 2: From the ribbon at the top, click tab Slide Show.
Step 3: From group Set Up, select option Record Slide Show.
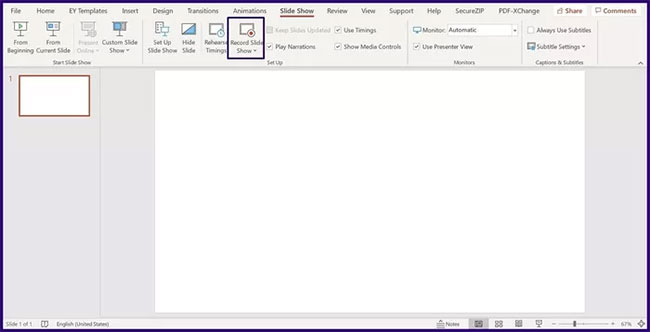
NOTE: You can choose Record from your Current Slide (record from current slide) or Record from the Beginning of the presentation (recorded from the beginning of the presentation).
Step 4: A new dialog box opens with your presentation and other menu options. Choose Record in the top left corner to start recording the presentation.
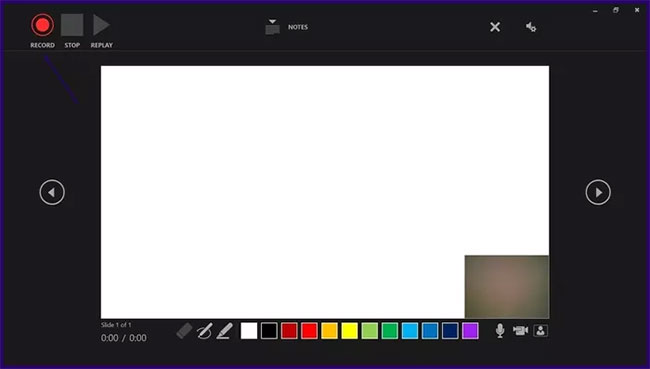
You can access the microphone settings option from the upper right corner.
By recording the demonstration or including the narration in your PowerPoint presentation, users will find it easier to understand whatever information you are trying to convey. Another way to make sure your audience is keeping a close eye on your PowerPoint presentation is to add fun effects like animations.
Hope you are succesful.
Source link: 2 ways to record video in Microsoft PowerPoint
– https://techtipsnreview.com/


