
You probably all know the legendary Windows Photo Viewer tool here: – This is one of the extremely lightweight photo viewing applications built into the Windows operating system, very user-friendly, simple and convenient. profit.
Unfortunately, on Windows 10, Microsoft has officially removed the Windows Photo Viewer tool and replaced it with a completely new photo viewing and management application, in the form of UWP – called Photos.
We should also get used to using this new photo viewer application, which has a lot of new and interesting features, BUT It shows only the photos stored in the folder Picutures never mind.
If you want to see the pictures elsewhere, you only have to double-click on them to see them. And that is why in this article, I will guide you how to add your photos in Windows 10 Photos!
Read more:
Add your photos to the Photos app in Windows 10
Above, I said that Windows 10 has officially removed Windows Photo Viewer from the system, but there is still a way to bring Photo Viewer back, just follow the instructions in this article.
In addition to being used to using the old photo viewer application, the reason that many people do not want to use Photos (new application) is because using it on the hard drive is very confusing, viewing the image only takes 9-10 seconds to load. Sometimes very annoying guys!
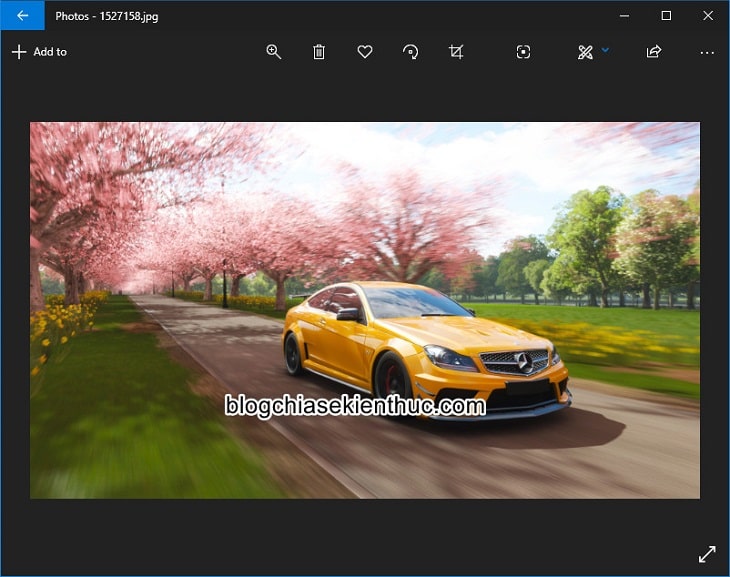
Well, like that, I wouldn’t get excited to see the pictures, right. And here is the new Windows Photos photo viewer.
Okay, to add your other photo folders, do the following:
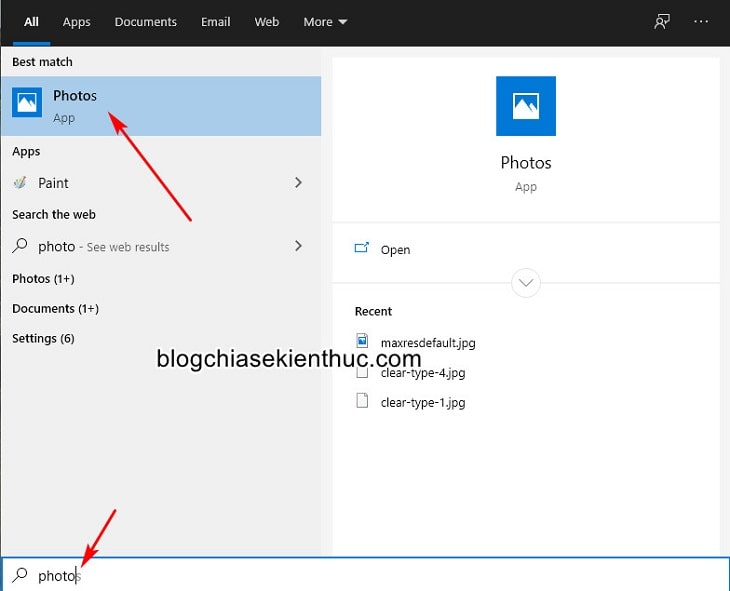
+ Step 1 : Open the Photos app by opening Windows Search => and search with the keyword photo, the key combination to open Windows Search is Windows + S offline => and open the application Photos as shown below.
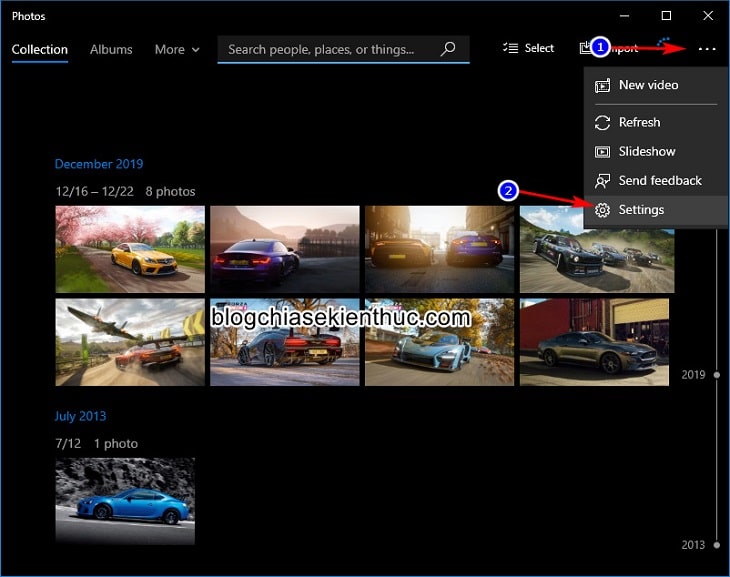
+ Step 2 : Click dấu 3 chấm in the right corner of the window => then select Settings in that menu to open the app settings.
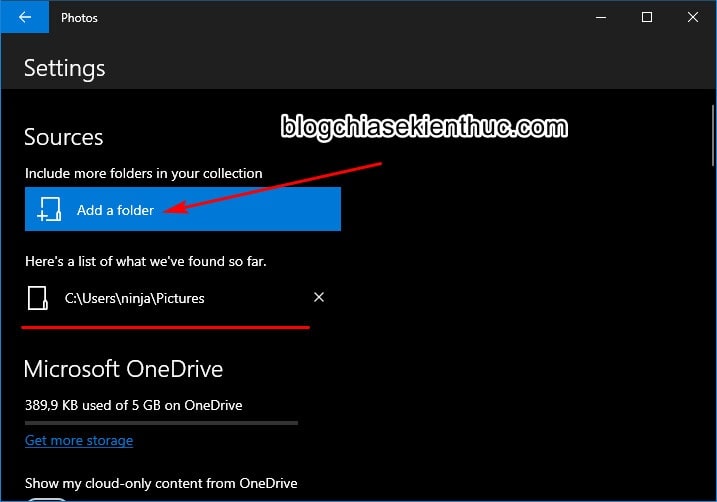
+ Step 3 : In the window Settings, in line Here’s a list of what we’ve found so far is the place to display the folders that the application is taking the photo to display in the application.
To add a new folder here, click on the line Add a folder.
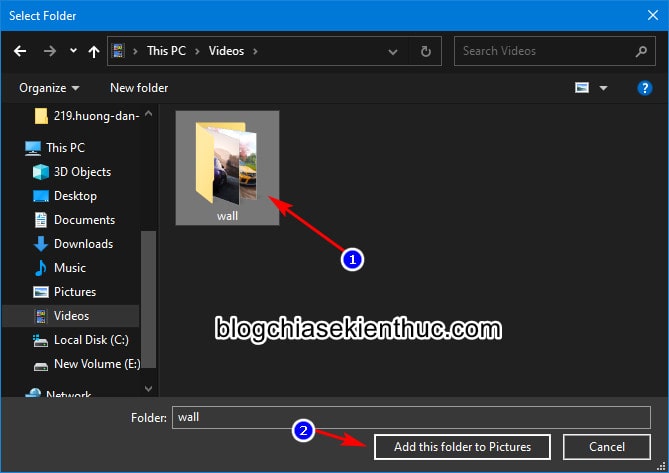
+ Step 4 : Window File Explorer appears for you to choose to a folder containing pictures that have been prepared.
I put it in the directory Wall in the directory Videos, so I will choose the correct folder => then press Add this folder to Pictures to add it Photos.
+ Step 5 : That’s it, you will see the photos in the selected folder appear in the main interface of the application Photos.

//*read more*//
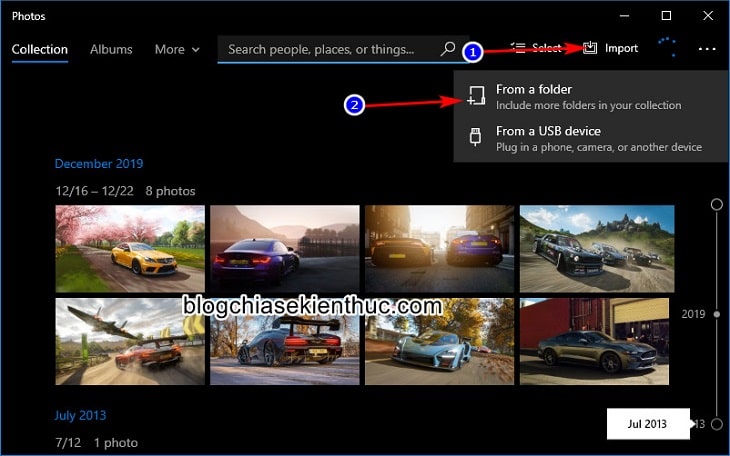
In addition, we have another way to add faster, and you can add from an external storage device such as a USB, camera, phone, …
First, also at the main interface of the application Photosyou click the button Import the right corner of the window => and choose where to contain your photos (Folder or from devices such as cameras, USB, mobile phones) => I will choose to enter From a folder.
Finally, you need to access the folder containing the image with File Explorer Windows => and press Add this Folder to Photos that is done.
// * end of further reading * //
Epilogue
Above is how tAdd your photos in another folder to the Photos app in Windows 10, help you to access and view those pictures more quickly and conveniently.
Personally, I still choose the traditional Windows Photo Viewer application because it is simple, easy to use and very light, if you have an SSD, you should use Photos. Good luck !
CTV: Nguyen Thanh Tung – techtipsnreview
Note: Was this article helpful to you? Don’t forget to rate, like and share with your friends and relatives!
Source: Add photos from another folder to the Photos Windows 10 app
– TechtipsnReview


