
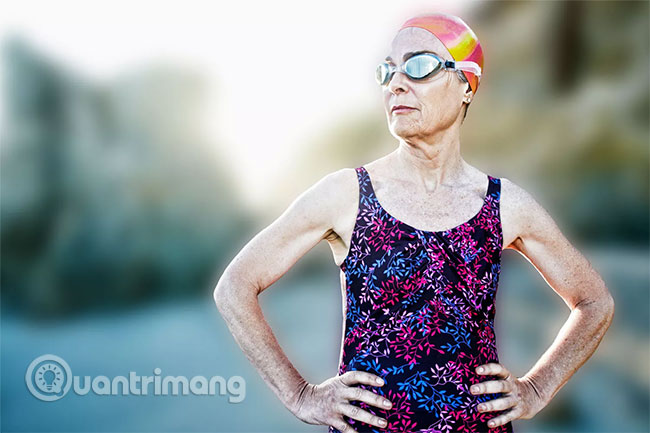
Background blur tricks can make a photo look a lot more professional or just focus on the elements on the image that you want to draw attention to. Whatever the reason, learning how to blur the background in Photoshop is a great way to make your photos stand out from the crowd.
Note: The following tutorial focuses on Adobe Photoshop CC version 20.0.4. But the methods will also work with older versions of Photoshop, in the same way.
What tool to use to blur the background?
Blurring the background is the most fun part of the process, but you need the right tools. Here are a few different ways you can do it.
Magic Wand
Magic Wand (fourth from the top in the menu Tools) is the fastest and easiest tool for background selection, although it also has certain disadvantages. Magic Wand works best on images with a clear background that contrasts a lot with the foreground. After selecting the Magic Wand, click on the background of the image to select it. You can hold the . key Shift to continue selecting additional elements as needed.
If you don’t see the menu Tools, Please choose Window > Tools in the top menu.
Lasso
If the background in your image is too complicated for the Magic Wand, the Lasso tool gives you more control.
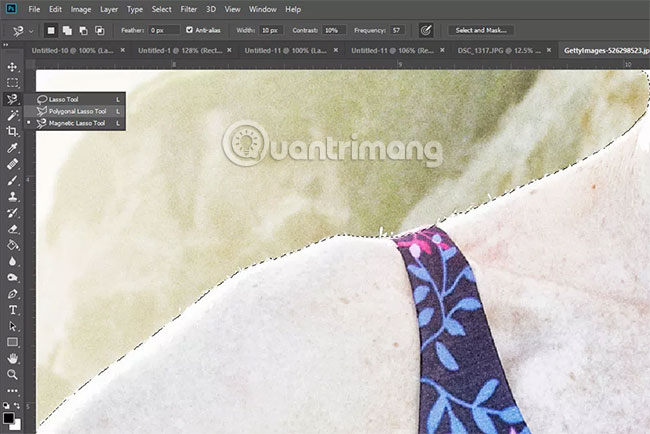
The standard lasso allows you to freely draw your selection. Polygonal Lasso allows you to draw straight lines. Magnetic Lasso will try to stick to the edges of part of the image, in this case the background. Click and hold the Lasso tool (third from the top in the menu Tools) to select the tool you want to use.
Be sure to draw around whatever you want to select. You can always “close” the selection by pressing Ctrl or CMDthen click or tap anywhere on the image.
Quick Mask
A more practical method to select the background is to use the second tool from the bottom of the bar Tools and looks like a gray EU flag.
1. Select tool Quick Mask.
2. Select tool Brush from the menu Tools, then use careful brush strokes to paint over everything you want to select. The elements you select will turn red.
3. When done, select the icon again Quick Mask again to see your complete selection.
Tips: You can also use the tool Erase to fine-tune the selection.
Whichever method you use, once the background is selected, be careful not to click or tap anywhere in the main window, as you could invalidate the selection. If you do, press Ctrl (or CMD)+Z to undo your action or press Ctrl (or CMD)+Alt+Z to undo some steps.
Tips: If you find that you actually selected the wrong foreground instead of the background, just press Ctrl (or CMD)+Shift+I to invert the selection is okay.
How to blur in Photoshop
Now you have selected the background. You can start the process of blurring it. There are a few different ways you can achieve different effects. Try out the aforementioned tools and see the results.
Gaussian Blur
Gaussian Blur is the most basic of all the blur effects, but often the most effective. Gaussian Blur merges and overlaps all pixels together creating a generalized blur effect.
1. Select Gaussian Blur, then use the slider to decide how much opacity you want for the background.
2. You can use the preview window to view part of your image or check the box Preview to see how it looks on the whole image.
3. When you are satisfied with the result, select OK and wait for the effect to be applied.
Motion Blur
This effect gives the impression of movement, as if the background is moving at high speed or the photographer is moving through it very quickly.
1. Select Motion Blur.
2. Use Distance Modifier to change the level of blur effect you want.
You can also change the angle of the movement by entering a number in the corresponding box or clicking and dragging the small rectangle.
Lens Blur
For a more subtle blur, akin to what is achieved using the shallow depth of field technique when taking photos, use Lens Blur. It has loads of options for testing, including:
- Radius: Affects the strength of the blur effect.
- Shape and Blade Curvature: Adjusting the virtual lens will shape the blur effect.
- Specular highlights: Used to brighten certain parts of an image to mimic the effect of a longer exposure than when the image was originally taken.
Experiment with the settings until you find an effect you like, then choose OK.
Radial Blur
For a unique look, try applying Radial Blur. Radial Blur doesn’t give the image a natural look, but actually makes your foreground subjects appear as if they’ve just walked through some sort of portal.
Hope you are succesful.
Source link: How to blur the background in Photoshop
– https://techtipsnreview.com/


