
Automatic numbering in Word helps users not need to number Word lines manually, saving time and operations. When you enter a serial number for a content and a newline, automatically the next content is also numbered consecutively and is automatically indented compared to the rest of the content. However, documents do not always need to be automatically numbered because this can affect the layout of the document you want to present. The following article will guide you to turn off automatic numbering in Word.
Instructions to turn off automatic numbering in Word
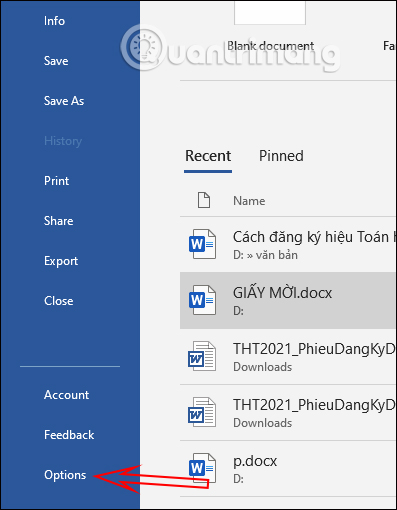
Step 1:
At the interface in Word 2010 and above, click File then choose Options. If using Word 2007 or below, click the Office icon and then select Word Options.
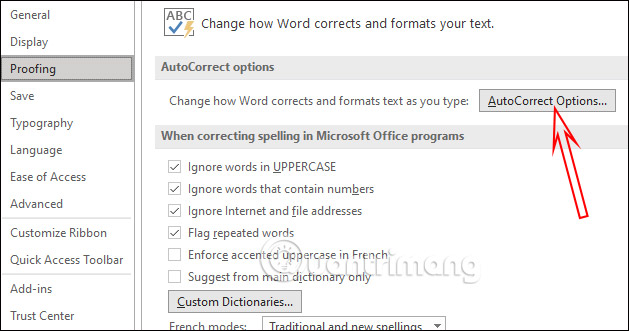
Step 2:
Next in the settings interface for Word documents, click Proofing settings in the menu list on the left, then look to the side Click AutoCorrect Options.
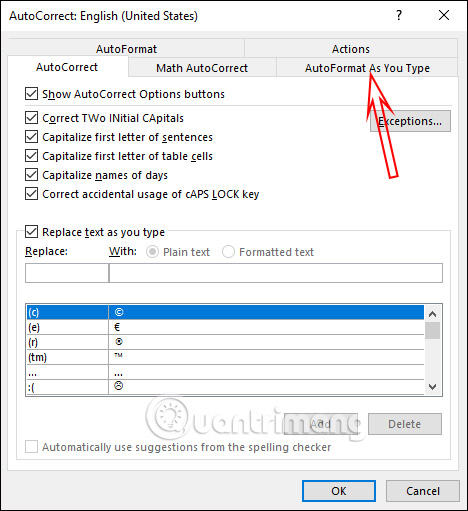
Step 3:
Now display the setup interface for the automatic typing feature in Word, click on setup AutoFormat As You Type.
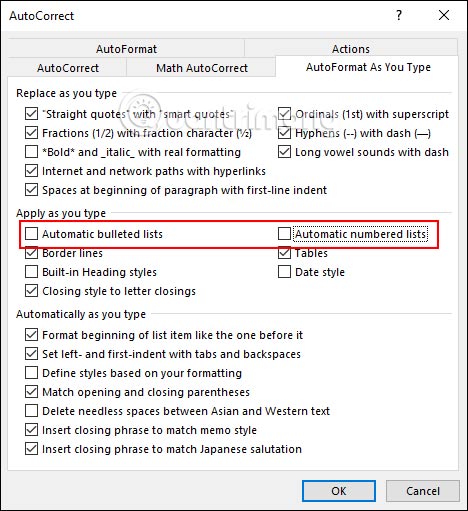
You look down and Uncheck Automatic bulleted lists if you want to cancel the dot numbering or Automatic numbered lists if you don’t want to automatically number the order in Word.
Finally click OK to save the new changes. So when you enter the content, it will not automatically number the bullet as before. However, we will have to manually format the list for the content.
Source link: How to cancel automatic numbering in Word
– https://techtipsnreview.com/


