The operation of converting columns to rows, rows to columns in Excel is very simple and can be done in many different ways, depending on the amount of data you are working with. You will not need to manually retype the content, all the data will be converted into horizontal rows. The following article will guide you to convert columns to rows in Excel.
1. How to convert columns to rows in Excel with the Transpose command
Step 1:
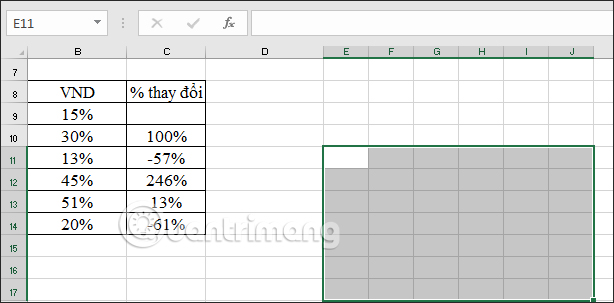
At the interface in Excel we will select a series of horizontal blank cells to convert from the vertical column, note that you must not select less than the number of rows to convert from the vertical column.
Step 2:
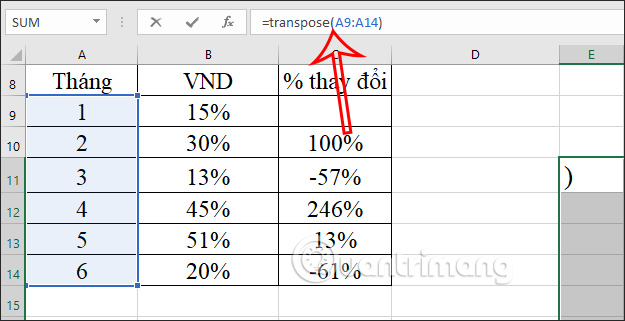
Next we will enter command transpose and the column area to be converted to rows in the data table. For example, in this data table there will be a statement =transpose(A9:A14). You enter the command into the function input box above.
Step 3:
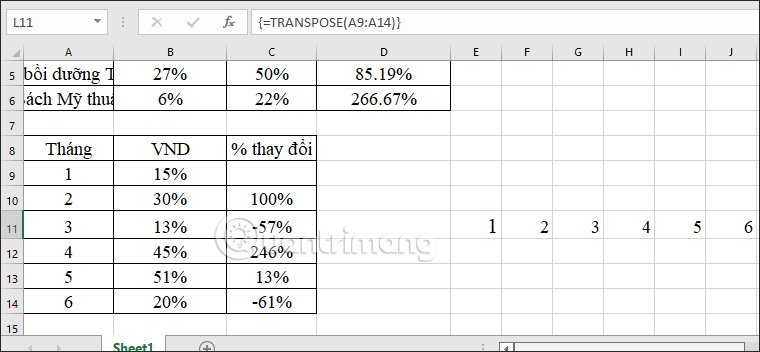
Next to us press Ctrl + Shift + Enter to proceed to convert data from vertical columns to horizontal rows. The result will be as shown below. All data from columns A9 to A14 have been moved horizontally. To make it faster, you can select the data area of the entire table.
2. Convert columns to rows in Excel by replacing data
This is relatively manual, but you can also try it out for more different ways of doing it.
Step 1:
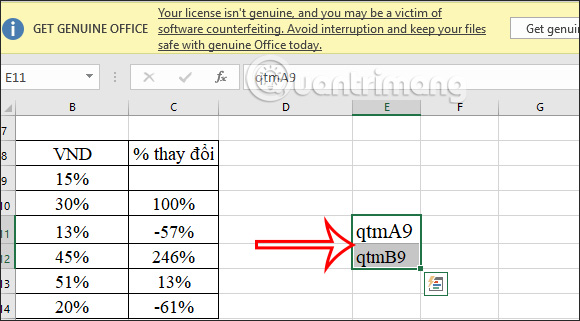
At the cell position where you want to move data from column to row, you Enter the content Alternate name + first cell of the column you want to move.
Step 2:
Then we fill data horizontally to fill in the data in the next cell corresponding to the number of cells in the data column you want to transfer.
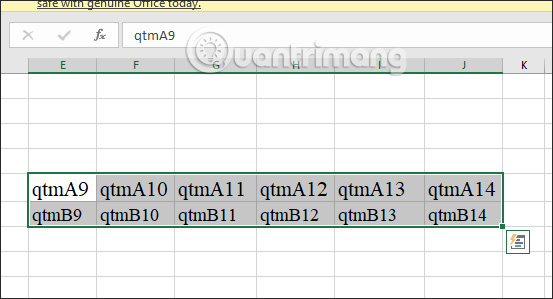
Step 3:
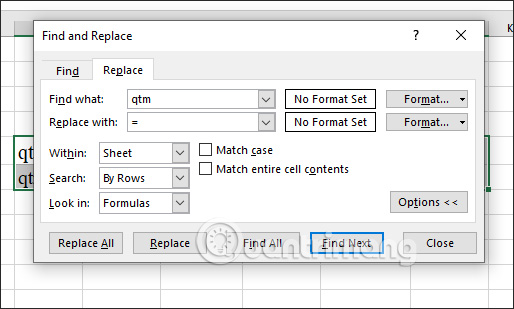
We press Ctrl + HOW to open the Find and Replace interface. In Find what we Enter Alternate Name to search for cells with that content. In Replace withyou just Fill in the sign = to automatically fill in the content according to the created cell.
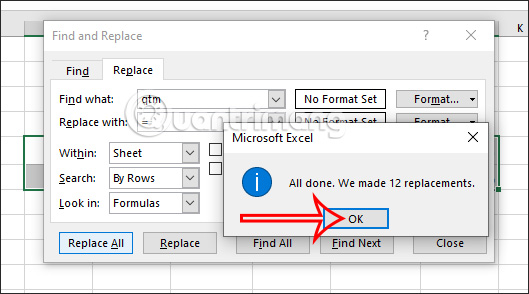
Then you Click Replace All to search data cells by search content. As a result, we will see how many cells need to be replaced, click OK to proceed with the replacement.
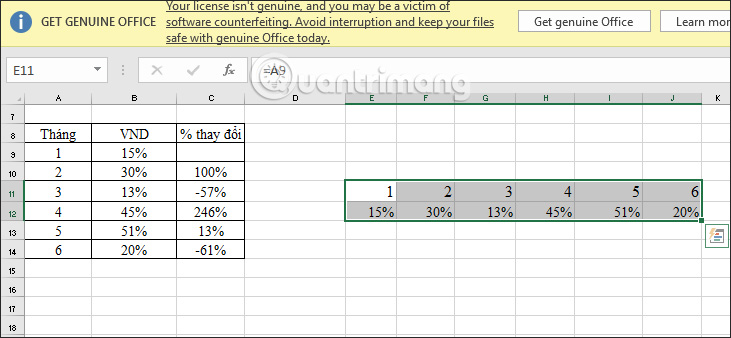
As a result, you have horizontal data as shown below.
3. How to convert rows into Excel columns with Copy & Paste
Step 1: Open an Excel file that needs to convert columns to rows or vice versa.
Step 2: Blacked out rows you want to convert to columns, or vice versa. Right click and select Copy or use the key combination Ctrl +.

Step 3: Move to the location where you want to create a new table. Here, click to select Paste Special.

Step 4: The Paste Special dialog box appears. Check the box Transpose. Press OK to complete.

So you can transform rows into columns as shown below. The steps to convert columns to rows are similar. You copy the row you want to convert to a column, then find the location where you want to create the table, paste the special and tick the Transpose option as above.

So with a very small trick, you can save a lot of time and effort in converting Excel data from columns to rows and vice versa, right?
Source link: How to convert columns to rows, rows to columns in Excel
– https://techtipsnreview.com/


