
If Hyper-DRAW is getting in the way of your work, get rid of it on Windows 11 with these simple tips.
Hyper-V comes pre-installed on Windows 11 computers. Although the virtualization tool is not available in the Home edition, you can install it using a batch script.
Unfortunately, Hyper-V can conflict with 3rd party applications on the PC. As a result, you may experience Hyper-V detection errors when trying to open an application, game, or hardware tuning tool.
Fortunately, you can disable or remove Hyper-V in Windows 11 with the help of Windows Features, Command Prompt, and PowerShell.
How to check if Hyper-V is running on Windows 11
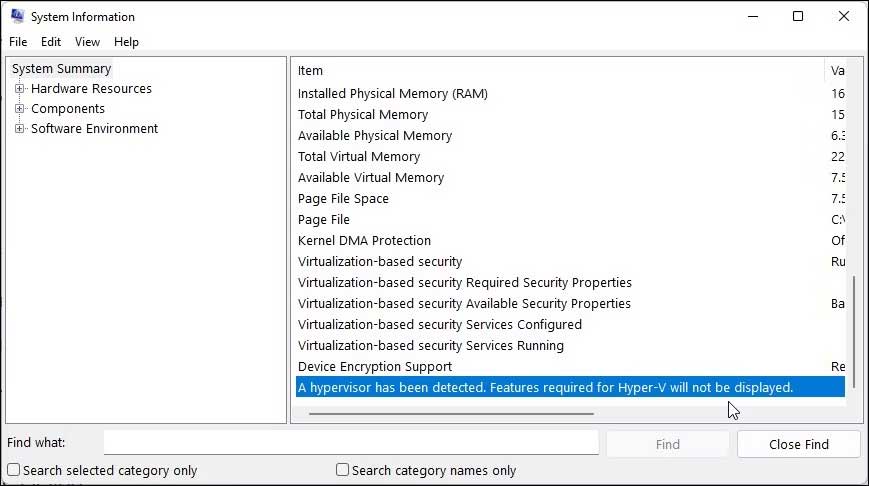
You can access the System Information app to determine if Hyper-V virtualization is running on the system. This is useful if you need to verify the state of Hyper-V after disabling it.
To check the current Hyper-V status on the computer:
1. Press Win + CHEAP to open Run.
2. Type msinfo32.exe and click OK to open the application.
3. Next check if the following is available at the bottom of the details tab:
A hypervisor has been detected. Features required for Hyper-V will not be displayed.If so, you’ll need to disable Hyper-V, Memory Integrity, and Credential Guard.
How to disable Hyper-V via Windows Features
Windows Features allows you to add additional features that are disabled by default in Windows 11. You can also use it to disable some advanced features, including Hyper-V.
Note that to fix Hyper-V detection, you need to disable the virtual machine platform and Windows Hypervisor Platform.
To disable Hyper-V using Windows Features:
1. Press Win + CHEAP to open the dialog box Run.
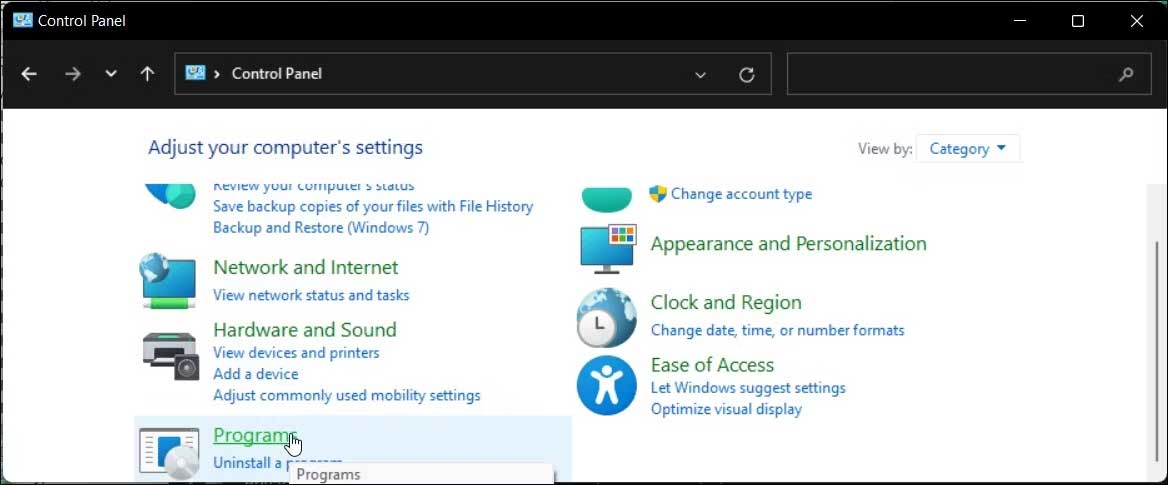
2. Type control and click OK to open Control Panel.
3. In Control Panelclick Programs.
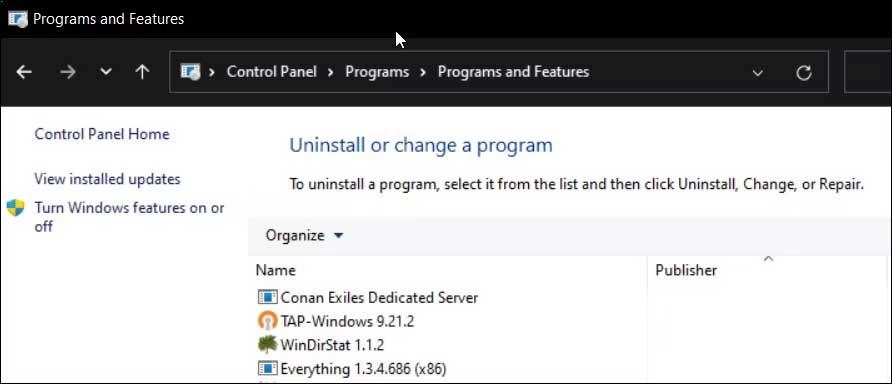
4. Next, click Programs and Features.
5. In the left panel, click Turn Windows features on or off.
6. In the dialog box Windows FeaturesFind Hyper-DRAW.
7. Uncheck Hyper-DRAW to disable this feature.
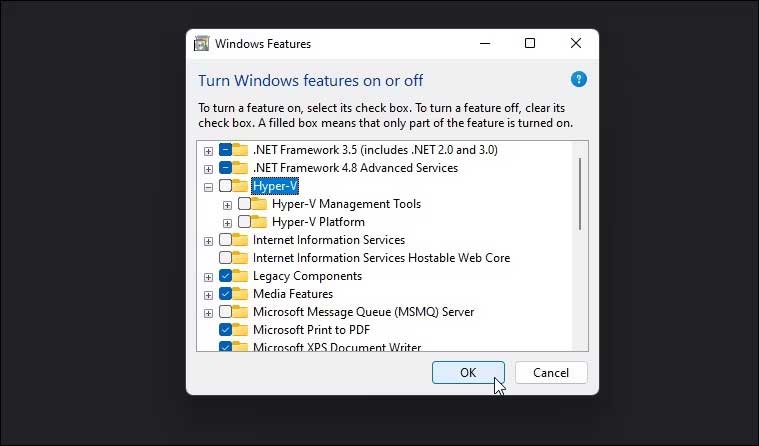
8. Next, scroll down and find Virtual Machine Platform and Windows Hypervisor Platform options.

9. Uncheck both options and press OK.
10. Windows will uninstall Hyper-V and other features from your system.
11. Then, restart the PC to apply the changes.
How to disable Hyper-V using BCDEDIT

You can disable Hyper-V in the startup configuration using the BCDEdit tool. It is useful when you just want to deactivate Hyper-V and not completely uninstall it.
To disable Hyper-V using BCDEdit:
1. Press the key Win and type cmd.
2. Right click on Command Prompt and choose Run as administrator.
3. In the Command Prompt window, type the following command and press Enter:
bcdedit /set hypervisorlaunchtype off4. When the success message appears, close the Command Prompt and restart the PC to apply the changes.
5. If you need to re-enable Hyper-V, use the following command:
bcdedit /set hypervisorlaunchtype auto6. Restart the PC to apply these changes.
How to Uninstall Hyper-V Using Command Prompt
If Windows Features fails to remove Hyper-V, you can use Command Prompt to disable it. Proceed as follows:
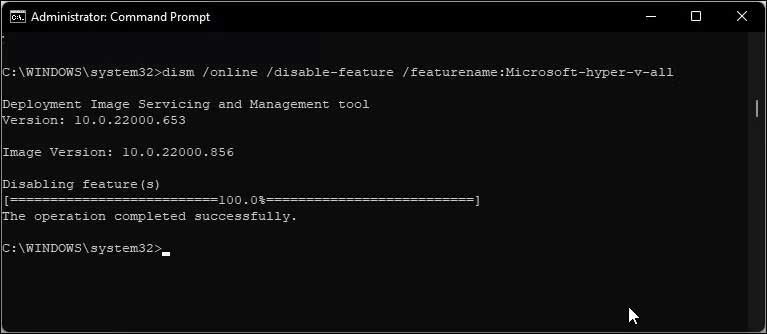
1. Open Command Prompt with admin rights.
2. In the window Command Promptenter the following command and press Enter:
dism /online /disable-feature /featurename:Microsoft-hyper-v-all3. The DISM tool will turn off Hyper-V and notify the operation completed successfully.
4. Type exit to close Command Prompt and restart the PC.
After rebooting, you can run games and other hypervisors without errors.
If not, open Windows Features, disable Virtual Machine Platform and Windows Hypervisor Platform, and restart the PC.
How to disable Hyper-V using PowerShell
If you like PowerShell, you can use WindowsOptionalFeature to disable Hyper-V in Windows 11. For this to work, you need to open PowerShell with admin rights and execute the command. Here’s how this works:
1. Press the Win key and type powershell.
2. Right click and PowerShell and choose Run as administrator.
3. Click Yes when prompted with User Account Control.
4. In the PowerShell window, copy and paste the command below and press Enter:
Disable-WindowsOptionalFeature -Online -FeatureName Microsoft-Hyper-V-AllWait for this process to complete. Then close PowerShell and restart the PC to apply the changes.
How to Uninstall Hyper-Virtual Network Adapter
Usually during reboot, after uninstalling Hyper-V, you may get the message “We couldn’t complete the updates, undoing changes”.
To resolve this issue, make sure the Hyper-V virtual network adapter has been removed from the PC. Follow these steps:
- Press Win + CHEAP to open Run.
- Type dvmgmt.msc and click OK to open Device Manager.
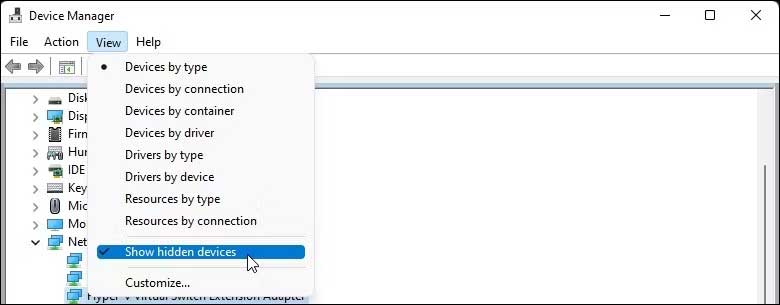
- In Device Manager, expand Network Adapters to find Hyper-V Virtual network adapters.
- If no Hyper-V-linked adapters are listed, click View and choose Show hidden devices.
- Right click on Hyper-V Virtual Ethernet Adapter and choose Uninstall device.
- Click Uninstall to confirm the action.
- Repeat the steps to remove all network adapters associated with Hyper-V.
Once done, close Device Manager and restart the PC. Next, uninstall Hyper-V and check if there are any changes on the system.
Above is how to turn off Hyper-V on Windows 11. Hope the article is useful to you.
Source: How to disable or remove Hyper-V in Windows 11
– TechtipsnReview


