The Photos app on iPhone automatically puts all photos from the front camera in the Selfies album. But if you don’t want the photo to appear there, here’s how.
Hide selfies in all albums
The easiest way to hide a photo from the Selfies album is to move it to the Hidden album. The downside of this method is that the photo will be hidden from all albums including the Recents album.
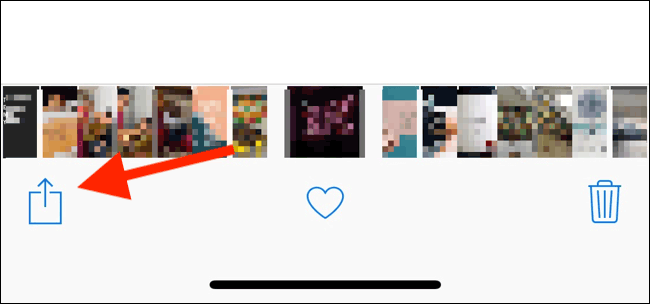
To hide a photo, open it in the Photos app and tap the . button Share looks like a box with an arrow coming out.
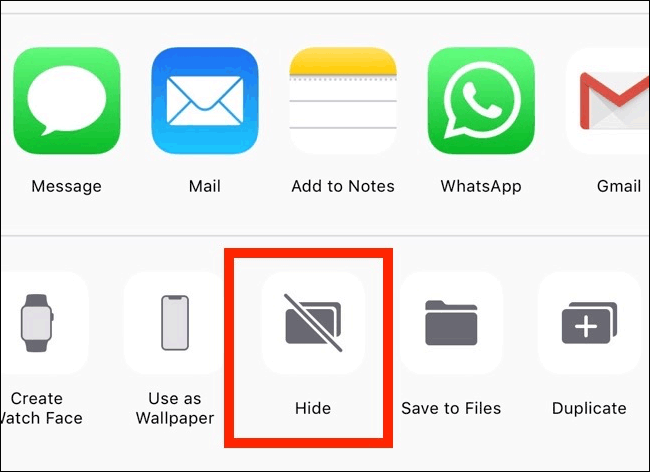
Next, choose Hide. The image will immediately disappear from the Selfies album.
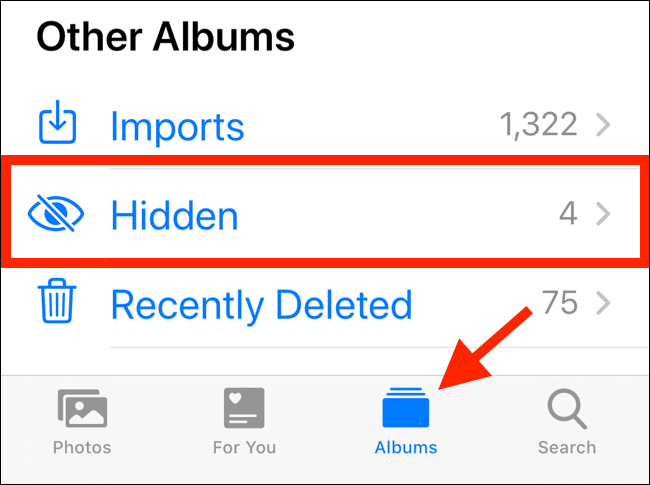
To find photos, go to the Albums tab, scroll down to Other Albums and touch Hidden.
Delete EXIF data using Shortcuts
Apple uses EXIF data (metadata attached to each photo) to organize photos into Selfies albums. If the EXIF data says the photo was taken with the front camera, it will automatically be included in the Selfies album. So how to stop this? The way to do it is very simple, just delete the EXIF data.
The Shortcuts app is one of the easiest ways to remove EXIF data from selfies. This app is included in iOS 13 and iPadOS 13 and later. If you use iOS 12, you can download it from the App Store.
You can think of Shortcuts as a set of actions that are performed automatically one after another. For example, you can create a shortcut that takes a PNG image as a source, resizes it to a specific resolution, converts it to JPEG, and saves the image to the Camera Roll with just one tap. Users can import an existing shortcut, add it to the library and start using the shortcut automatically.
Metadata Remover is one such shortcut. It is made up of actions that remove metadata from the image you choose. This shortcut even creates a duplicate image and deletes the original file. The original image will therefore disappear from the Selfies album.
https://www.icloud.com/shortcuts/a651d141b2ff43c28757e14a54a2a0ecA note before performing metadata removal is that Apple integrates the Shortcuts application directly in the operating system on devices running iOS 13, iPadOS 13 or later. While it offers many benefits, it changes the way third-party shortcuts are viewed.
When installing a shortcut to download from the Internet, the Shortcuts application will prevent it from running due to its security settings.
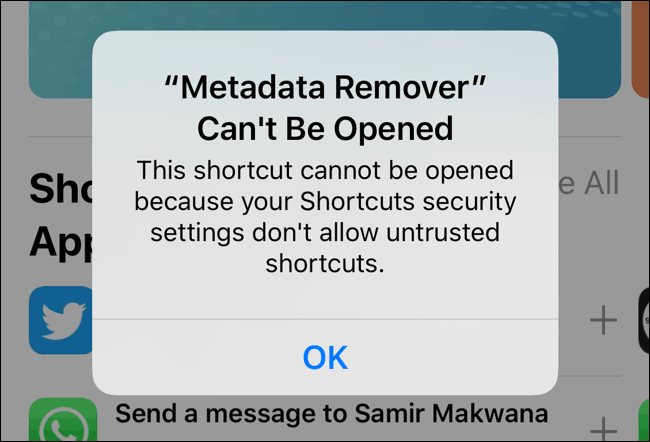
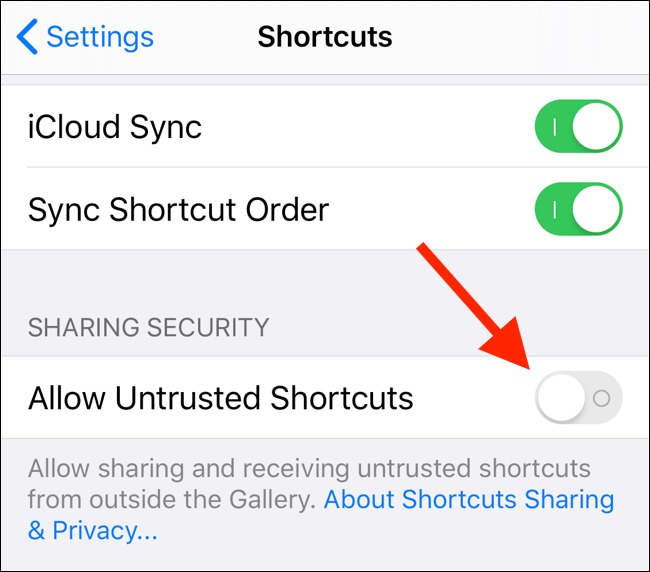
Apple considers any shortcuts downloaded from the Internet to be untrustworthy because it could put your personal data at risk. If you trust that shortcut, you can allow it to run.
To do so, open the app Settingsgo to section Shortcuts and touch the edge button Allow Untrusted Shortcuts.
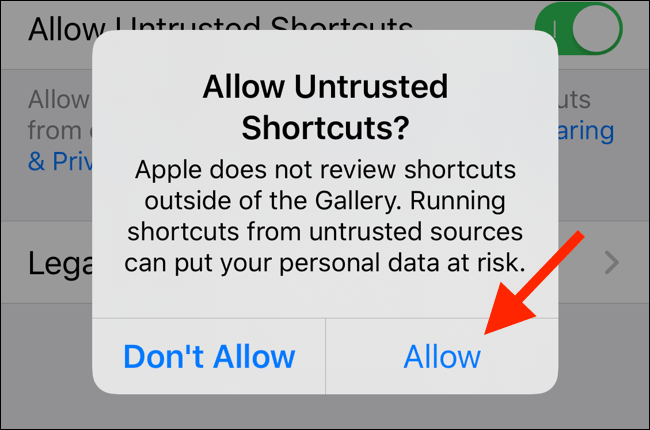
From the notification that appears, tap Allow and enter the device password to confirm.
Now, open the Metadata Remover shortcut on your iPhone or iPad and tap Get Shortcut.
This will open the Shortcuts app. On this screen, scroll to the bottom of the screen and tap Add Untrusted Shortcut (if running a newer version of iOS or iPadOS).
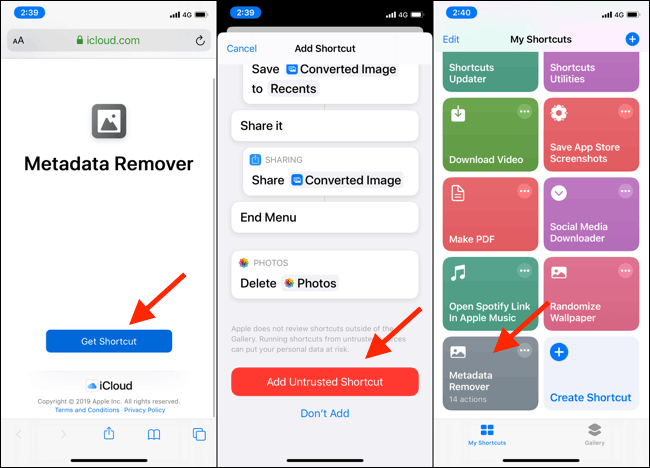
Now, go to the My Shortcuts page and tap Metadata Remover and choose Select Photo.
Next, select a photo from the Selfies album, then tap Save to Camera Roll. From the message that appears, delete the older photo.

The next time you open the Photos app, you’ll see the new photo at the bottom of the Recents album and no longer in the Selfies album.
Delete EXIF data using SafeShare app
The SafeShare app (free) is designed to help you share photos online without metadata. It also allows saving metadata-free photos back to the photo library.
Open the SafeShare app on your iPhone or iPad and tap Choose Image. Select a photo from the gallery and tap Save Image when the share menu appears.

The new photo will be saved in the Camera Roll in the Recents album. It will not appear in the Selfies album. SafeShare doesn’t change the original photo, so you can go into it and delete it manually.
The App Store has a few alternatives for removing metadata from photos, such as Viewexif if you have problems using SafeShare.
Remove photos from Selfies albums with Mac
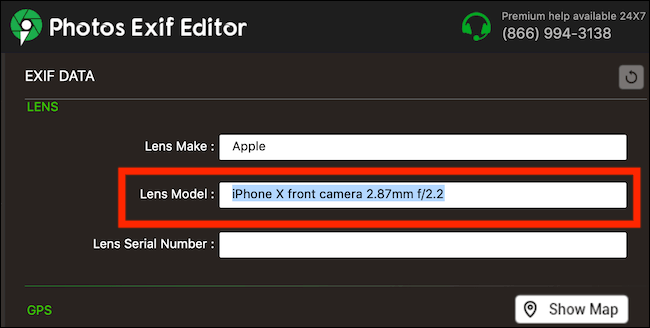
The process is simpler and less destructive for Mac users. If you use the Mac Photos app and sync all your photos using iCloud Photos, a Mac app called Photos Exif Editor will allow you to selectively delete EXIF data for iPhone front camera photos. .
Open the Photos app on Mac, select a selfie, and export it using keyboard shortcuts Command+E. Open the Photos Exif Editor app and drag the photo from the Finder. You can drag as many photos as you want.
In the EXIF data editor window, find and delete the text in Lens Model.
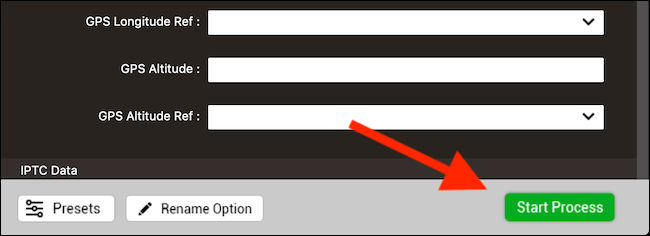
Click the button Start Process to change the EXIF data.
From the next window, choose where you want to save the image.
Then, open the Finder app, find the photo you just saved, and drag it into the Photos app to import it into your iCloud Photos library. Photos will now appear on all your devices, but not in the Selfies album.
Wishing you success!
Source link: How to prevent selfie photos from appearing in Selfies album on iPhone
– https://techtipsnreview.com/