
Screen recording is an extremely useful feature, but not all operating systems have this feature natively integrated. Sometimes you have to download third party apps to do that. Fortunately, Chromebooks have a built-in tool that makes it easy to create screen recordings without the need for additional software.
Introduced in Chrome OS 89, the Chromebook screen recording tool is now built into the Quick Settings panel. This tool can be used to capture still screenshots and record videos. It’s surprisingly powerful yet easy to use. Let’s find out right now.
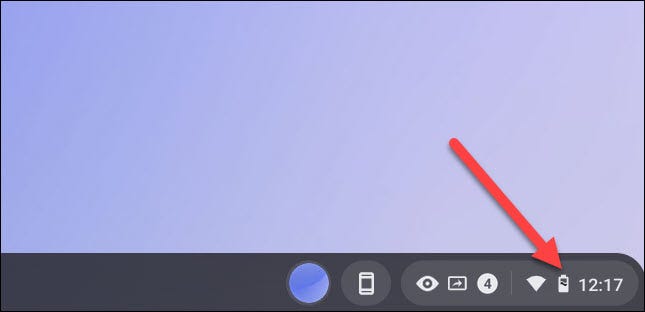
First, click the clock area in the bottom right corner of the screen to open the quick settings panel Quick Settings.
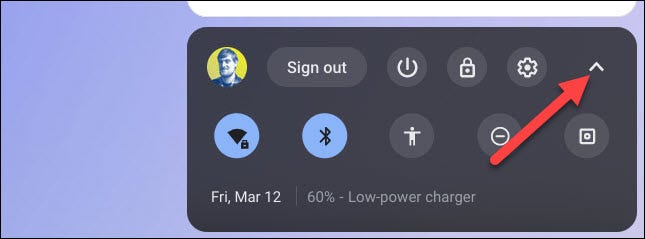
Click the arrow button in the top right of the menu if it is not already fully expanded.
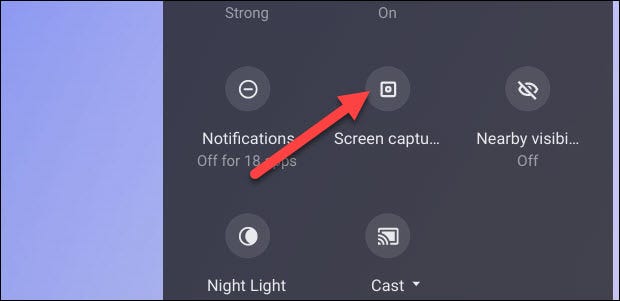
Next, you click the button “Screen Capture“.
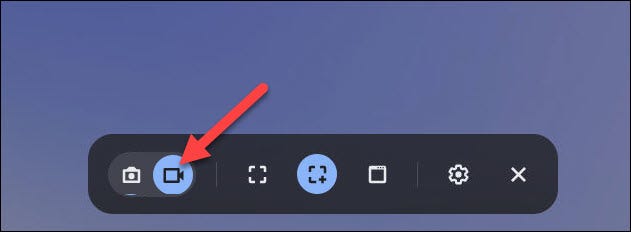
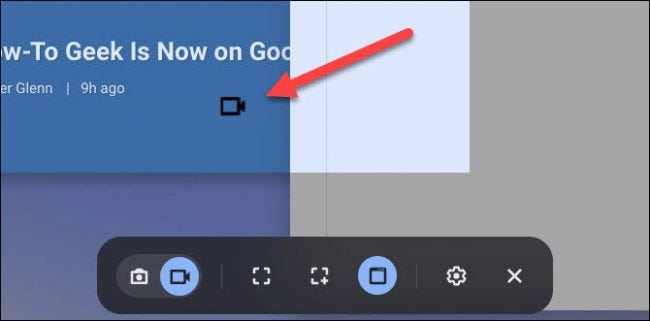
Toolbar Screen Capture appears at the bottom of the screen. Make sure you click on the icon of the camcorder to switch to screen recording mode. (The camera icon will only help you to take screenshots on your Chromebook.)
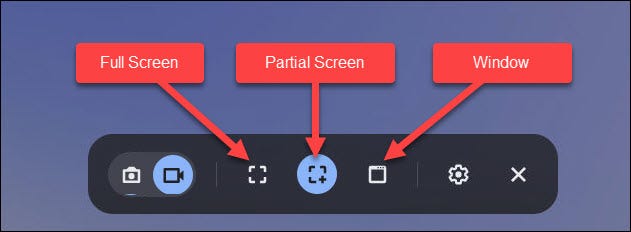
There will be a number of different screen recording modes to choose from. You can choose to record full screen, part of the screen, or a specific window. Choose an option that suits your needs.
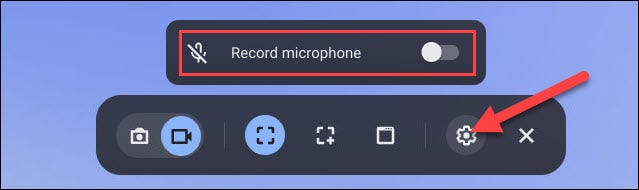
Before you start recording, click the gear icon. Here, you can choose to record through the built-in microphone during screen recording.
Screen recording starts slightly different depending on the mode you have selected.
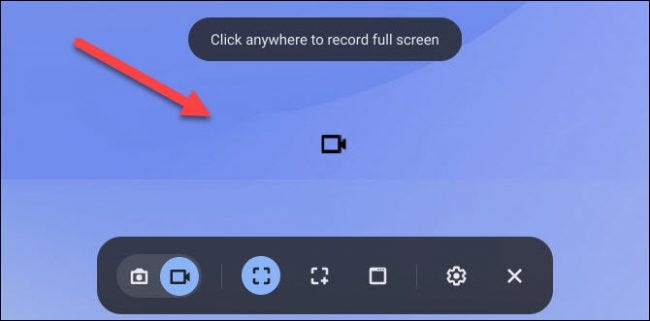
- Full screen (Full Screen): Click anywhere on the screen to start recording.
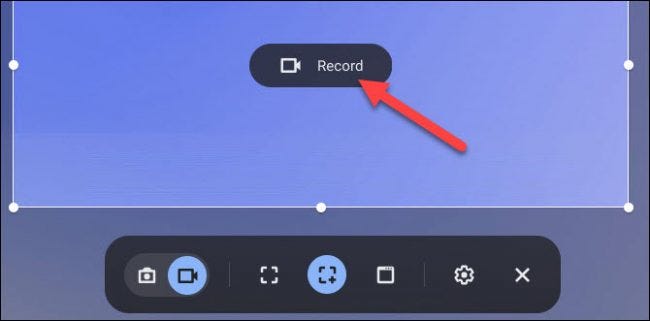
- Partial (Partial): Drag to select the area you want to record and then click the “Record” button.
- Window (Windows): Click the window or specific area on the screen you want to record to get started.
As mentioned, with full screen video recording, you just need to click anywhere on the screen of your Chromebook.
In case you only want to record a small part of your screen drag the screen recording window to that part and click the button “Record“.
And with the window recording feature, start recording your screen by selecting a specific window you want to record.
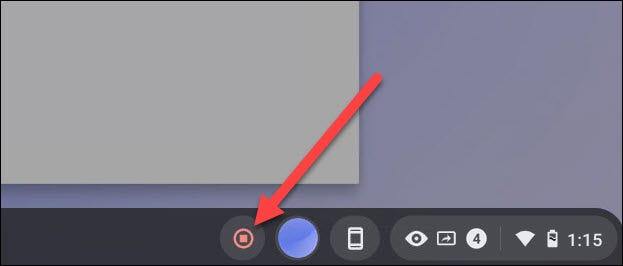
A three-second countdown message appears on the display and recording will then begin. When you are finished recording, click the button Stop red on the Shelf.
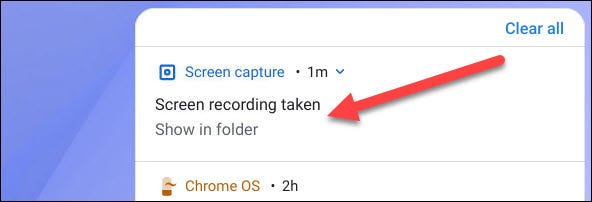
A message will appear later with the text “Screen Recording Taken“. Click it to go to the video file you just recorded in the folder “Downloads“Of the system.
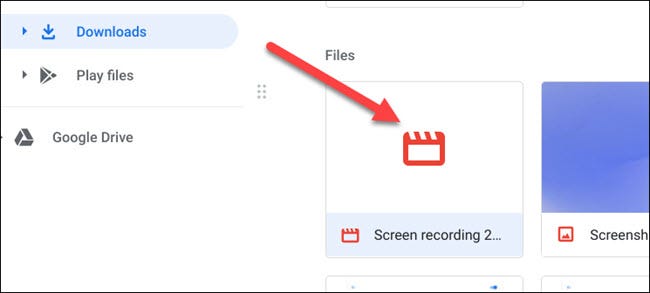
A folder will open and you can choose the video file to watch, share, save to Google Drive, or delete it.
Screen recording on a Chromebook is quite easy, with a few simple taps. You can also take screenshots of your Chromebook, and do a lot of things on the operating system as well.
Source link: How to record screen video on Chromebook
– https://techtipsnreview.com/


