In addition to 3rd party iPhone video editing applications such as Viva, Snow, etc., Appe has launched the Clips application with basic video editing features and many other video editing features. Clips application offers a simple video editing interface, not too complicated to use. We can add color filters to the video such as black and white, paintings, etc. Especially the application also provides additional backgrounds to insert into the video. You can insert a backdrop into an opening scene in a video, and then insert or re-record the video. Videos are all managed on a weekly basis so that users can easily find and edit them when needed. The following article will guide you how to use Clips to edit videos on iPhone/iPad.
Instructions for editing videos on Clips iPhone
Step 1:
We click on the link below to install the application on the device.
Step 2:
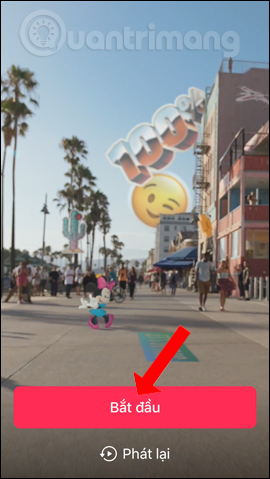
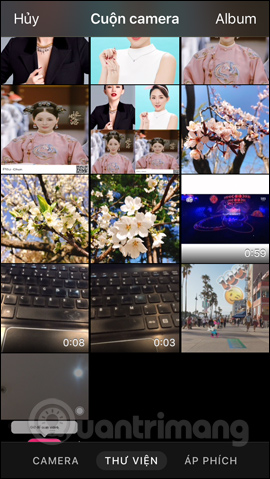
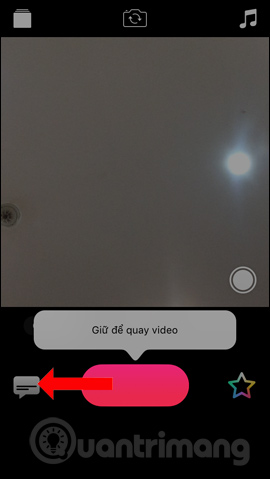
Start the app and watch the full intro video then tap Start button. At the first interface, users will have the choice to record videos directly on Clips, or click on the Library item to use available videos. The red button can be pressed to record multiple videos to create different scenes.
Step 3:
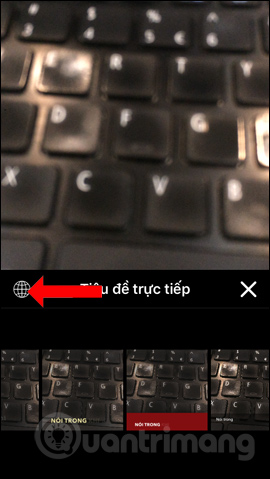
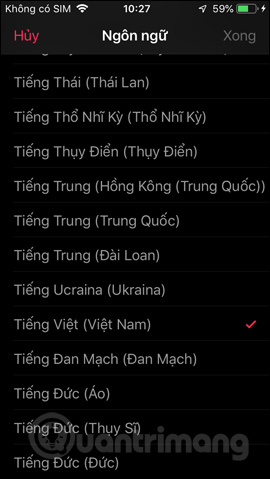
Clips app more features insert voice in video. Click text icon to select the frame type to display the voice content. In this interface, there will be voice display types when recording video. Click next spherical icon to select the language.
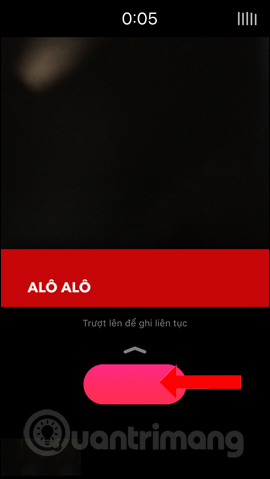
Users just need to record a video and speak so that the application automatically records your voice.
Step 4:
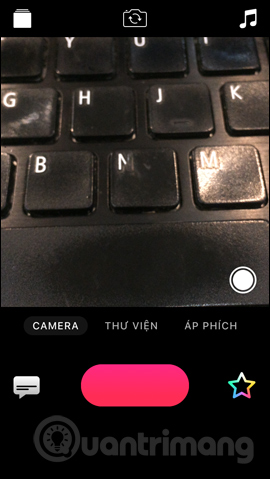
If you take videos are available then you need press the red button to record video to Clips. Then the video will display at the bottom of the screen as shown below. Click to edit. Immediately the video editing tools will show up above.

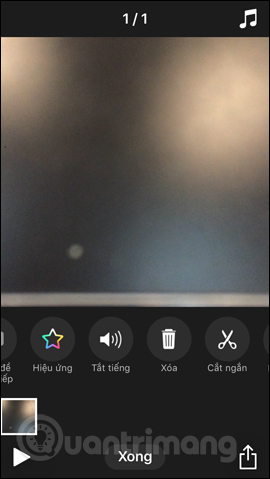
Step 5:
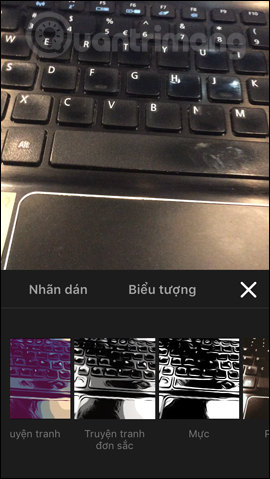
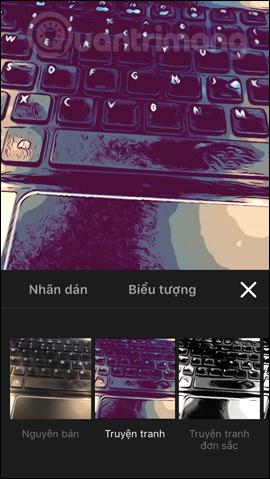
When clicking on the Effect section will appear Filter. Here we can choose to use the Comic, Ink, etc color filter for the video.
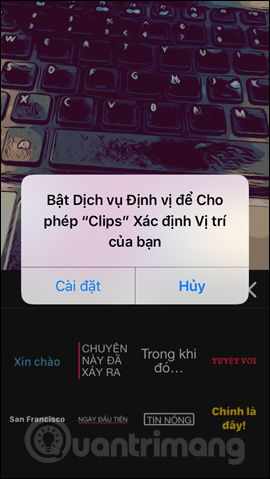
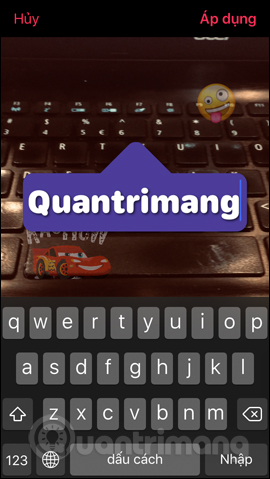
Keep clicking Labels section will show sayings to add to the video. Clips will also ask the user to turn on location services. You can add multiple labels to the video if you like, press the x to remove the label.
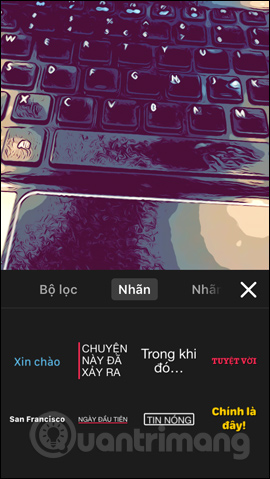
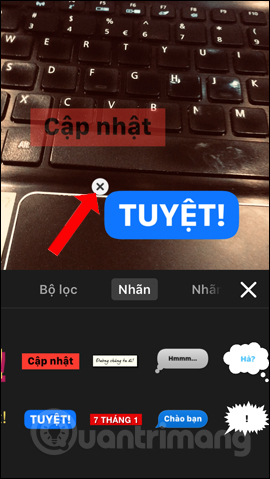
In addition to the available label content, we can change to new content and press Apply for new content. Labels can be enlarged or reduced depending on the user
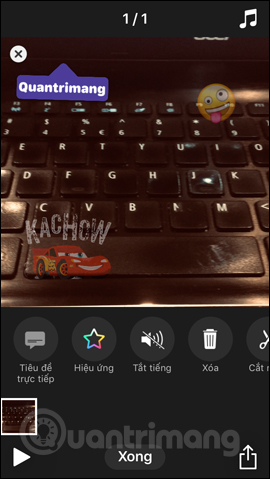
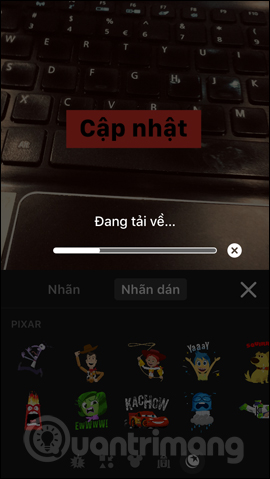
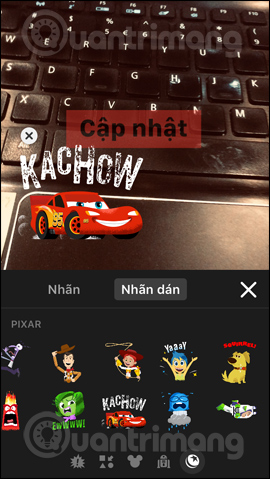
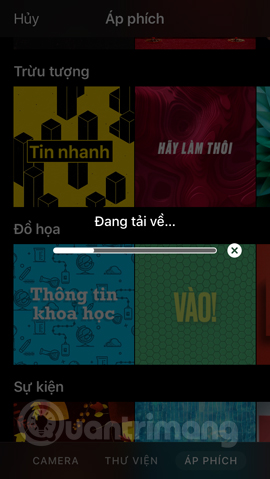
Part Stickers will be interesting icons with different themes. You swipe on the icons below to change the sticker. The stickers after being downloaded will be added to the video shortly after.
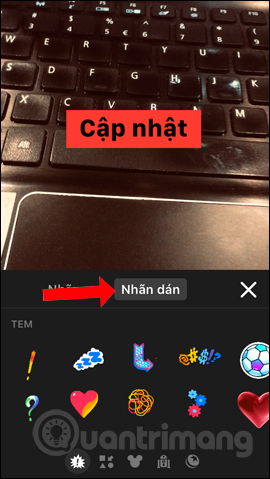
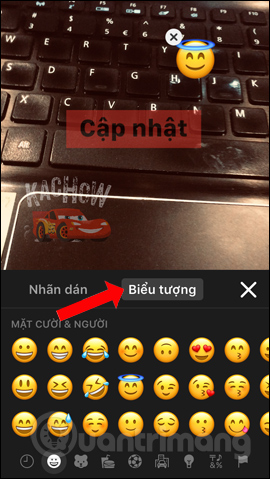
The icons section are extremely familiar icons to us. You also click on the icon you want to insert into the video.
Step 6:
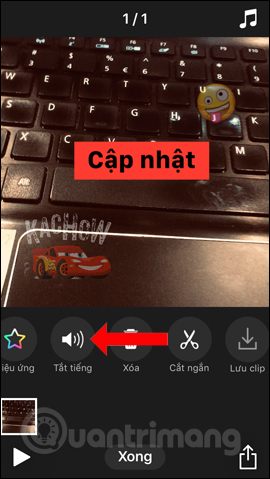
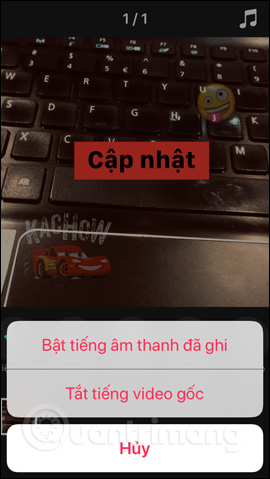
Speaker icon used to adjust the sound when recording a video including using the original audio of the video or turning off the audio of the video completely.
Step 7:
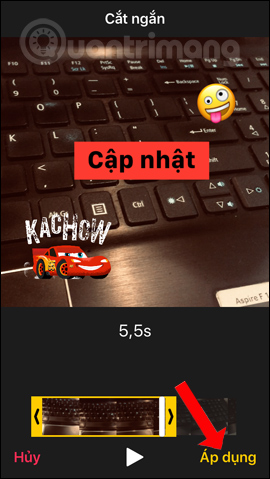
With Truncate icon Users will be able to select the video they want to cut. We will see the current total time of the video. Press and hold the arrow icon to show video clipping golden frame.
The new duration after cutting the video will also be displayed for the user to know. Press Play icon to play the video to see if the video has been cut correctly or not. Final press Apply to trim video.

Step 8:
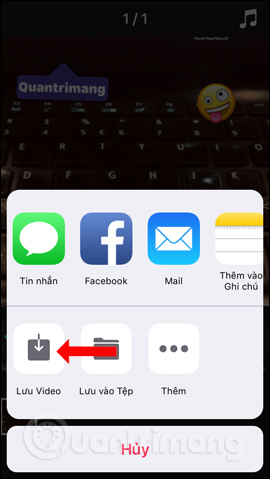
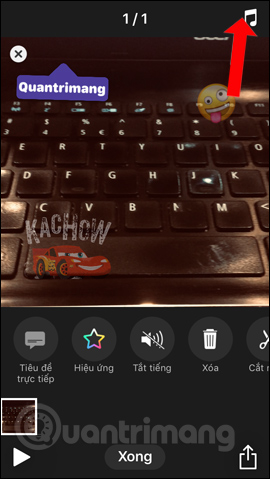
Finally, if you download the video to your device, click share icon in the right corner of the screen, select Save video. Press Accomplished to return to the original video interface. To add audio to the video click musical note icon in the top right corner.
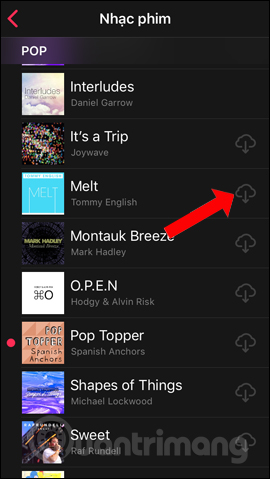
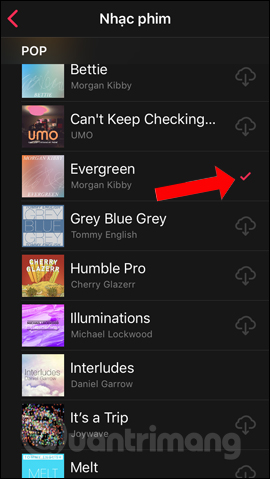
You can choose from the available sounds in the Soundtrack or audio from the album at My music. In the Soundtrack interface, click on the song you want to merge for the video to download, then click the song again to select it.

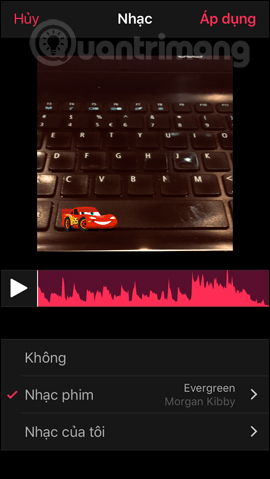
Step 9:
Displays the audio editing interface for the video. Here if you want to change to the song available in the album, click My Music. Finally press Apply button in the upper corner to add music to the video.
Step 10:
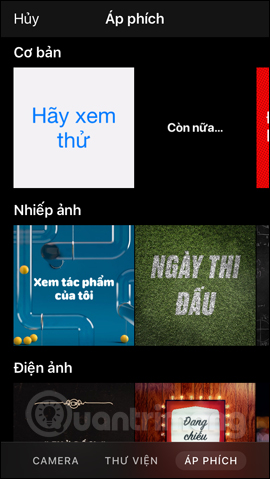
Item Posters will be the video wallpapers. The video will use the selected background image to make the video as usual. You can still insert icons, labels, sounds like the steps above. Users can take the posters as the beginning of the video and then continue to record another video, or use the video available in the album.

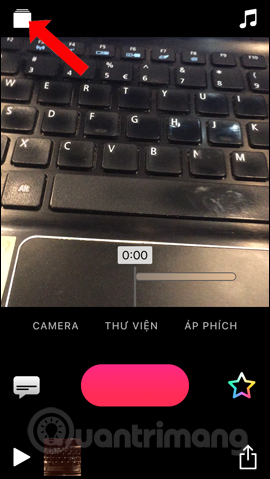
Step 11:
Any new video recording or editing on Clips will be saved. Click square icon in the top left corner. The videos are all saved in different dates. Here the user presses trash can icon to delete videos. Click Create New to add a new video editor.

Above is how to use the Clips application to edit videos on iPhone/iPad. Although Clips does not bring colorful and funny effects like other video editing applications, Clips can fully meet the needs of editing and creating videos.
See more:
Wishing you success!
Source link: How to use Clips to edit iPhone videos
– https://techtipsnreview.com/