
If you are bored with the default mouse pointer on Windows operating system, then this is probably an interesting article for you.
Because in this article, techtipsnreview will guide you change mouse pointer by default on computers running Windows XP / 7 / 8 / 8.1 and Windows 10 in the fastest way.
In addition, through this article you will also know how to change the mouse speed, as well as provide you with some beautiful mouse pointer effects that you will be satisfied with 😛
Read more:
#first. How to change the computer mouse pointer?
OK, now we’re going to get started, let’s open Control Panel up:
+ Step 1: Open Control Panel.
- For Windows XP and Windows 7, please click the . button
Start=> and chooseControl Panel. - For Windows 8/ 8.1 and Windows 10: Press the key combination
Windows + X=> and chooseControl Panel.
Or a way to open Control Panel Common to all operating systems is: Open the Run dialog box (Windows + R) => enter the command control => press Enter done. Simple !
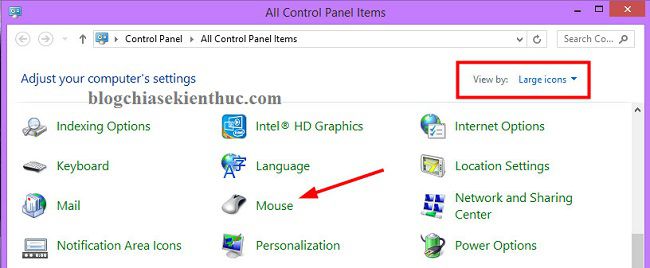
+ Step 2: At section View by Please select the viewing mode as Large icons => and choose Mouse to enter settings.
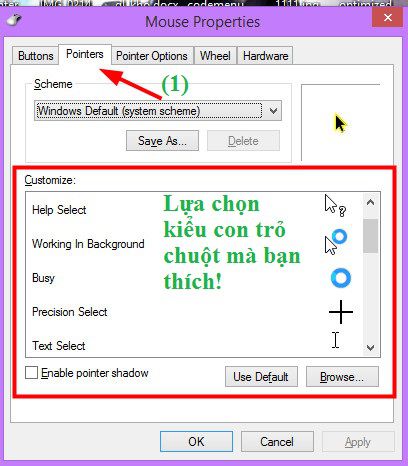
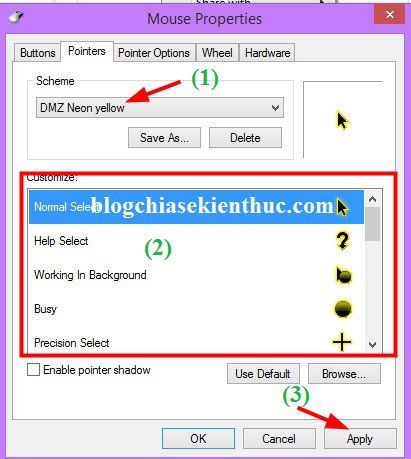
+ Step 3: Please press the tab selection Pointers => and choose the type of mouse pointer displayed in the frame Cumstomize => then press Apply to perform.
Your mouse pointer will be changed immediately to the display style you just selected.
Note: If you don’t like or want to return to default, please click
Use Defaultto return to the default mouse pointer.Tips: Set up and edit right-click menus with Easy Context Menu
#2. Personalize the mouse pointer to your liking?
In addition to the types of mouse pointers that Windows provides for you, you can also download a beautiful set of mouse pointers here either here or here. After downloading, proceed to unzip the file.
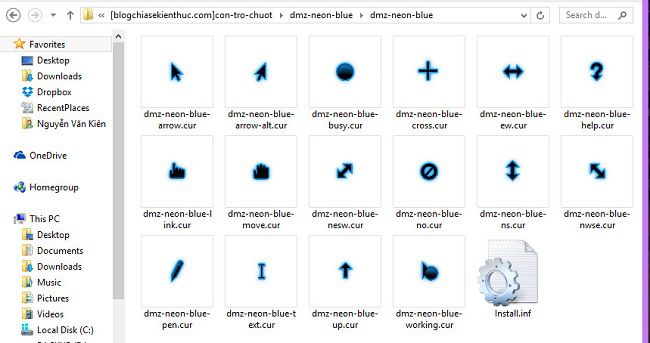
Demo some types of mouse pointers in the file you just downloaded.
+ Blue mouse pointer (Blue)
+ Yellow mouse pointer (Yellow)

There are also 2 colors red and green. In general, this series I really like because it’s simple but very beautiful :D. To use the above mouse pointer, do the following:
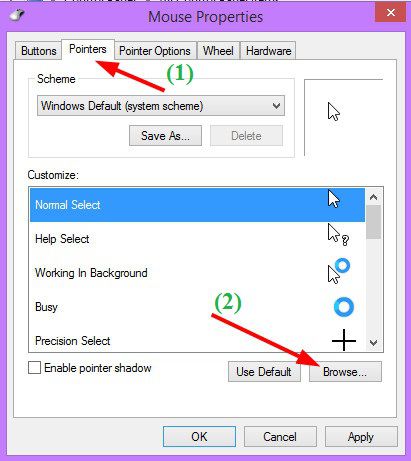
Select Tab Pointers => click select Browse... and find the folder containing the mouse pointer
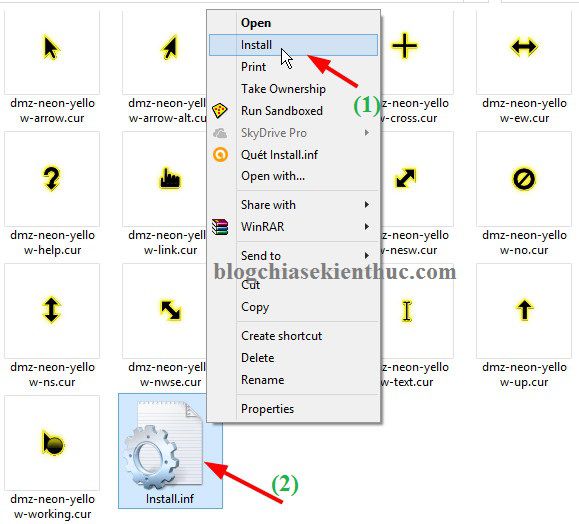
Or is that you can install by right clicking on the file Install.inf to add your favorite set of mouse pointers to the Windows root directory. A dialog box appears, click Open.
OK ! at frame Scheme Please select the folder containing the set of mouse pointers that you have just installed. And now you just choose the style you like 😀
#3. Change mouse pointer speed on Windows
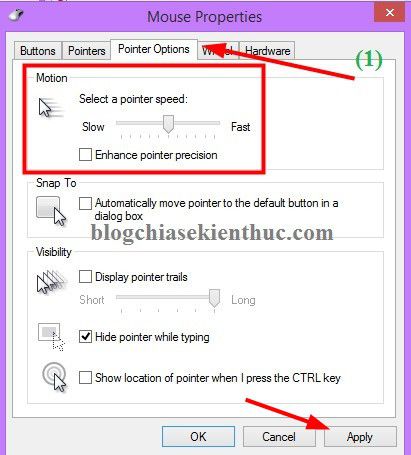
It’s very simple, you just need to click tab Pointer Options => and at the Motion Change the mouse pointer movement speed by dragging the slider to the left (slow speed) or right (fast speed).
#4. Epilogue
That’s it, I’ve finished showing you how change mouse pointer on the computer Windows is the fastest.
I think this is too simple, in fact, there is no need for instructions, you can figure it out by yourself, the main purpose of this article is to share with you this mouse pointer icon set. 😛
Hope the article will be useful to you, good luck!
Kien Nguyen – techtipsnreview
Note: Was this article helpful to you? Don’t forget to rate the article, like and share it with your friends and family!
Source: Instructions to change the mouse pointer on Windows 7/8/10/11 computers
– TechtipsnReview


