![[Tuts] Create a schedule to restart your computer after Update Win 10](https://techtipsnreview.com/wp-content/uploads/2020/11/Tuts-Create-a-schedule-to-restart-your-computer-after-Update.png)
NOTE: Welcome to the Knowledge Sharing Blog! If you encounter any errors during use, such as error in download link, slow blog loading, or unable to access a certain page on the blog … please notify me. via Contact page. Thanks!
As you all know, Microsoft regularly releases updates on the Windows 10 operating system to enhance security or provide patches for security holes to fight malware. for our computer to operate more stably. Or it can be an update to add new features to Windows.
This job is extremely necessary and extremely important, it helps the versions of Windows 10 that we are using to have more powerful, more stable features and make the computer fully protected. user data integrity.
It’s so important, but one thing that really annoys us is whether you are doing a lot of important work on the computer or we are in time needing the computer to finish the work. Once assigned, automatic updates are downloaded, automatically installed, and the computer reboots as well. This does not seem very reasonable, because without our consent it was automatically restarted like that. Of course, the system reboot now is to apply the updates / patches it just installed immediately. It sounds crazy and very annoying, doesn’t it?
Well, that is why today I will share with you how to keep Windows updated with the latest updates, so that the computer can operate more stably. But what’s special is that we will control its auto-update schedule.
Read more:
OK, let’s get started now!
1. Set up a schedule to automatically restart after Update on Windows 10 Pro
+ Step 1: You need to open Local Group Policy Editor up to do some editing.
Perform: On how to open, in the previous articles I have also detailed instructions for you already. You press the key combination Windows + R to open the dialog box Run => enter gpedit.msc into the search box => press Enter.
+ Step 2: After opening Local Group Policy Editor Successfully, you go to the following link to start editing:
Computer Configuration Administrative Templates Windows Components Windows Update.
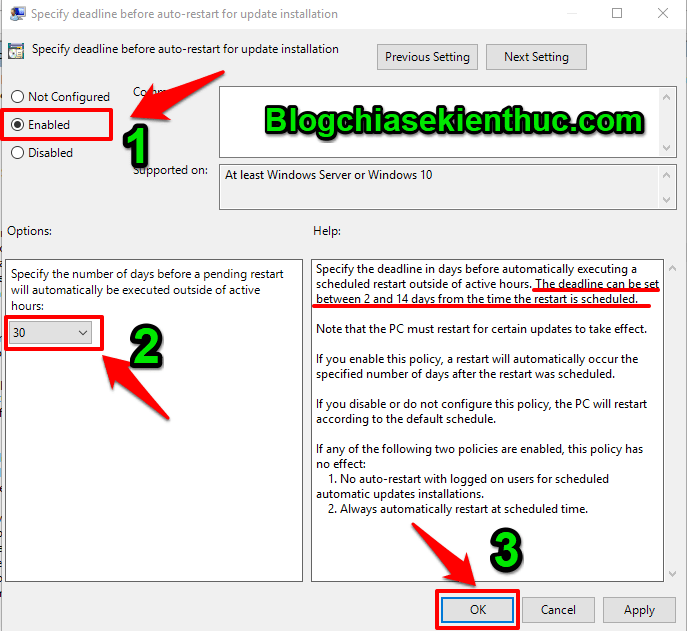
Next, look at the table Setting on the right => double click on the line “Specify deadline before auto-restart for update installation“As shown below.

+ Step 3: Then, an editing panel will appear.
Please tick Enabled => then select the maximum number of days. People leave the number of days you can choose up to 30 but in fact Windows will only delay automatic restart within 14 day.
So choose the number of days you feel comfortable with and finally press OK to save.
Tips: If you do not want to change the schedule anymore, but to automatically update Windows and restart, please choose again Not Configured and press OK Save it.
2. Delay Windows Update automatically restarting on Windows 10 Home
+ Step 1: You need to open Windows Registry Only when editing can be done. Similar to the above, to open Registry Editer, press the key combination Windows + R to open the dialog box Run => then enter the command search box regedit => press Enter to perform.
+ Step 2: Then you access to the following path:
HKEY_LOCAL_MACHINE SOFTWARE Policies Microsoft Windows
See how to quickly open a Regedit link!
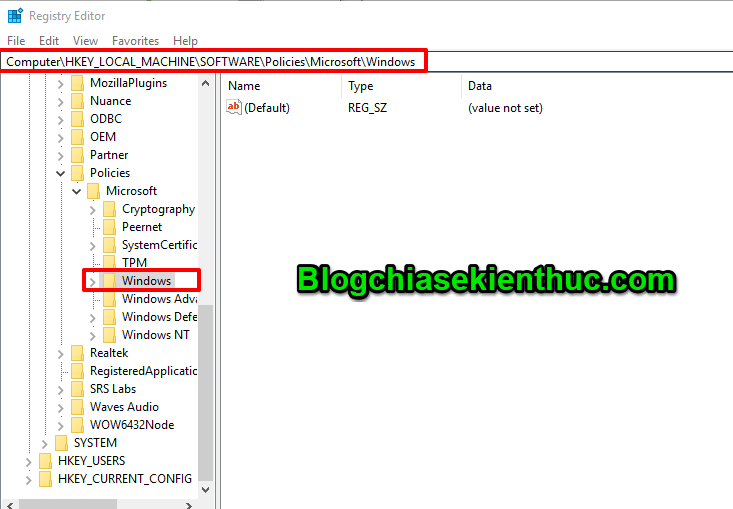
+ Step 3: We need to create a new key.
To do that, right-click on the key Windows => select New => select Key.
Name the newly created key WindowsUpdate. If your computer already has it, you do not need to create it anymore, but move on to the next step.
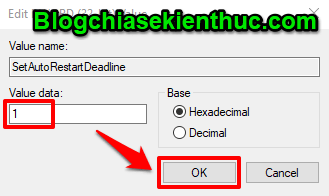
Perform: Right click on any empty area in the right column => select New => select DWORD (32 bit) Value => Name the value as SetAutoRestartDeadline. Next, you create a value DWORD another and named it AutoRestartDeadlinePeriodInDays.
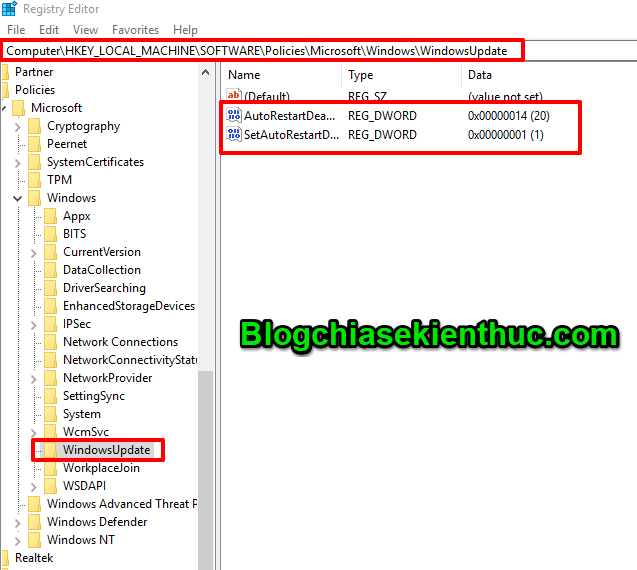
+ Step 4: Double click on 2 values DWORD (32 bit) that we just created => then edit as follows:
The value is named AutoRestartDeadlinePeriodInDays then you choose the appropriate number of days, the maximum will be 14 days, guys. Then press OK to save.
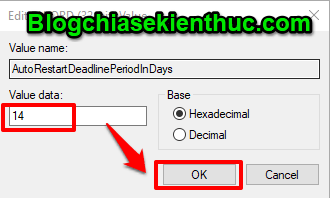
The name value is AutoRestartDeadlinePeriodInDays Then you must set the value to 1, guys. Then press OK to save.
So it is done, guys! If you do not want to create a schedule anymore, please delete the values just created.
Epilogue
Yes, so I have just instructed you in great detail how Create a schedule to automatically restart the computer after performing Update Windows 10 to a new version Alright. I would like to repeat once more about the effect of this tutorial so that those who are lazy to read the first part can better understand that is: Will prevent the computer from automatically restarting when Windows Update updates, but instead will restart the system on the number of days you have set.. OK!
Thank you for following my today’s post. Wish you have the best days of studying and working.
Wish you all luck and success!
CTV: Phan Minh Sang – techtipsnreview
Note: Was this article helpful to you? Don’t forget to rate, like and share with your friends and relatives!
Source: [Tuts] Create a schedule to restart your computer after Update Win 10
– TechtipsnReview


